Backup Service (Personal Network Folder)
CFAPS Backup Instructions
These instructions will assist you in making a backup copy of your data files to your central network personal folder using the Windows Backup Utility. Once set up, your data will automatically be backed up daily.
A backup of your data is insurance against accidental loss. Use of the Windows Backup utility is fast and easy. If needed, your data can be quickly restored to your Toronto Metropolitan University (TMU) computer using the restore utility.
Things to be aware of when using this backup utility:
- Should the TMU network be unavailable, your files will not be available for restoration at that time.
- The backup files are not readable except by using the Windows Restore Utility.
- Because these files are compressed during the backup, these files cannot be accessed off campus.
- If you work from TMU-VPN, you might just choose to store all of your files on your shared or personal folders for easy access off and on campus. You DO NOT need to back up files that exist on your shared or personal folders. These are your network folders that get backed up automatically.
- To copy files or folders directly from your computer (C: drive) to the personal (U: drive) or shared (S: drive) right click the file or folder, select Copy, then go to your CFAPS folder, right click and select Paste.
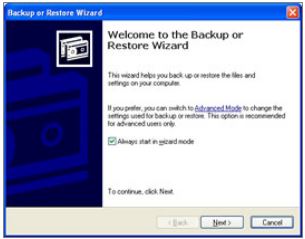
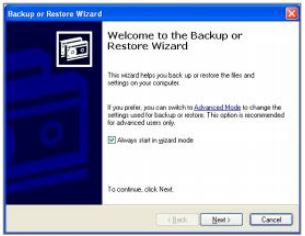
- Click on Start > All Programs > Accessories > System Tools > Backup. At the resulting screen, click on Next.
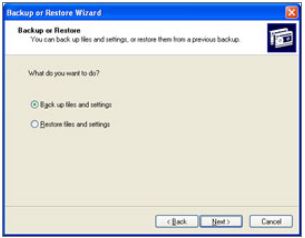
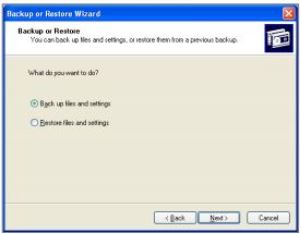
- At the resulting screen, ensure that Back up files and settings is selected. Click on Next.
- If the Insert Disk window appears, click on Cancel.
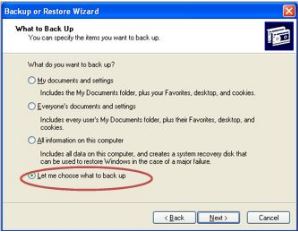
- At the resulting screen select Let me choose what to back up. Click on Next.
- In the resulting screen, locate the folder(s) you wish to back up, in the left pane, and ensure that you select the box next to it. Once you have selected all of the folders you wish to back up, click on Next.
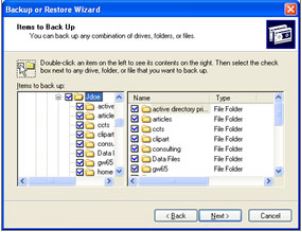
Note: This service must NOT be used to backup your whole hard drive! Due to the limited space, ONLY your data files are to be backed up using this method.
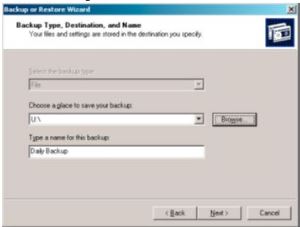
- In the resulting Window, click on the Browse button.
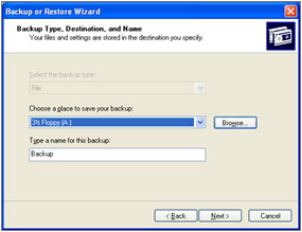
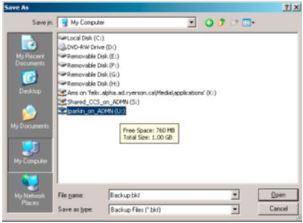
- In resulting window, navigate to your CFAPS folder by double-clicking on My Computer. Double-click on the department CFAPS folder that you want, for a backup, you’ll be selecting your personal network folder userid_on_ADMN (for most departments, this is your U: drive). Either double click, or click Open.
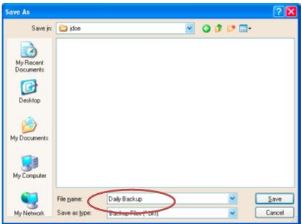
- In the resulting window, type Daily Backup in the File name box. Click on Save.
- In the resulting screen, click on the Next button.
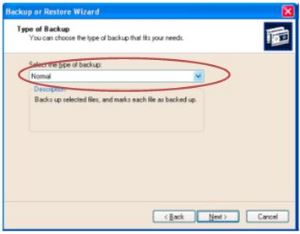
- At the resulting screen click on Advanced… button.
- In the resulting window, ensure that Normal is selected. Click Next.
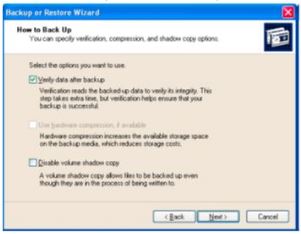
- Ensure that Verify data after backup is selected. Click Next.
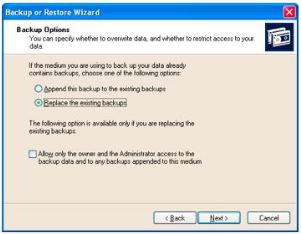
- At the resulting window, ensure that Replace the existing backups is selected. Click Next.
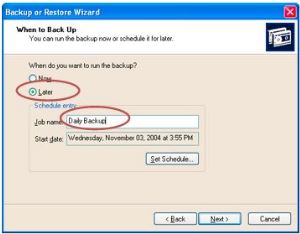
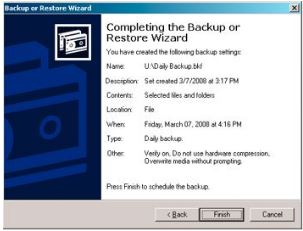
- At the resulting window, ensure that Later is selected. In the Job Name: area, type Daily Backup. Click on Set Schedule button, in order to schedule your task.
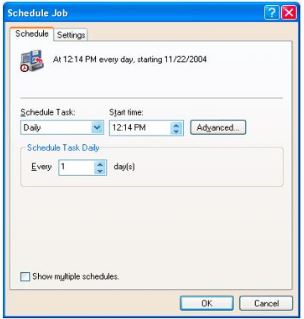
- Select the desired frequency of the backup by clicking on the arrow in the Schedule Task: area and select Daily. Under Start time, select a time you want this daily backup to start. Click OK.
Note: Select a time of the day when your computer is usually turned on (usually between the hours of 8 am to 5 pm). Do not choose the hours between 6:20 am and 7:30 am when CCS does server maintenance.
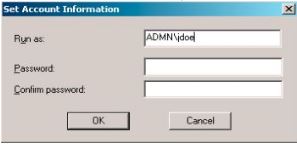
- In the resulting window enter your CFAPS password in the Password box and again in the Confirm password box. Click OK.
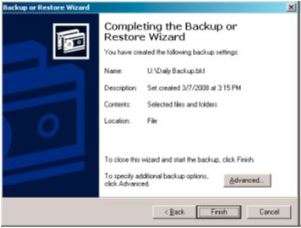
- On the next screen, click next
- Click Finish
To check if this task has been set up correctly, you can view your newly created task by clicking on Start > Control Panel > Performance and Maintenance > Scheduled Tasks. You should see a task called Daily Backup.
Use this manual backup method for those times where you want to immediately backup your data files rather than wait for the automated scheduled timed backup task.
Before you can manually backup your data, you must have already created a backup task once. If not, complete the instructions for How to set a daily back up (WIN XP).
- Click on Start > Control Panel > Performance and Maintenance >Scheduled Tasks.
- Locate the scheduled task you created and Right-Click on the task.
- At the resulting pop up menu, click Run.
You have now manually backed up your data. The process will automatically close when done.
(PDF file) Manually Back Up Your Data-For Windows XP Professional Systems
These instructions will assist you in restoring your data files that were originally backed up to your Personal Folder using the Windows Backup or Restore Utility. You will normally use the Restore Utility only to restore files back to your computer if your original files were accidentally deleted or destroyed.
Things to be aware of when using this Restore utility:
- Should the TMU network be unavailable, your files will not be available for restoration at this time.
- Once backed up, the files are not readable except by using the Windows Restore Utility.
- Because these files are compressed during the backup, these files cannot be accessed or restored from off campus.
- The restoration process can only restore files that have been backed up.
- Click on Start > All Programs > Accessories > System Tools > Backup. At the resulting screen, click on Next.
- At the Backup or Restore screen, ensure that Back up files and settings is selected. Click on Next.
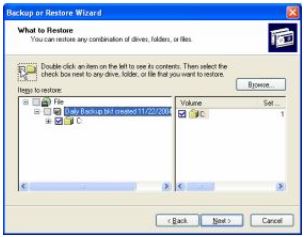
- At the What to Restore screen select, locate and select the backed up file(s) that you wish to restore to your computer. Click on Next.
- At the Completing the Backup or Restore Wizard screen, click on Finish.
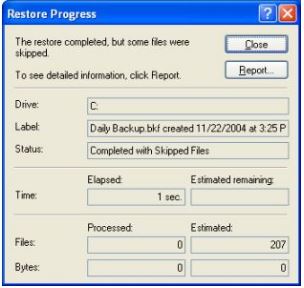
- At the Restore Progress screen, click on Close. Your files have now been restored to PC.
(PDF file) How to Restore Your Back up File (WIN XP)