Understand content structure and settings
Files uploaded to your course are stored in the Manage Files folder, which can be accessed via Course Admin.
Review the settings for the content tool to customize the student experience.
File management in Brightspace
When you create and upload files into your modules and sub-modules, the file that appears in the module is a link that points to the content housed in the Manage Files folder of each course. If you delete a module or sub-module, you have the option of deleting all the content permanently OR deleting the module itself but keeping the folders in the Manage Files area.
When you're adding new files, be sure to use a unique file name, otherwise you may overwrite content in the Manage Files folder.
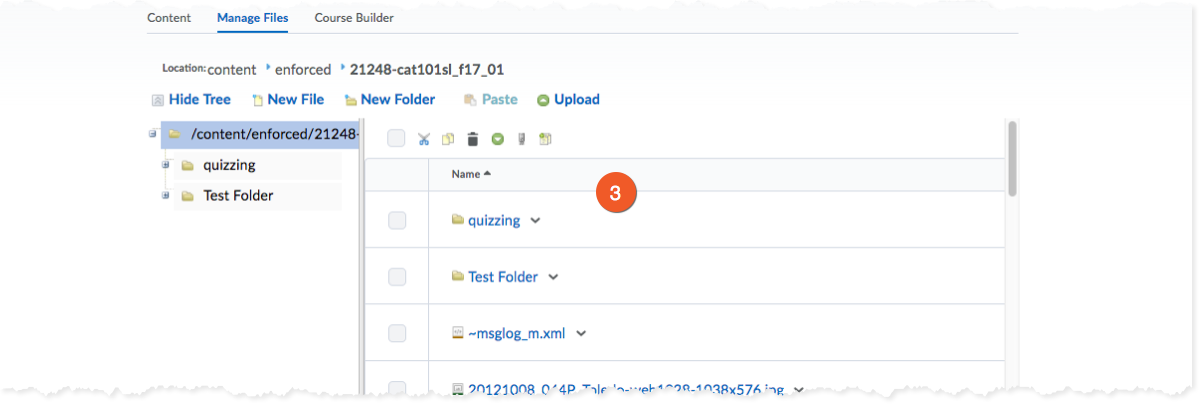
To access Manage Files:
- Click Course Admin, in the top menu.
- Click Manage Files (found under "Site Resources").
- Click and view/download the files in your course shell.
Content settings
Content settings provide a little control over several visual aspects of your course, such as how content is arranged, which buttons appear, and if you can use HTML templates in your content.

1. Click Settings in the Content tool.
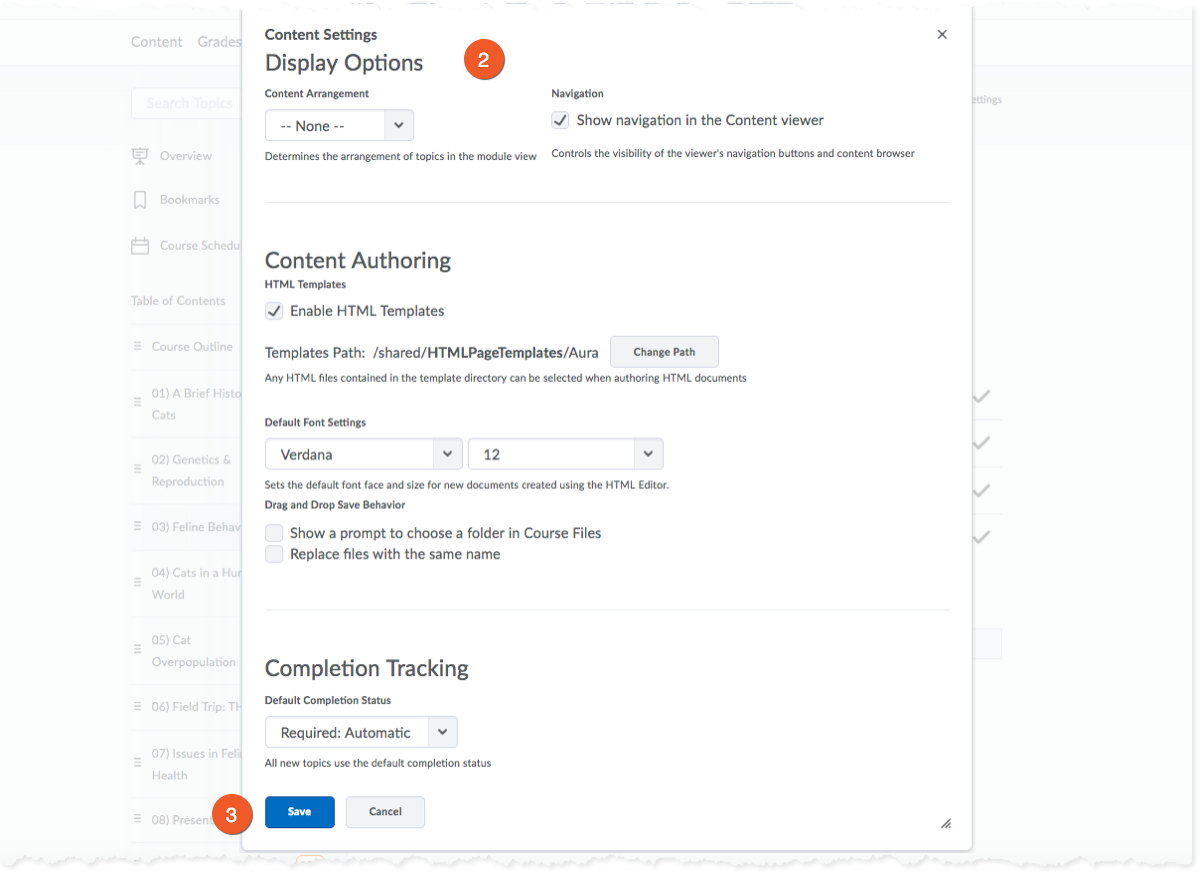
2. From here, you can do the following:
- Set how content is arranged in the module view by selecting from the Content Arrangement dropdown list. See below for more information.
- Show or hide the collapsible content browser and navigation buttons in the content viewer by checking or clearing the Show navigation in the Content Viewer check box.
- Select Enable HTML Templates to make them available when creating content.
- Set your default font settings from the Default Font Settings drop-down list.
- Select the Replace files with the same name check box from the Drag and Drop Upload section if you want to automatically overwrite a module's existing content each time you drag and drop files of the same name and file type into the same module.
- Set the default completion tracking method from the Default Completion Status drop-down list.
3. Once you finish customizing your Content settings, click Save.
If you select to arrange course content by Content Type from the Content Arrangement drop-down list, each module will appear in the following content type groups:
- Materials (Uploaded files, course files, new documents, and links.)
- Modules (Sub-modules. Topics within sub-modules only appear arranged by Content Type once you navigate into the sub-module.)
- General (External Learning Tools.)
- Assignments
- Quizzes
- Discussions
- Checklists
- Chats
- Self Assessments
- Surveys

 Copyright Notice:
It is your responsibility to make sure that all material uploaded to Toronto Metropolitan University's LMS/Brightspace by D2L and other systems complies with Canadian copyright laws. Please consult the "Do-it-Yourself Copyright Checking workflow (opens in new window) " before you upload content.
Use the university's already existing licences for content from the library and the Toronto Metropolitan University "Fair Dealing Guideline (opens in new window) ".
If you have copyright questions contact copyrt@torontomu.ca.![]()