Manage dates
The manage dates tool
There are six tools in Brightspace that allow you to control actions based on the start/end dates (Announcements, Discussions, Quizzes, Assignments, Content, Grades). If you're repurposing content from an old course shell, you can use the Manage Dates tool to view a list of objects in your course and edit their date availability values. Use the filter options to narrow down your list of items by tool, date range, duration, and calendar status settings. Dates can be changed individually, or all at once by offsetting the dates forward a specified number of days. D2L can make the calculation for you.
- The manage dates tool CAN be used to revise due, start and end dates for Content, Assignments, Quizzes, Announcements, Discussions and Grades.
- The manage dates tool CANNOT be used to revise submission views release dates, bulk 'hide' items that were not initially set with a release date ('though you can click on the link to open and adjust individual submission view settings in a new tab).
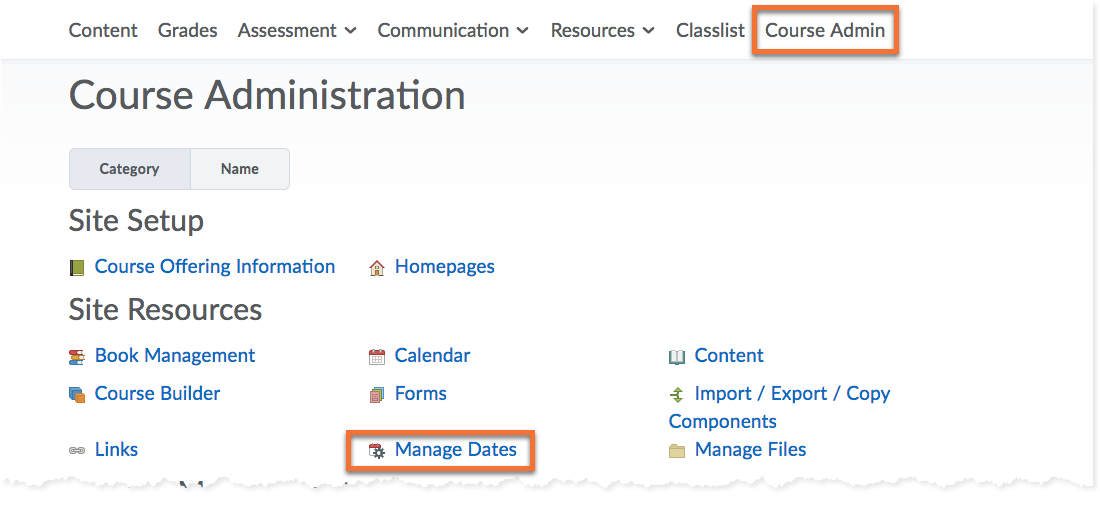
To use the Manage Dates tool, go to Course Admin > Manage Dates.
Use the filter options to narrow down your list of items by tool, date range, duration, and Calendar status settings.
Use the filter options to narrow down your list of items
If you find that you have a long list of items, it may seem a little unwieldy. You can use the filter options to narrow down the list, making it easier to see what you wish to edit.
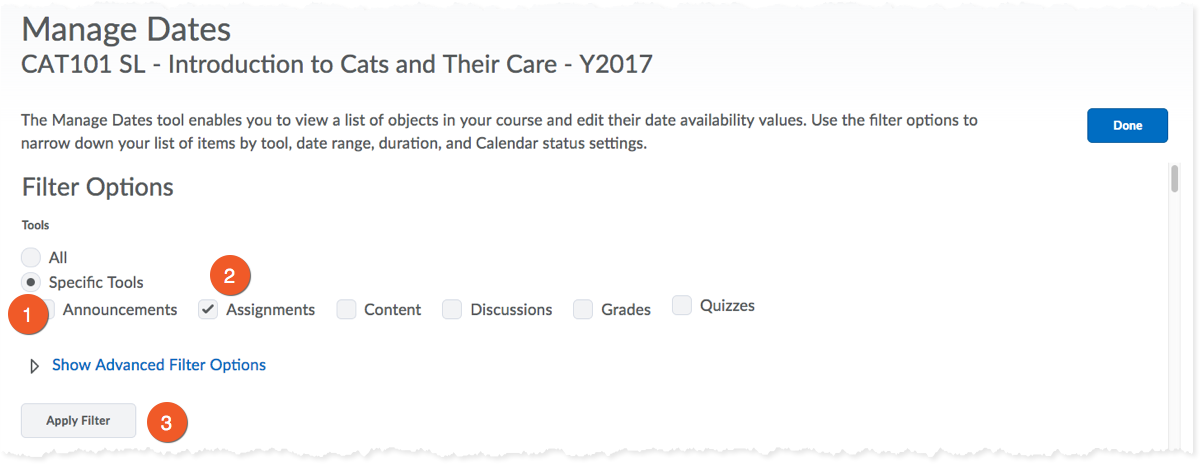
To select only certain tools, such as Assignments or Quizzes:
- Under Filter Options, select Specific Tools.
- Then, select the tools you wish to view
- Click on Apply filter.
You can now use the instructions found below to either edit or offset dates.
Advanced Filter Options
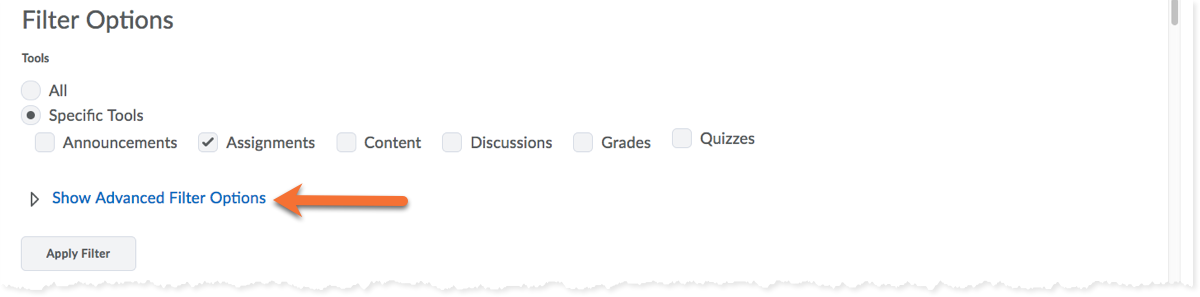
Click on Show Advanced Filter Options.
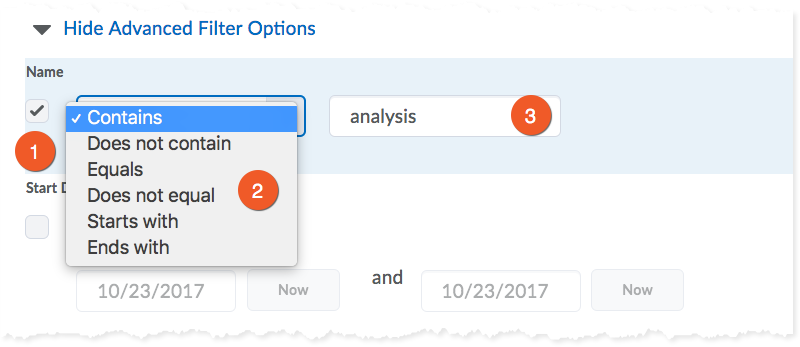
1. Select the checkbox under Name.
2. Select the search detail qualifier in the dropdown, such as "contains" or "starts with".
3. Type your text into the textbox.

4. Apply additional filters, if desired (see detailed instructions throughout this page), and click on Apply filter.
You can now use the instructions found below to either edit or offset dates.
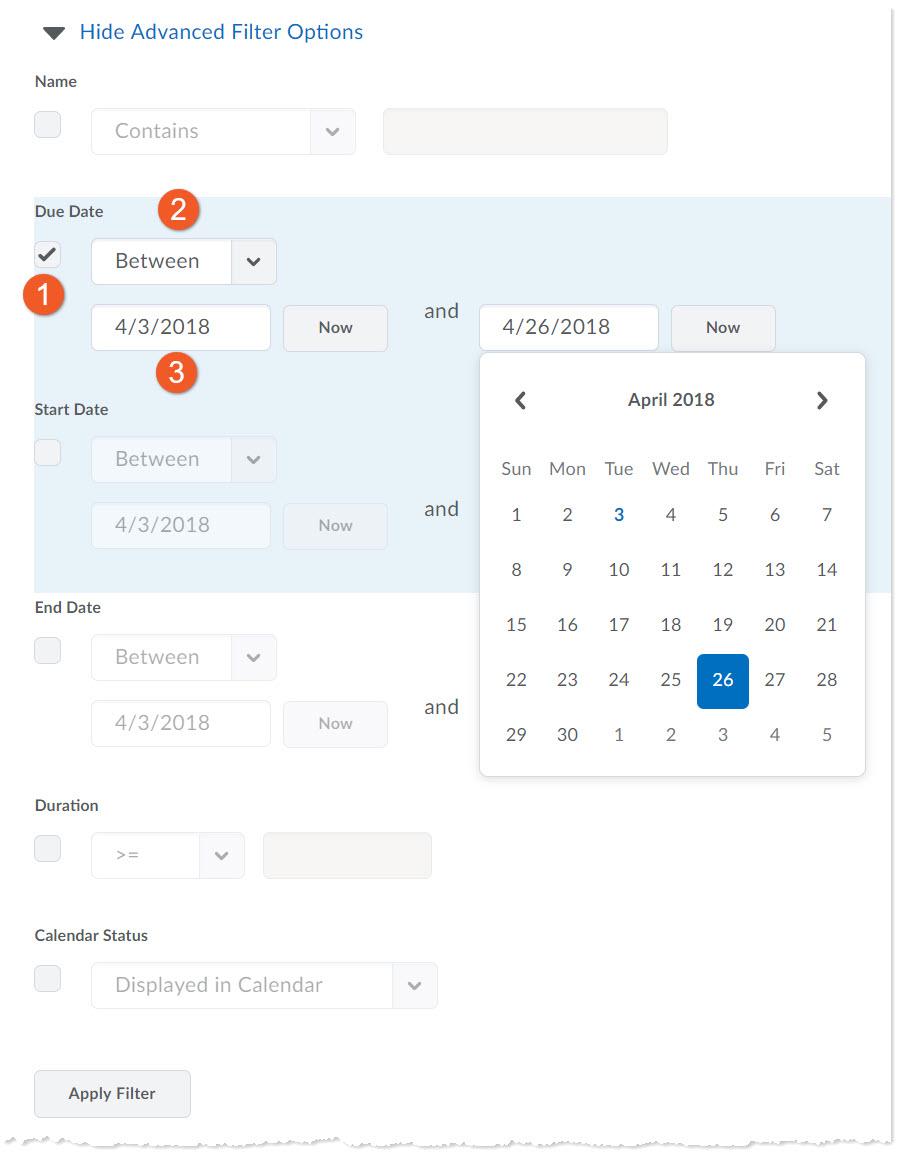
1. Select the checkbox under Due Date, Start Date and/or End Date.
2. Select the search detail qualifier in the dropdown, such as "between", "before" or "after".
3. Click on the date fields to select the desired date(s).
4. Apply additional filters, if desired (see detailed instructions throughout this page), and click on Apply filter.
You can now use the instructions found below to either edit or offset dates.

1. Select the checkbox under Duration.
2. Select the search detail qualifier to note details such as ">=" or "=".
3. Type in the duration in days (ie. 7).
4. Apply additional filters, if desired (see detailed instructions throughout this page), and click on Apply filter.
You can now use the instructions found below to either edit or offset dates.
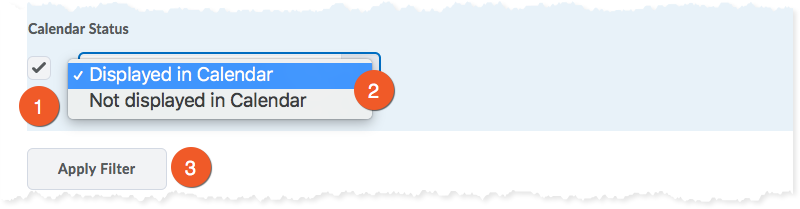
1. Select the checkbox under Calendar Status.
2. Select the qualifier, either "Displayed in Calendar" or "Not displayed in Calendar".

3. Apply additional filters, if desired (see detailed instructions throughout this page), and click on Apply filter.
You can now use the instructions found below to either edit or offset dates.
Edit dates/add to calendar
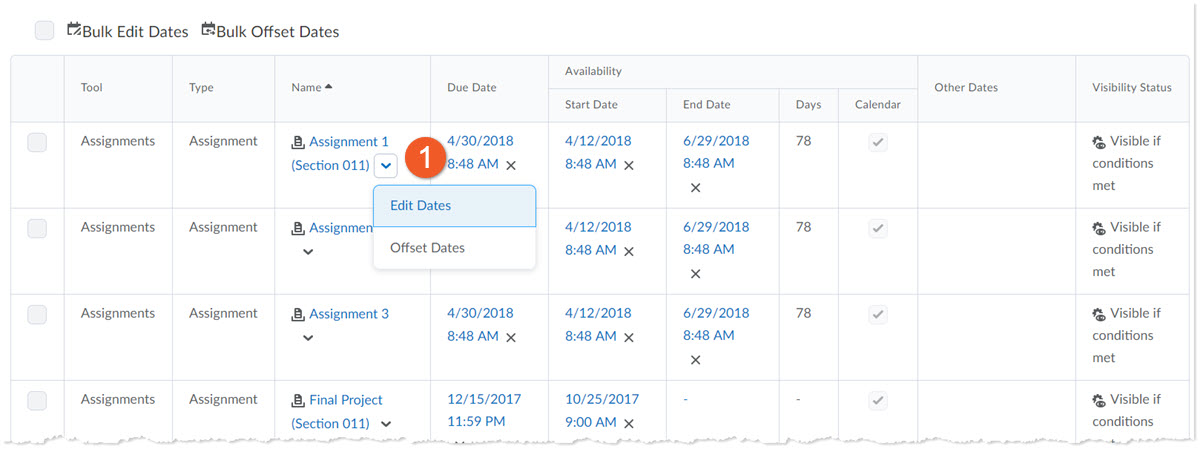
1. Click on the downward-facing arrow beside the item for which you wish to edit dates, and choose Edit dates.
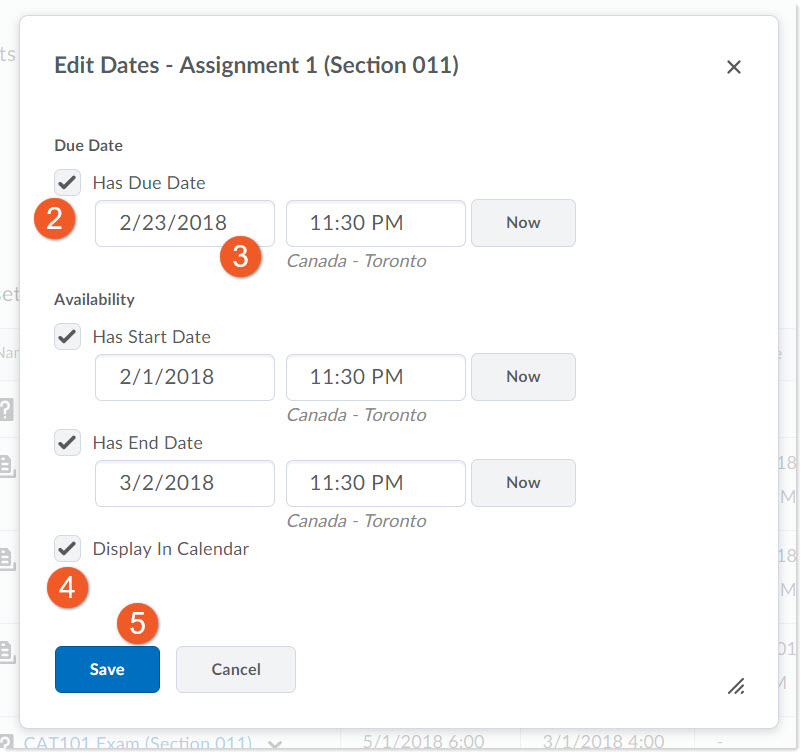
2. For each of the Due, Start and End Dates you can either Set the date or Remove the Date by selecting the checkbox in front of that function.
3. Choose the date and time for that function. Repeat as desired.
4. Select (or deselect) the Display In Calendar checkbox to add or remove the item from the course shell calendar.
5. Click on Save.
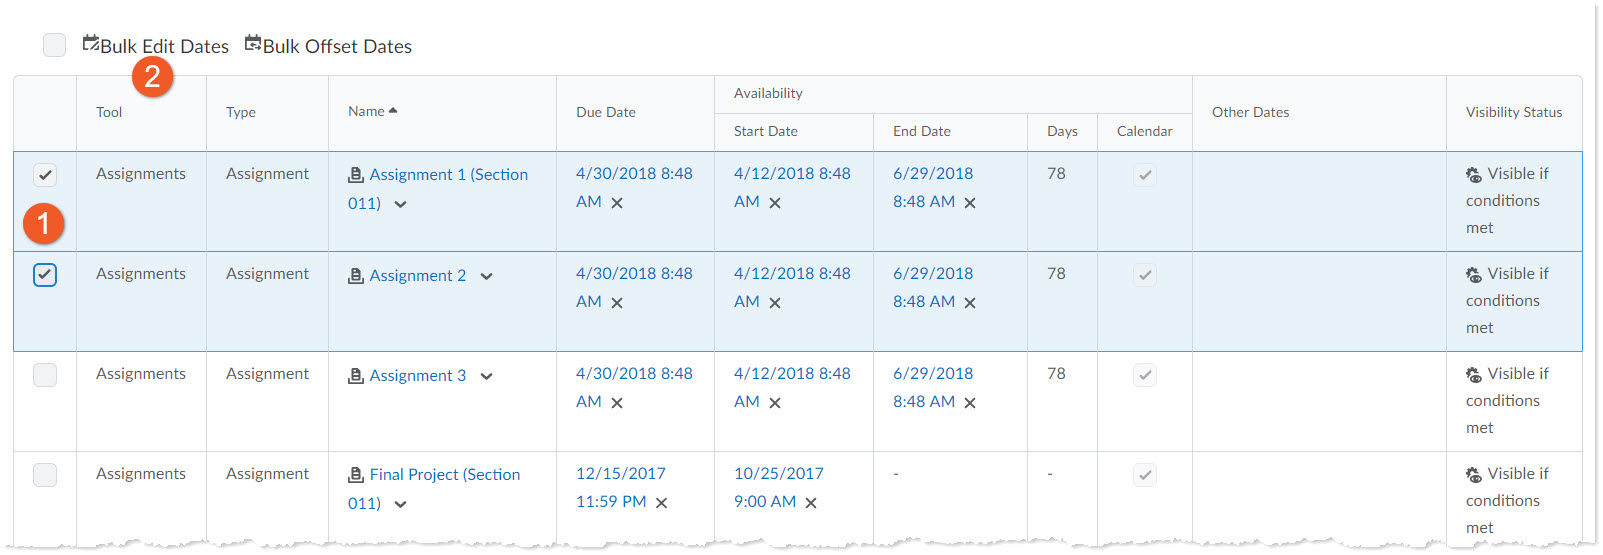
1. Check the box beside the items you wish to edit.
2. Above the list of tools/items, click the Bulk Edit Dates link.

3. For each of the Due, Start and End Dates you can either Set the date or Remove the Date by selecting the checkbox in front of that function.
4. Select the desired action in the dropdown.
5. Choose the date and time.
6. You can also add or remove each item by selecting the Display in Calendar checkbox and the desired action.
7. Click on Save.
Offset dates
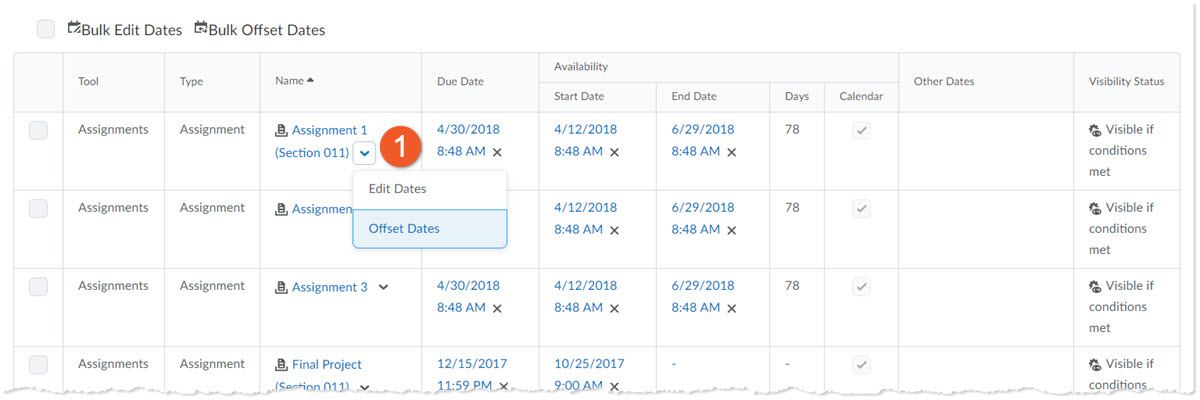
1. Select the downward-facing arrow beside the item for which you wish to offset dates, and select Offset Dates.
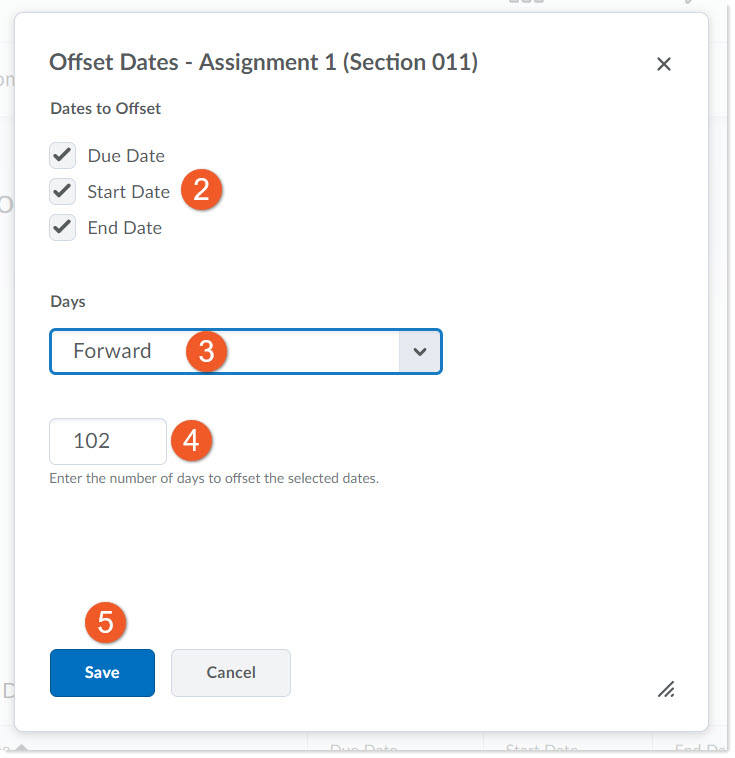
2. Select whether you would like to offset Due Dates, Start and/or End Dates by checking (or unchecking) the boxes in front of each.
3. Select how you would like to offset the dates (Forward, Backward or Calculated based on two dates).
4. Type in the number of days you wish to offset these dates.
5. Click Save.
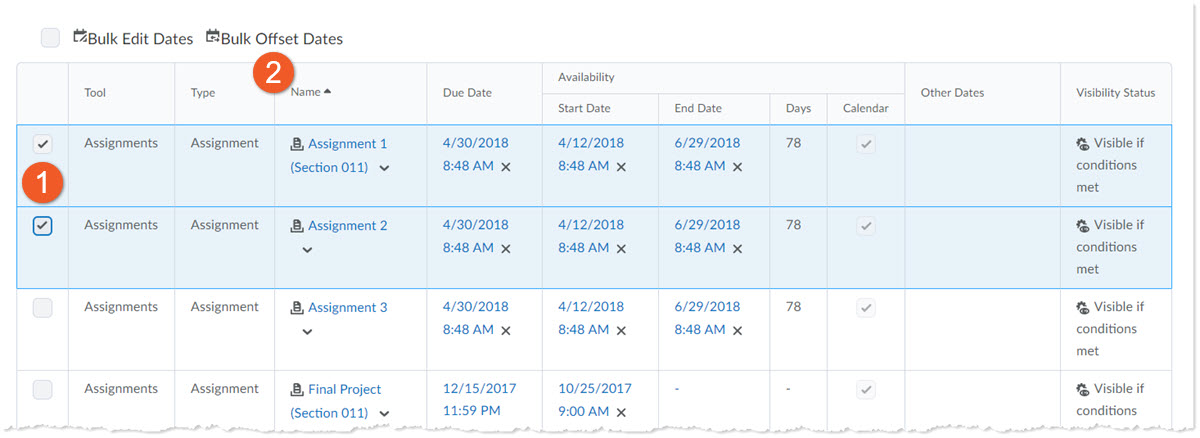
1. Check the box beside the items you wish to edit.
2. Above the list of tools/items, click the Bulk Offset Dates link.
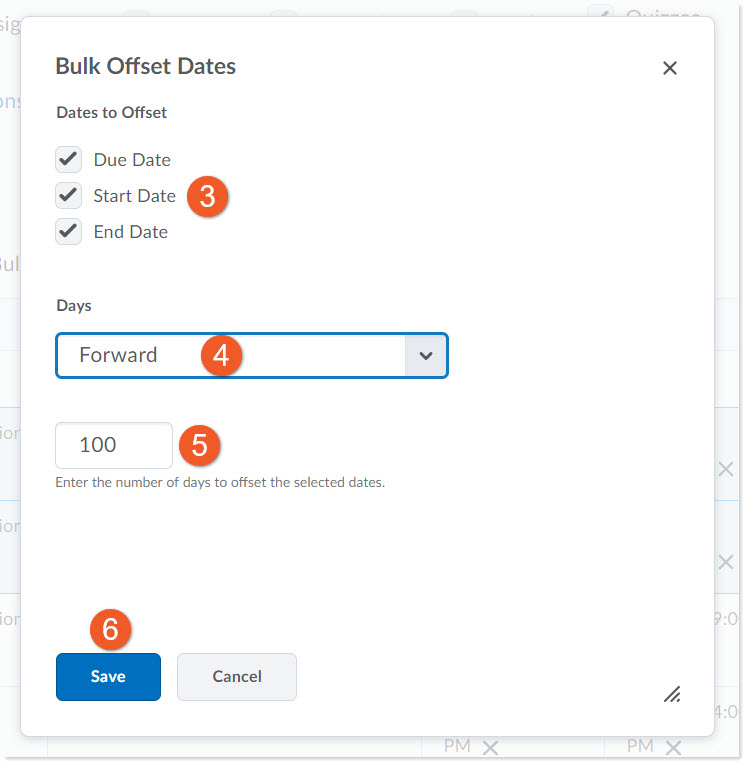
3. Select whether you would like to offset Due Dates, Start and/or End Dates by checking (or unchecking) the boxes in front of each.
4. Select how you would like to offset the dates (Forward, Backward or Calculated based on two dates).
5. Type in the number of days you wish to offset these dates.
6. Click Save.