Manage shell members

Overview
Using Manage Shell Members, one feature of the self service shell management tools found in the my.torontomu.ca portal, you can add non-student users, either individually, or in batches of up to 100 comma-separated usernames, to your D2L course or organization shell.
Use this feature to add TAs, Course Builders, Auditing Participants and more!
Important: Your enrolled students cannot be added to your shell using this tool, as it may interfere with the enrollment system (MyServiceHub, formerly RAMSS) that we rely on to manage the enrollment process. Please use the Manage Student Sections tool to add course sections to your Brightspace shell.
Find the ‘Manage Shell Members’ tool
The tools used to manage course shells and organization shells can be found on different pages in self-service. Be sure to start by entering the section dedicated to the type of shell you are looking to manage.
- Go to my.torontomu.ca and sign in using your torontomu username and password.
- Find the section called Self Service, and click on Courses and Organizations.
- Once in the Courses and Organizations section, click Request and Manage Course Shell. The options will appear on the screen.
- Click the option to Manage Course Shells.
- Search for and/or click on a course from the list - once it has been selected, you will see a number of options listed below.
- Click on Manage Course Shell Members.
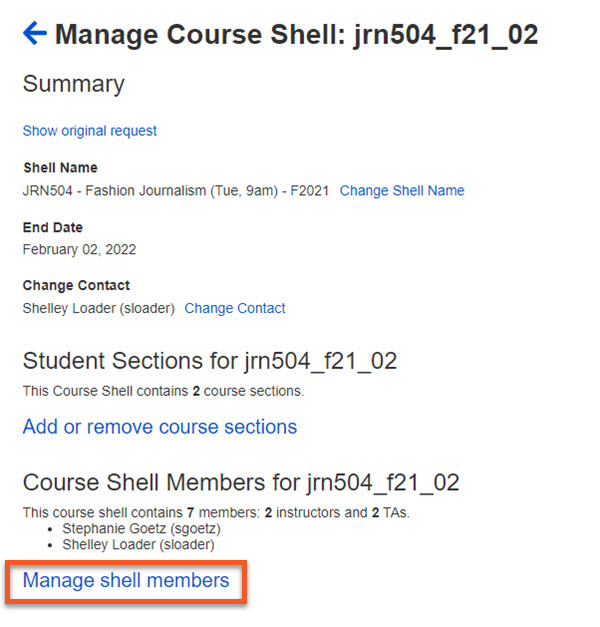
Click on Manage shell members.
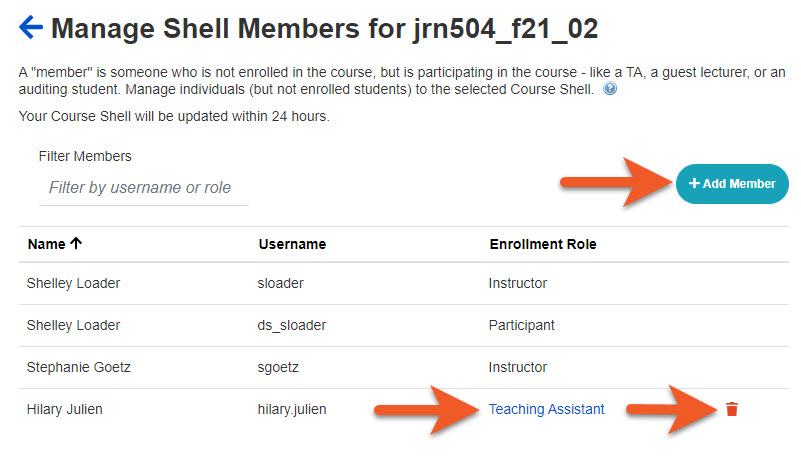
From here, you can complete the following tasks:
- Add a New Member
- Change a Member's Role
- Remove a Member
- Go to my.torontomu.ca and sign in using your torontomu username and password.
- Find the section called Self Service, and click on Courses and Organizations.
- Once in the Courses and Organizations section, click Request and Manage Organization Shell. The options will appear on the screen.
- Click the option to Manage Organization Shells.
- Search for and/or click on an organization from the list - once it has been selected, you will see a number of options listed below.
- Click on Manage Organization Shell members.

Click on Manage Shell members.
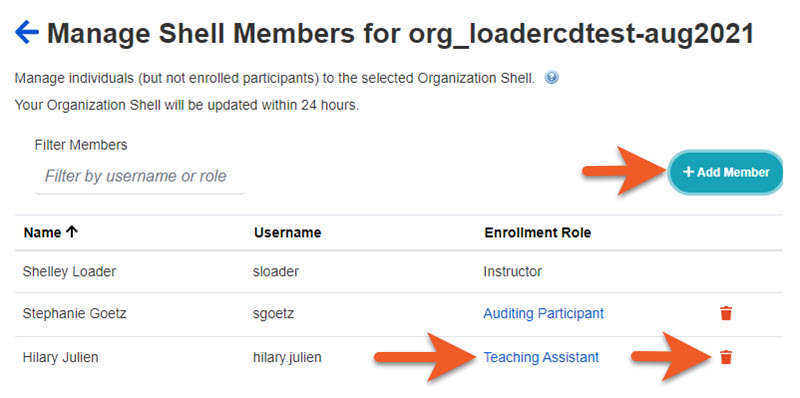
From here, you can complete the following tasks:
- Add a New Member
- Change a Member's Role
- Remove a Member
Manage shell members
The roles available to be assigned to users in this tool include Instructor (courses only - please see note below), TA, Course Builder, Grader, Auditing Participant, and Participant (organizations only).
Please note that 'Instructor' is an ownership role, meaning that the user will be able to do everything with the shell that you can -- and you won't be able to change their role to something lesser or remove them from the shell. Also note that only certain Toronto Metropolitan University community members are permitted this role in a D2L shell.
Students should not be added to course shells using this tool, as their access is controlled by official enrollment records provided by the MyServiceHub system.
A 'shell member' is a (non-student) person that you permit to access your D2L shell.
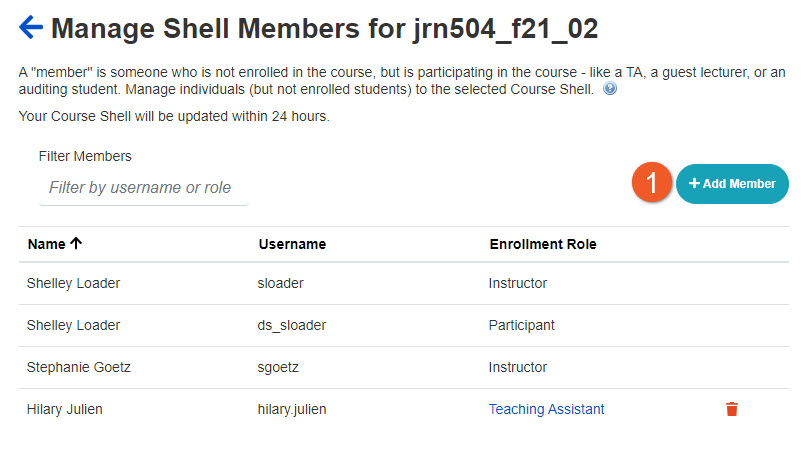
1. Click on the + Add Member button.
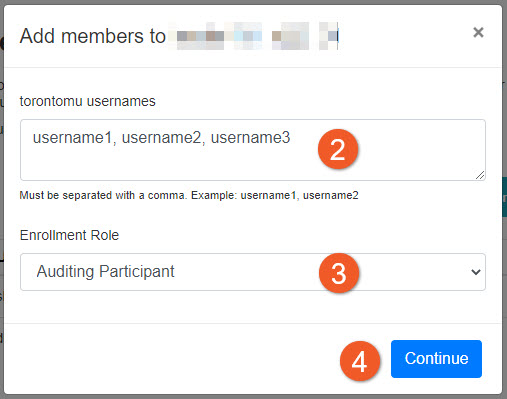
2. You will see a dialogue box pop up. In the username field, type the torontomu username for the person you would like to add. Please do not guess. Their username will be the part before @ in their @torontomu.ca email address. To add multiple users at once, enter the usernames separated by a comma (up to a maximum of 100).
3. Next, click the Enrollment Role dropdown, and click on the role you would like them to have. If you aren't sure, please see the 'About Roles' section of this document.
4. To add this person (or people) to your D2L shell with the selected role, click the Continue button. Please note that processing larger batches of user additions (e.g. adding 60 'Participant' users to an organization shell) takes time, so please be patient.
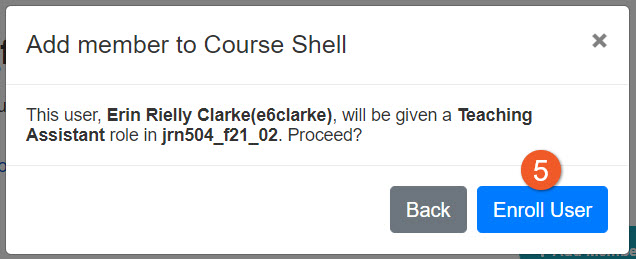
5. Review the confirmation popup, and click Enroll User.
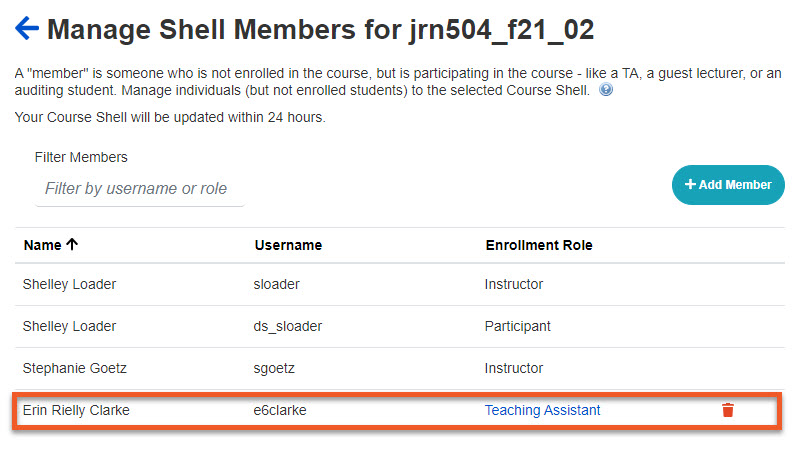
6. You will see that the person and their role will appear in your member list, usually as the very last entry.
If you need to add more members, click on the + Add Member button and repeat the process.
If the person you are adding is eligible for the role you have selected, they will be added to your list right away, and added to your D2L shell within 24 hours. If they are not eligible for the role you have selected, you may select another role.
Need to add your Demo Student?
Since you can't add someone with a 'Student' role, please try adding your Demo Student as an 'Auditing Participant'.
This will be sufficient for testing content, assessments and grading. If you need to test Discussions or Groups as a student, please contact our support team for an alternative option.
Only 'eligible' users can access student information
If a Brightspace role would give someone access to the students' names, email addresses, grades, communications or work, they need to be 'eligible'.
This applies to roles like TA, Grader and Facilitator... but not Course Builder, for example. More details about Brightspace roles can be found on the User Roles page.
What makes someone 'eligible'?
Toronto Metropolitan University employees are 'eligible'. More specifically, the person needs to be in the university's HR system with a role of Instructor, Staff or Academic Assistant.
How does this relate to my TA?
If you are trying to add a TA to your course and you receive a "not eligible for the role" error message, it may be because:
- The TA's Academic Assistant contracts are still being processed for this term. It may take up to a couple of days after the contract is updated in eHR for the status to appear in our system so that you can add your TA. You can ask them to check their status in eHR, and look in their university email for any notifications from HR, in case action is required.
- The TA may have a second username that they use for their Academic Assistant contract. If that's the case, contact your TA and ask them for this username.
There is no way for us to expedite this process, so please try to address these concerns prior to the start of the term, if possible.
You can change the role of an existing shell member, unless they have the Instructor role.
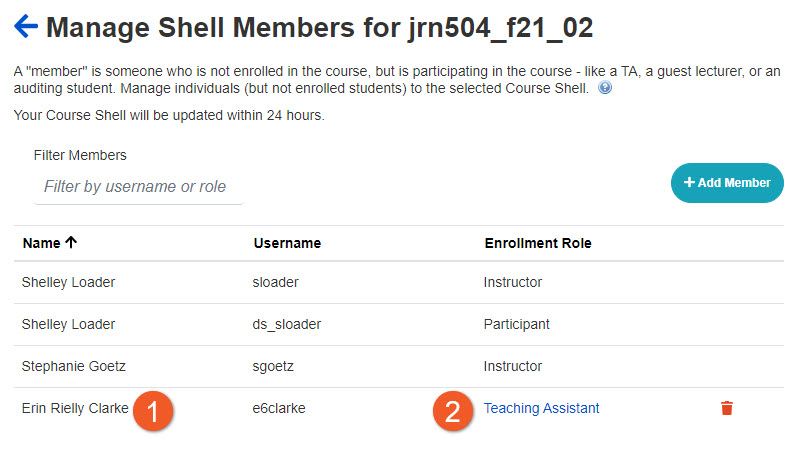
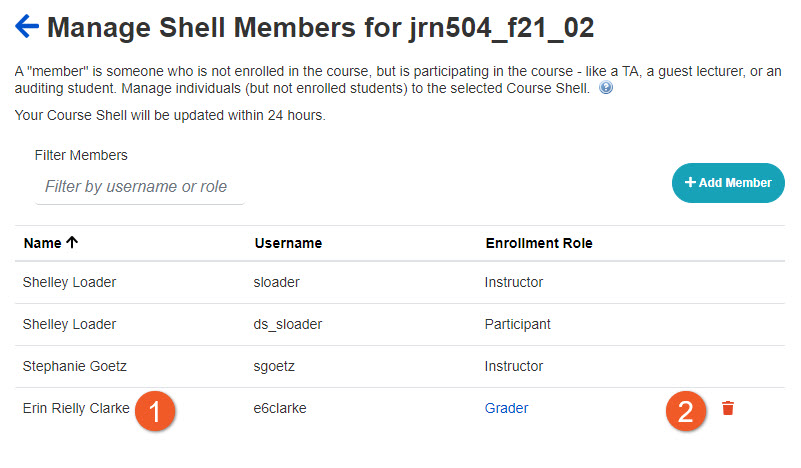
1. Look at the list of the current members of your shell and locate the person whose role you would like to change. Please note that you will not be able to change the role of anyone with the Instructor role.
2. Next, click on their current role, seen to the right of their username.
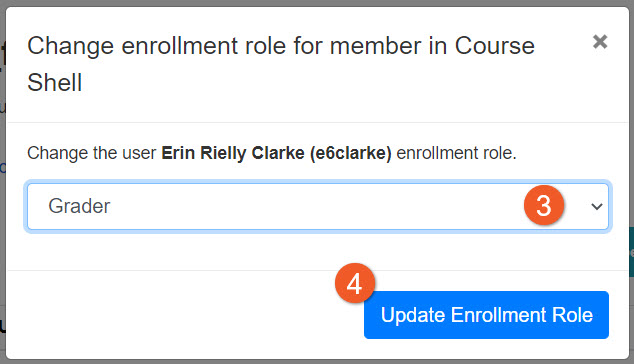
3. A dialogue box will pop up. Click on the role you would like them to have. If you aren't sure, please see the 'About user roles' section of this document.
4. To change the role of the shell member, click the Update Enrollment Role button. Their role will be updated, both in the user list of this tool and in D2L.

5. Notice the user with the updated role in the list of shell members.
If the person you are adding is eligible for the role you have selected, they will be added to your list right away, and added to your D2L shell within 24 hours. If they are not eligible for the role you have selected, you may select another role.
NOTE: If you have added someone to your shell in an Instructor role, but wish to remove them, you cannot do this using Self Service. You will need to contact our team, at courses@torontomu.ca. Please provide details about why the person was added, and why they need to be removed, and we’ll help you find a solution.
You can change the role of an existing shell member, unless they have the Instructor role.
1. Locate the person in the list of shell members for the selected shell.
2. Next, click the Remove button, associated with the user.
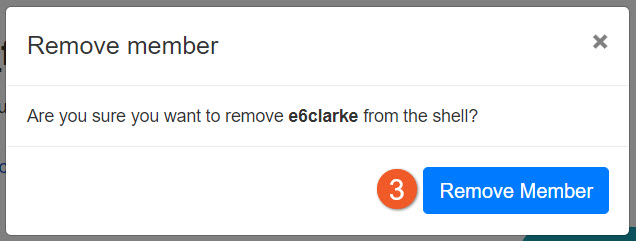
3. Review the pop-up, asking you to confirm the removal of this user. Click Remove Member.
You will notice that the member is removed from your list right away, and this change will be reflected in your D2L shell within 24 hours. If you change your mind, you can always add them back in.