Reweight final grade calculations
In certain circumstances, it is necessary to re-think the grading of a course. It may be that a semester is cut short, and you suddenly have to re-distribute the weight of assessments that could not be delivered as planned.
We will explore a few options for rethinking the gradebook, including the reweighting of the grades that factor into the final grade calculation.
Before you make any changes to the gradebook, be sure to export (download) the grades!
In case of any unintended changes to the students' grades, these grades can be re-imported into the gradebook.
In this example, the final exam will not be delivered, and its grades need to be redistributed across the other graded items.
Assignment 3 is being adjusted to take the place of a final assessment, and will take on the bulk of the weight from the final exam. The remaining weight will be incorporated into the first two assignments.
In addition, the instructor has decided to make Quiz 3 optional, and has told the students that the lowest of the 3 quiz grades will be dropped (to account for students who opted to not take Quiz 3).
We will walk through the necessary adjustments in the sections below.
Original weighting
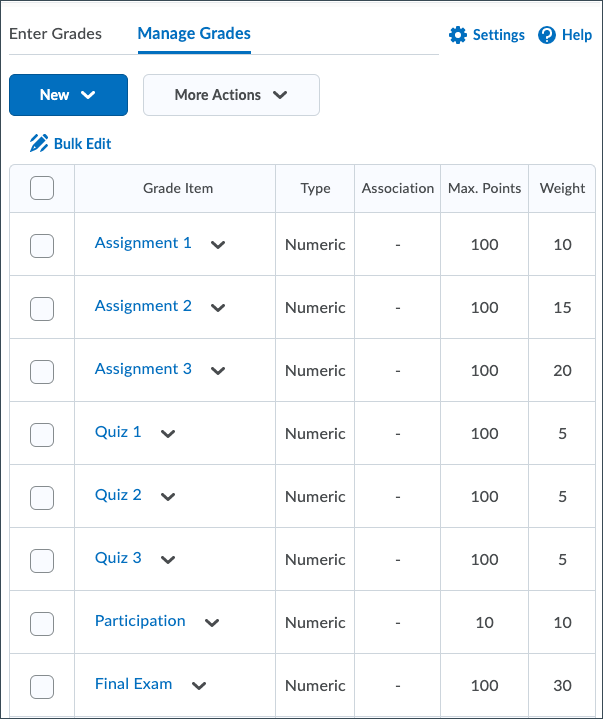
The image here represents the original weighting of the grades. In this tutorial, we will redistribute the grades and group the quizzes into a category.
New grade breakdown
Before we begin, the adjusted grade breakdown will be:
- Assignment 1 - 15%
- Assignment 2 - 20%
- Assignment 3 - 40%
- Quizzes - 15% (calculated as a group)
- Participation - 10%
- Final Exam - 0%
*The quizzes will now all be calculated as a group, using a "Category", which will be outlined below.
This workflow may be useful If you need to create a scenario where a collection of grades is assessed as a group (i.e. "quizzes are worth 15% total"), and the lowest or highest will be dropped.
This tutorial assumes that you have already created the grade items, and will proceed with creating a category and moving the grade items into that category.
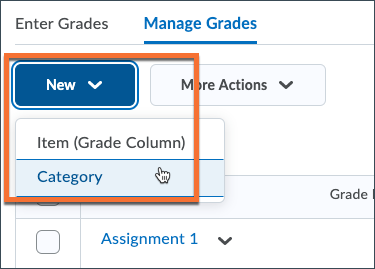
- From the Grades tool, make sure you are in Manage Grades, and click New > Category.
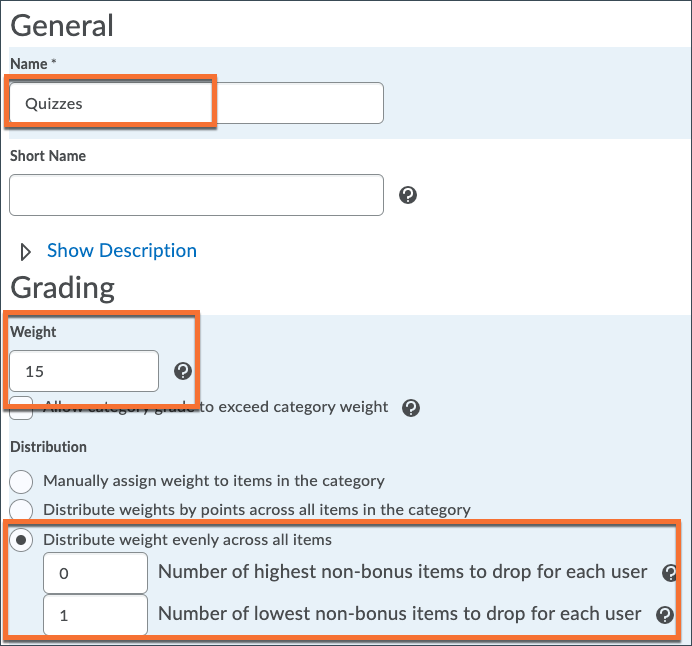
- Give the new category a clear and concise name.
- Add a weight that will account for the entire group of grades - not per grade (i.e. "Quizzes are worth 15% total").
- Most importantly, select to "Distribute weight evenly across all items" and identify how many of the highest or lowest grades to drop for each student.
- Click "Save and Close", at the bottom of the page, to complete the process. The new category will appear at the bottom of the list.
The individual grade items that make up the group need to be moved into the new category.
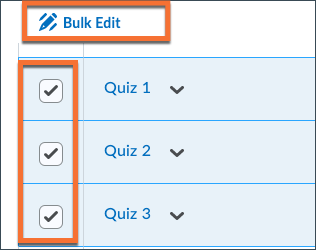
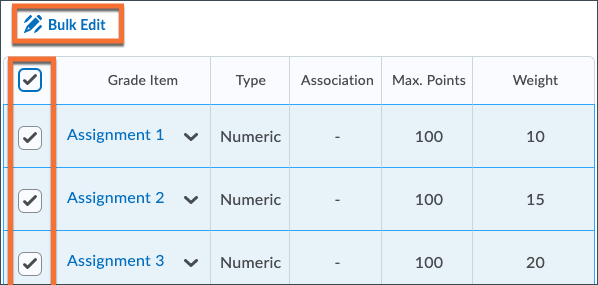
- Check the boxes for each affected grade item
- Click the "Bulk Edit" link at the top of the grades page.
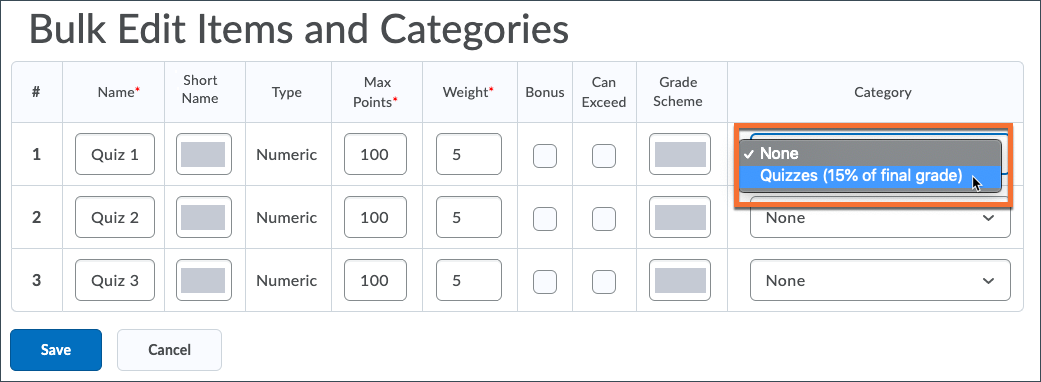
Once in the "Bulk Edit Items and Categories" page, look to the "Category" colum (the rightmost column in the list).
- For each of the affected grade items, click the "Category" dropdown menu and select the category you just created. Don't change anything else at this stage!
- Click to "Save" these changes.
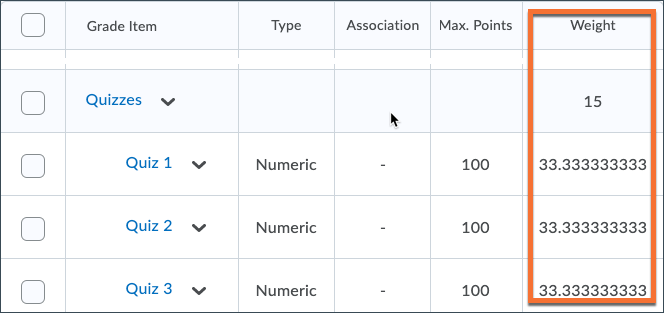
Back in "Manage Grades", you will see how the grade items and their weights have been adjusted for the new category settings.
In this example, all of the quizzes will add up to 15% of the final calculated grade, with the lowest of the three quiz grades being dropped. If a student did not complete one of the three quizzes, it will be the dropped grade.
Finally, we can adjust the weighting of the final grade calculation.
- Make sure you are in the "Manage Grades" view of the Grades tool.
- Click the checkbox above the list of grade items/categories. This will check everything in your gradebook.
- At the top of the table, click the "Bulk Edit" button.
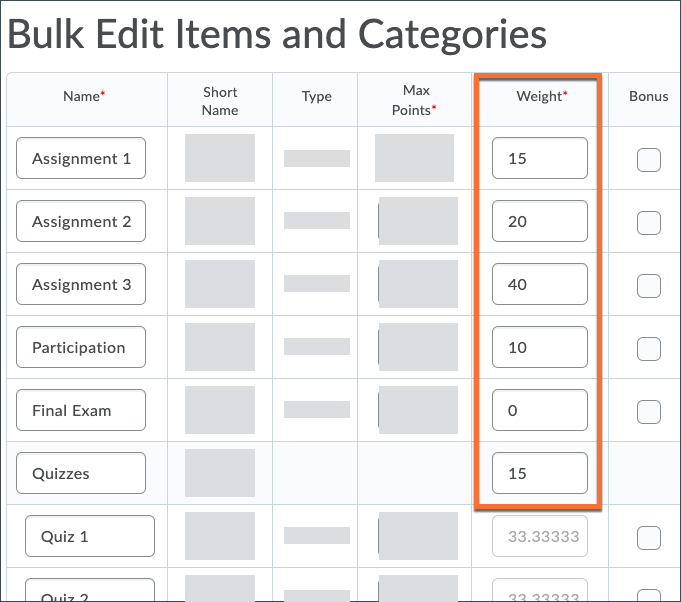
Locate the "Weight" column. You will see the current weighting for all of your grade items and categories. For this calculation, you will disregard the weights of items inside any categories (such as "Quizzes" in the example).
- Enter the new weights for your grades.
- If you created a new category (as outlined above), you likely do not need to change the category weight here. It should already be set to the appropriate weight.
- Do not change the "Max Points" values for any of the columns that already contain student grades.
- Click the "Save" button at the bottom of the page.
When you return to the "Manage Grades" view of the Grades tool, look to the top of the page. If you have no warnings, your grades add up to 100%! If you have any warnings, it means that your weights do not add up to 100% -- you may need to recalculate.
In the D2L Brightspace Grades tool, "bonus" items are grades that can only add value to a student's grade -- they are calculated on top of the grade calculation.
There may be some smaller graded activities that could not be completed by the whole class. What if some students already started working on them? A "bonus" item is a great way to give students credit for work they completed without punishing the students who couldn't complete it.
A possible scenario
In the example below, the students were each expected to lead groups in the labs throughout the term. At this point, 80% of the students have completed this task, but 20% cannot complete it (as labs have been cancelled).
This is now being converted to an optional task.
The remaining students have been given the option to complete an alternative activity if they would like the bonus marks. The students who do not complete it will not be penalized.
- Make sure you are in the "Manage Grades" view of the Grades tool.
- Click the checkbox above the list of grade items/categories. This will check everything in your gradebook.
- At the top of the table, click the "Bulk Edit" button.
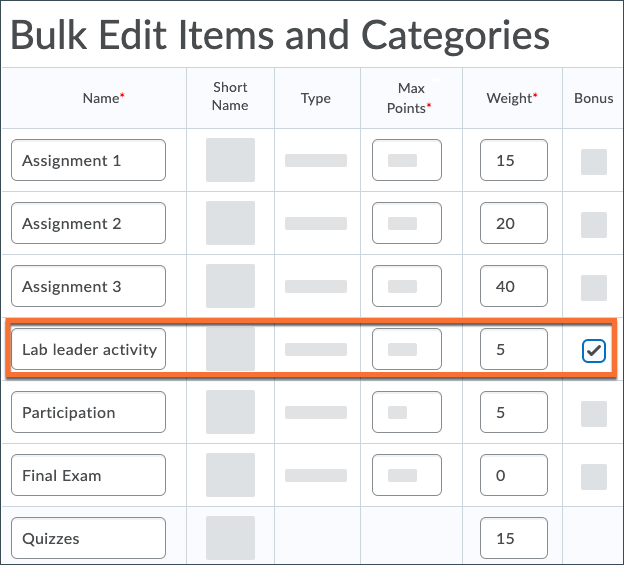
- Look for the graded activity that you want to convert to a "bonus" activity.
- Check the box in the "Bonus" column for the column.


Redistribute the weight of the bonus item
- The weight value of the bonus item will have to be added to another non-bonus graded item.
- Do not set the weight of the bonus item to 0, otherwise students won't receive any grades for it!!
Click "Save", at the bottom of the page, to complete the changes.
In this example, the 5% weight from the (now bonus) "Lab" activity has been added to the "Participation" weight.