Akindi assessments (integration with Brightspace)
Akindi is an assessment tool used to deliver bubble sheet or online multiple-choice examinations. It is integrated with D2L Brightspace, which means it is accessed through your course shell.
There are two types of Akindi assessments:
- Paper-Based Assessments, where you can print and scan the bubble sheets yourself using any printer and scanner, or easily send it off to be done for you on campus.
- Online Assessments, which are delivered entirely online via Brightspace.

Support
- Visit the Akindi Help Center (external link)
- Akindi’s Getting Started Guide (external link)
- Contact Akindi Support using the blue live-chat button in the bottom right corner of the screen while using the tool.
About Akindi On Paper Assessments
Once complete, you can either print and scan the bubble sheets yourself using any printer and scanner, or easily send them to be done for you on campus.
Features include:
- Integrated with D2L Brightspace
- Scantron bubble sheet alternative
- Use any scanner and regular printer paper
- Innovative web based platform
- Use any dark writing utensil to fill it out
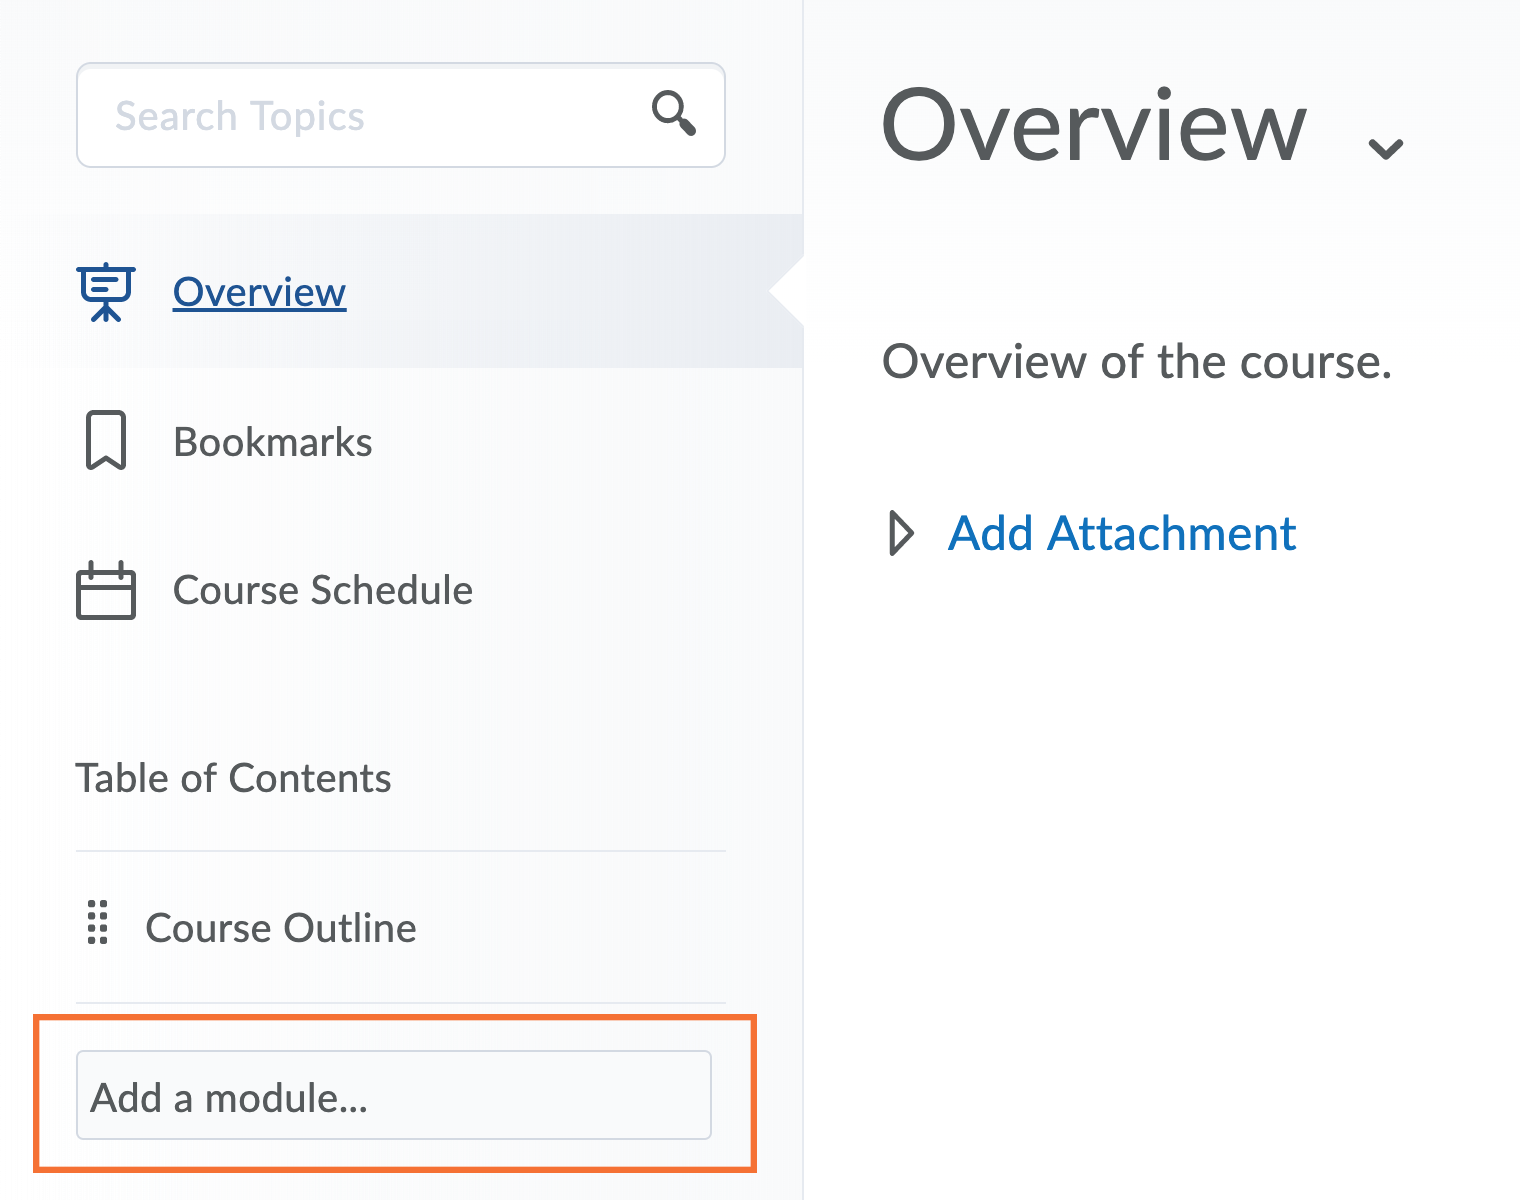
Access the Content tab in your D2L Brightspace course shell. Add a module to the left-hand navigation bar by clicking Add a module… and give it a name.
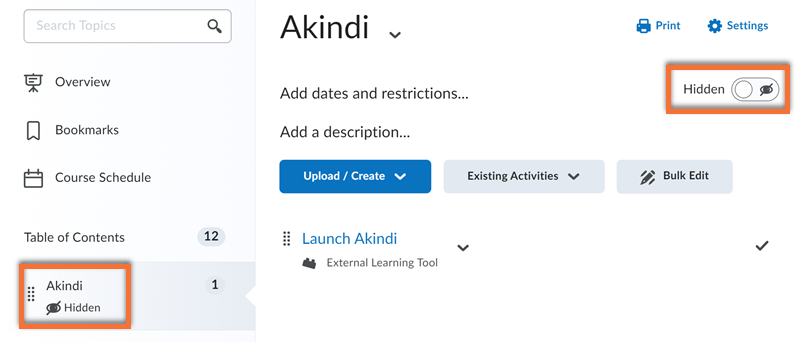
Student-facing pages are not necessary when using Akindi only for Paper-Based Assessments.
If you are not running online assessments and would like to hide the module from students, click on the eye icon in the top right corner and switch the visibility to off.
This is confirmed by the eye icon displayed below the name of the module in the sidebar navigation.
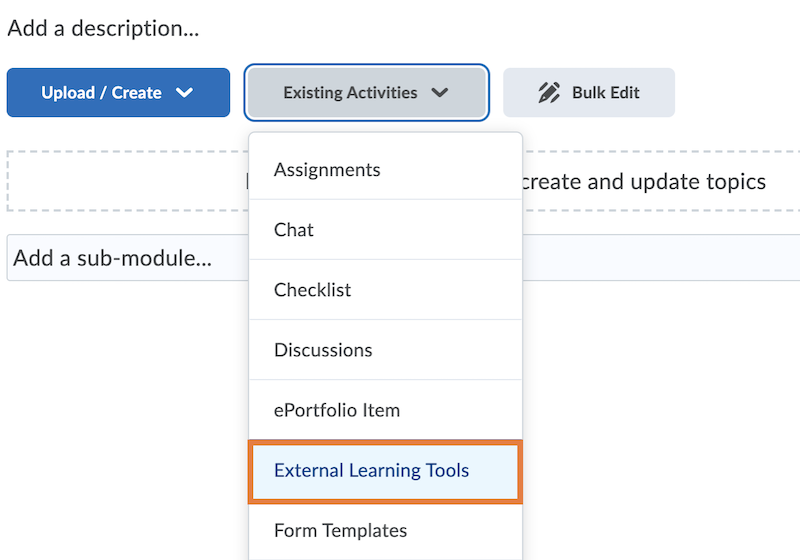
Inside your new module, click on the Existing Activities drop-down menu and select External Learning Tools.
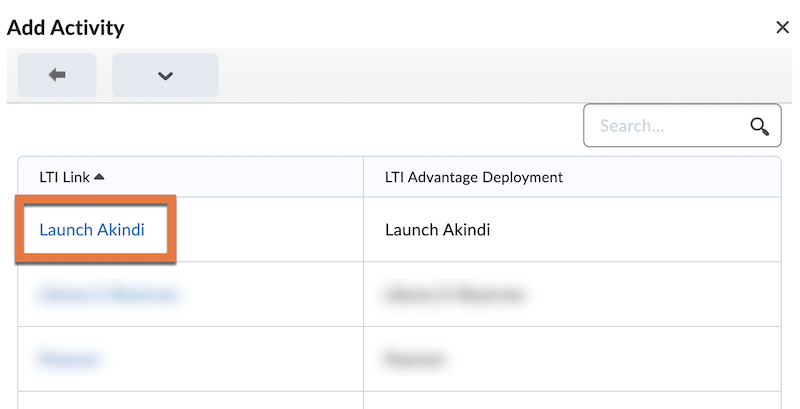
Select Launch Akindi.
This will add a link with the same name to your module; click it to open the tool.
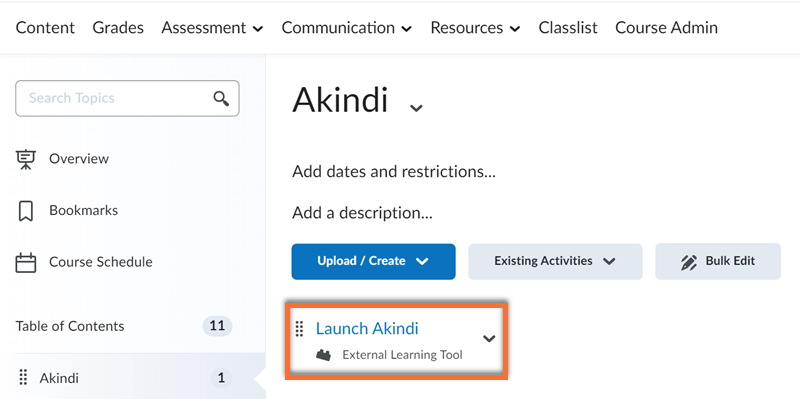
Access the tool by clicking on the Launch Akindi link in your module.
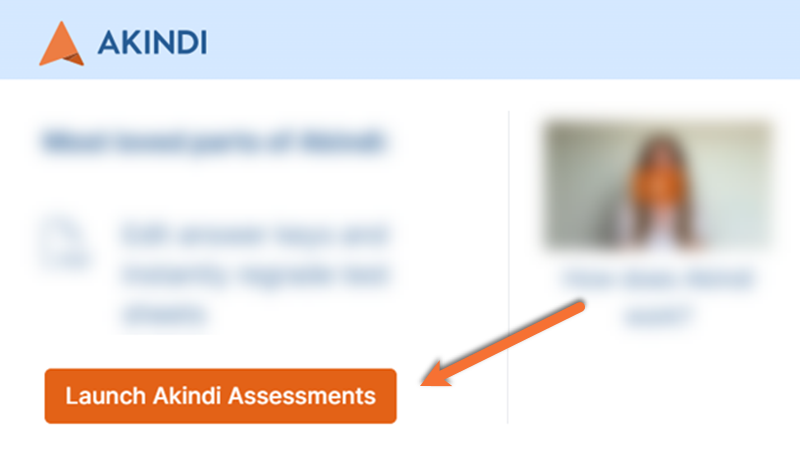
Click on the big orange Launch Akindi Assessments button in the bottom left of the new window.
This will take you to Akindi on an external site.
Detailed steps to create an in-person bubble sheet assessment (including videos) can be found on the Create an Assessment page of the Akindi Help Centre (external link) .
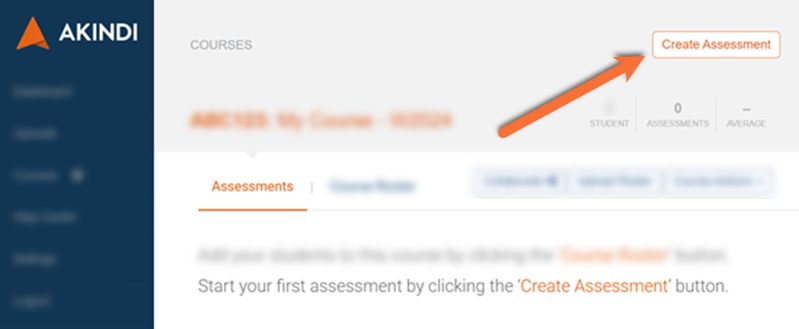
Access the Akindi Dashboard through the link you added to your course.
Click the Create Assessment button in the top right corner.
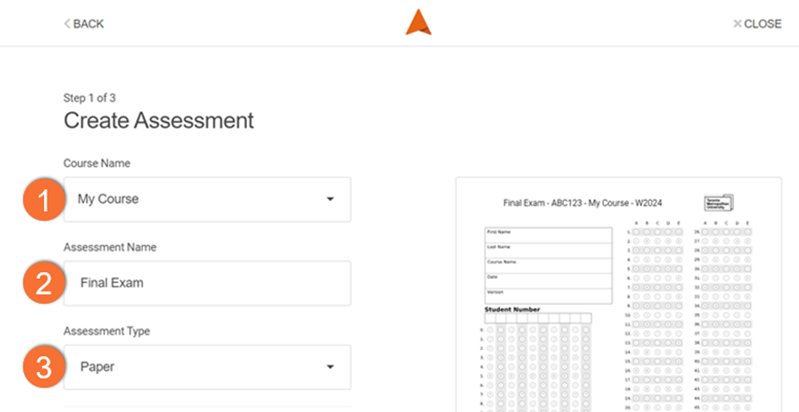
1. Course Name - Select the name of your course under the dropdown menu. Never use the + Add new course option as it will cause syncing issues with D2L Brightspace.
2. Assessment Name - Name your assignment (ie. Final Exam).
3. Assessment Type - Select “Paper” from the dropdown menu to create a paper-based assessment.
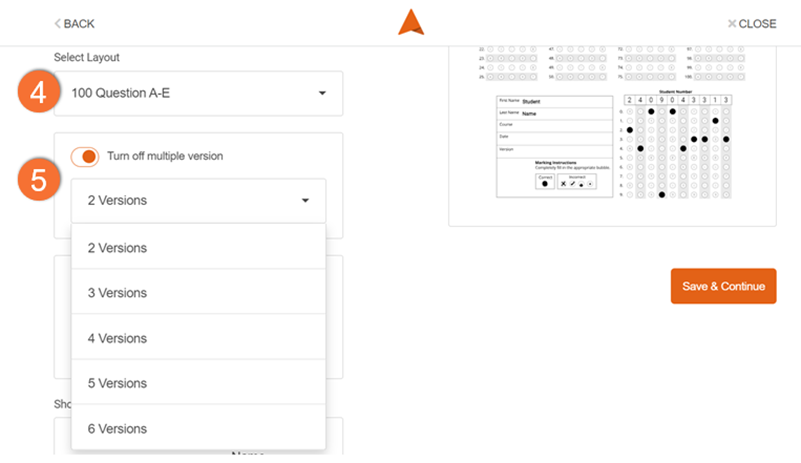
4. Select Layout - Choose a 50, 100, or 150-question layout. Select a layout that has equal to or more questions than your assessment. If your answer key has unanswered questions, it will skip the question during marking.
5. Turn on/off multiple versions - Allows you to select the number of versions of this test you would like to create, up to 6 versions.
Note: You will have to create a separate answer key for each version of the assessment. How you divide the different versions of question sheets in person is up to you. While writing the test, students will specify the version of the test they received by filling in the appropriate bubble on their bubble sheet.

6. Prefill Student Information - Choose if you would like the printed bubble sheets to automatically fill in your students' first names, last names, and student numbers. If you do not select this option, the sheets will all be the same and each student will be required to fill in their information.
7. Sort printed sheets… - If you've opted to prefill student information, you can choose to sort printed sheets by Student Name (ordered by last name) or Student ID number to facilitate exam sheet distribution.
8. Show in Title - Choose what information is automatically displayed at the top of every bubble sheet. The preview window on the right will automatically update to reflect these changes. As it can get quite long, we recommend displaying the Section Name and Assessment Name (and including the course code in the name of the assessment).
Click Save & Continue.
Option 1: Manual Input (Recommended)
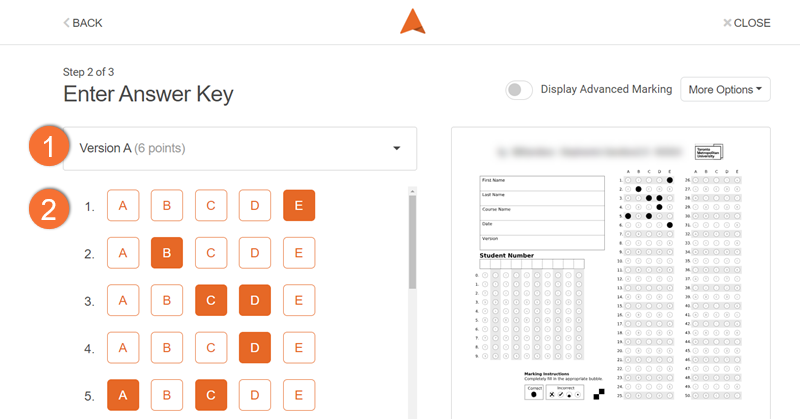
- If you have multiple versions turned on, you can edit the different versions of the test by selecting them in the dropdown menu at the top (Version A, B, etc).
- You can manually input the answers to each question by clicking the letters next to each question, turning each box orange. Select multiple boxes on each row if a question has multiple correct answers.
When you input the answers for each question, changes are immediately reflected on the bubble sheet previewed on the right.
Option 2: Import/Export
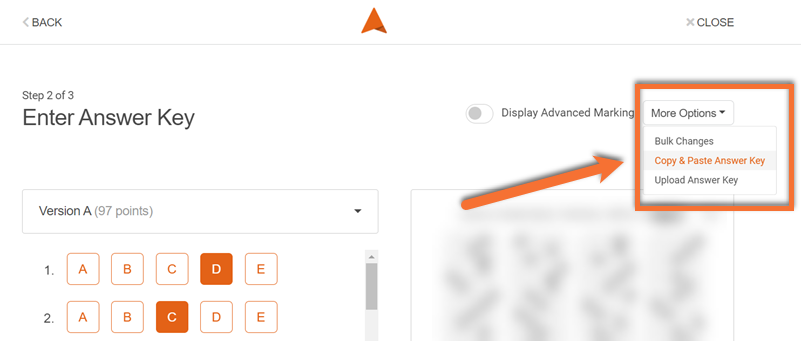
You can import an answer key by selecting Copy & Paste Answer Key from the "More Options" drop-down menu at the top right of your screen. A new window will pop up.
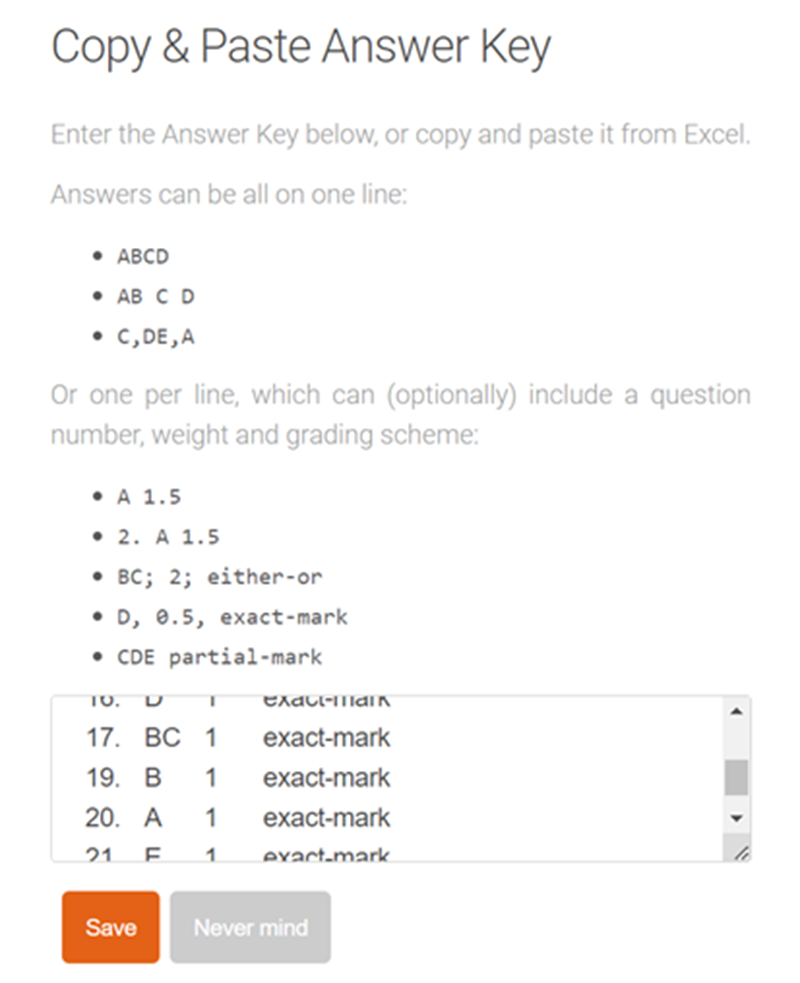
Answer keys must be typed or copied and pasted into the text box using the format indicated on the screen. Each new line will be counted as a new question.
If you have already filled out your answer key in the tool using a different type of input, this text box will be filled automatically.
You can export your answers as plain text by clicking in the text box window and copying and pasting them to an external location on your computer (ie. Word, Google Docs, etc).
Option 3: Upload Questions & Answers as a Document
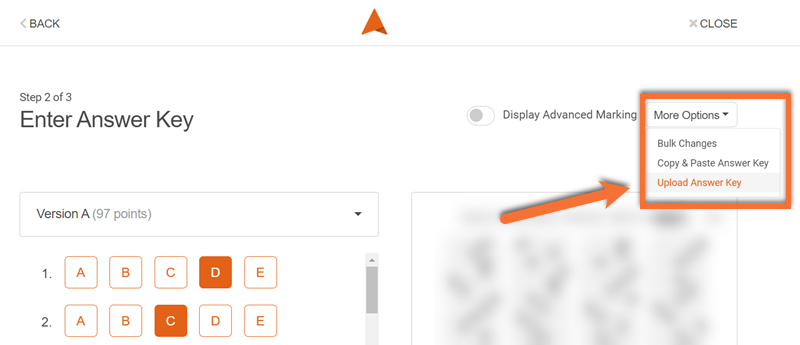
If you have your questions listed in a plain text Word Document (.docx), you can upload them as a file by selecting Upload Answer Key from the "More Options" dropdown menu at the top right of your screen. A new window will pop up.
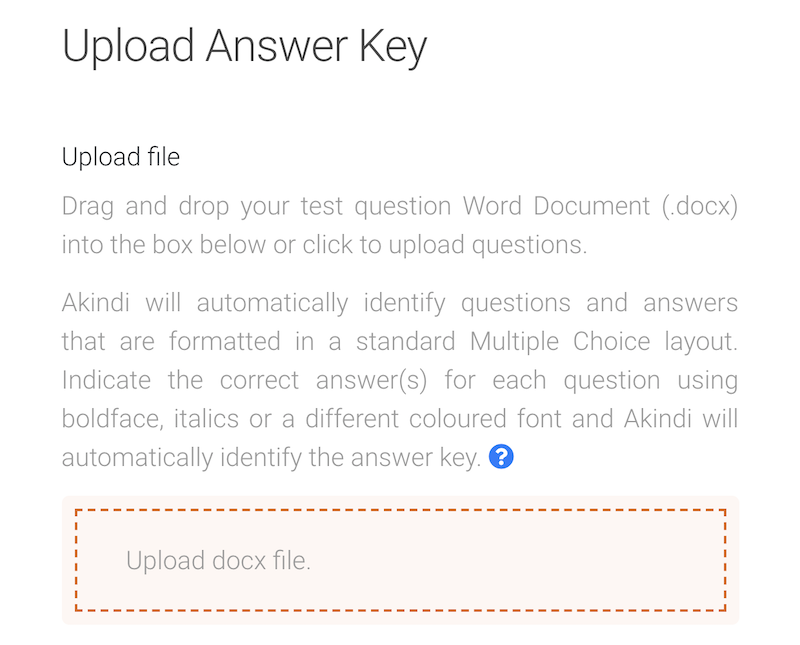
In your document, you can identify correct responses by changing the text colour, making it bold, or italicized.
Akindi will select the correct answers from the uploaded Word Document (.docx), and create an answer key.
Option 4: Upload A Filled-In Answer Sheet

You can print and complete an on-paper answer key by filling in "0000" as the student ID.
Once this document is scanned, it can be uploaded to your Akindi assessment as a response sheet in Brightspace.

You can toggle advanced marking by clicking the on/off slider at the top right of your screen. If the slider is orange, advanced marking is turned on.
Setting advanced marking options is only necessary for your assessment if your assessment has bonus questions, questions worth different amounts, or questions with multiple answers.
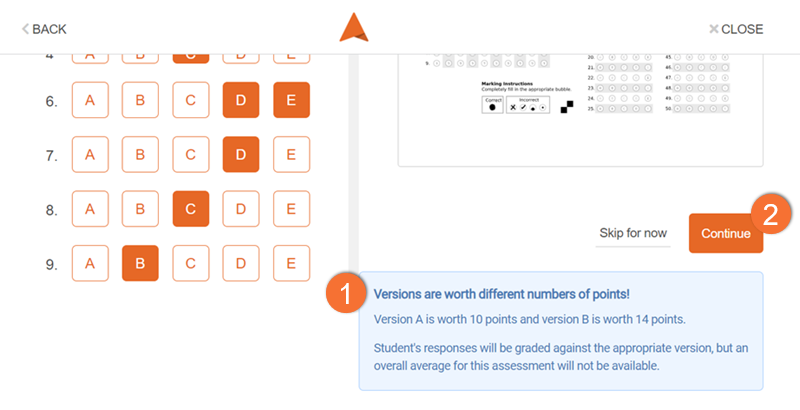
- If you have multiple versions of your test and they are worth different amounts of points, you will get a warning message.
It is possible for tests set up this way to be accurately graded, but you won’t be able to take full advantage of Akindi’s statistics dashboard after your assessment is complete.
- Click on the orange Continue button for printing options.
Time-Based Accommodations
As this assessment is completed on paper, the timing is not managed by the tool, but through the facilitation of the exam.
Make-up Test or Rewrites in the Test Centre
- the number of questions (50 - 150)
- the number of possible answers (A-E or A-J)
This will allow the Test Centre to provide students with a blank bubble sheet that best matches the exam.
Once the exam is completed,
- Collect an envelope of the filled response sheets from the Test Centre.
- Scan them as a PDF (via scanner, or by taking photos on a mobile device and converting them to PDF).
- A course instructor must upload the completed exam sheets into the Akindi Dashboard (see Option 2 in the Scanning Completed Tests resource below).
There are multiple ways to access the printing features within Akindi.
Note: The response sheets generated through Akindi are linked to one assessment, and to the Brightspace course the assessment is in. They cannot be re-used for multiple assessments, or shared between separate courses.
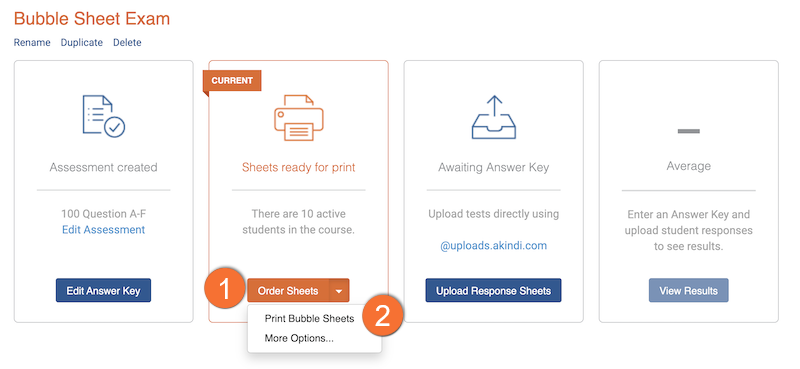
Option 1: From your course Akindi Dashboard you can access your assessment’s blank Akindi sheets, or order them to be printed.
1) Order Sheets from Duplicating and Printing Services on campus, at 105 Bond Street. A pop-up will appear with options for your Print Shop Order. After submitting, you will receive an email when the sheets are ready to be picked up.
2) Click the drop-down beside "Order Bubble Sheets", and select Print Bubble Sheets. A PDF of the response sheets will open in a new window.
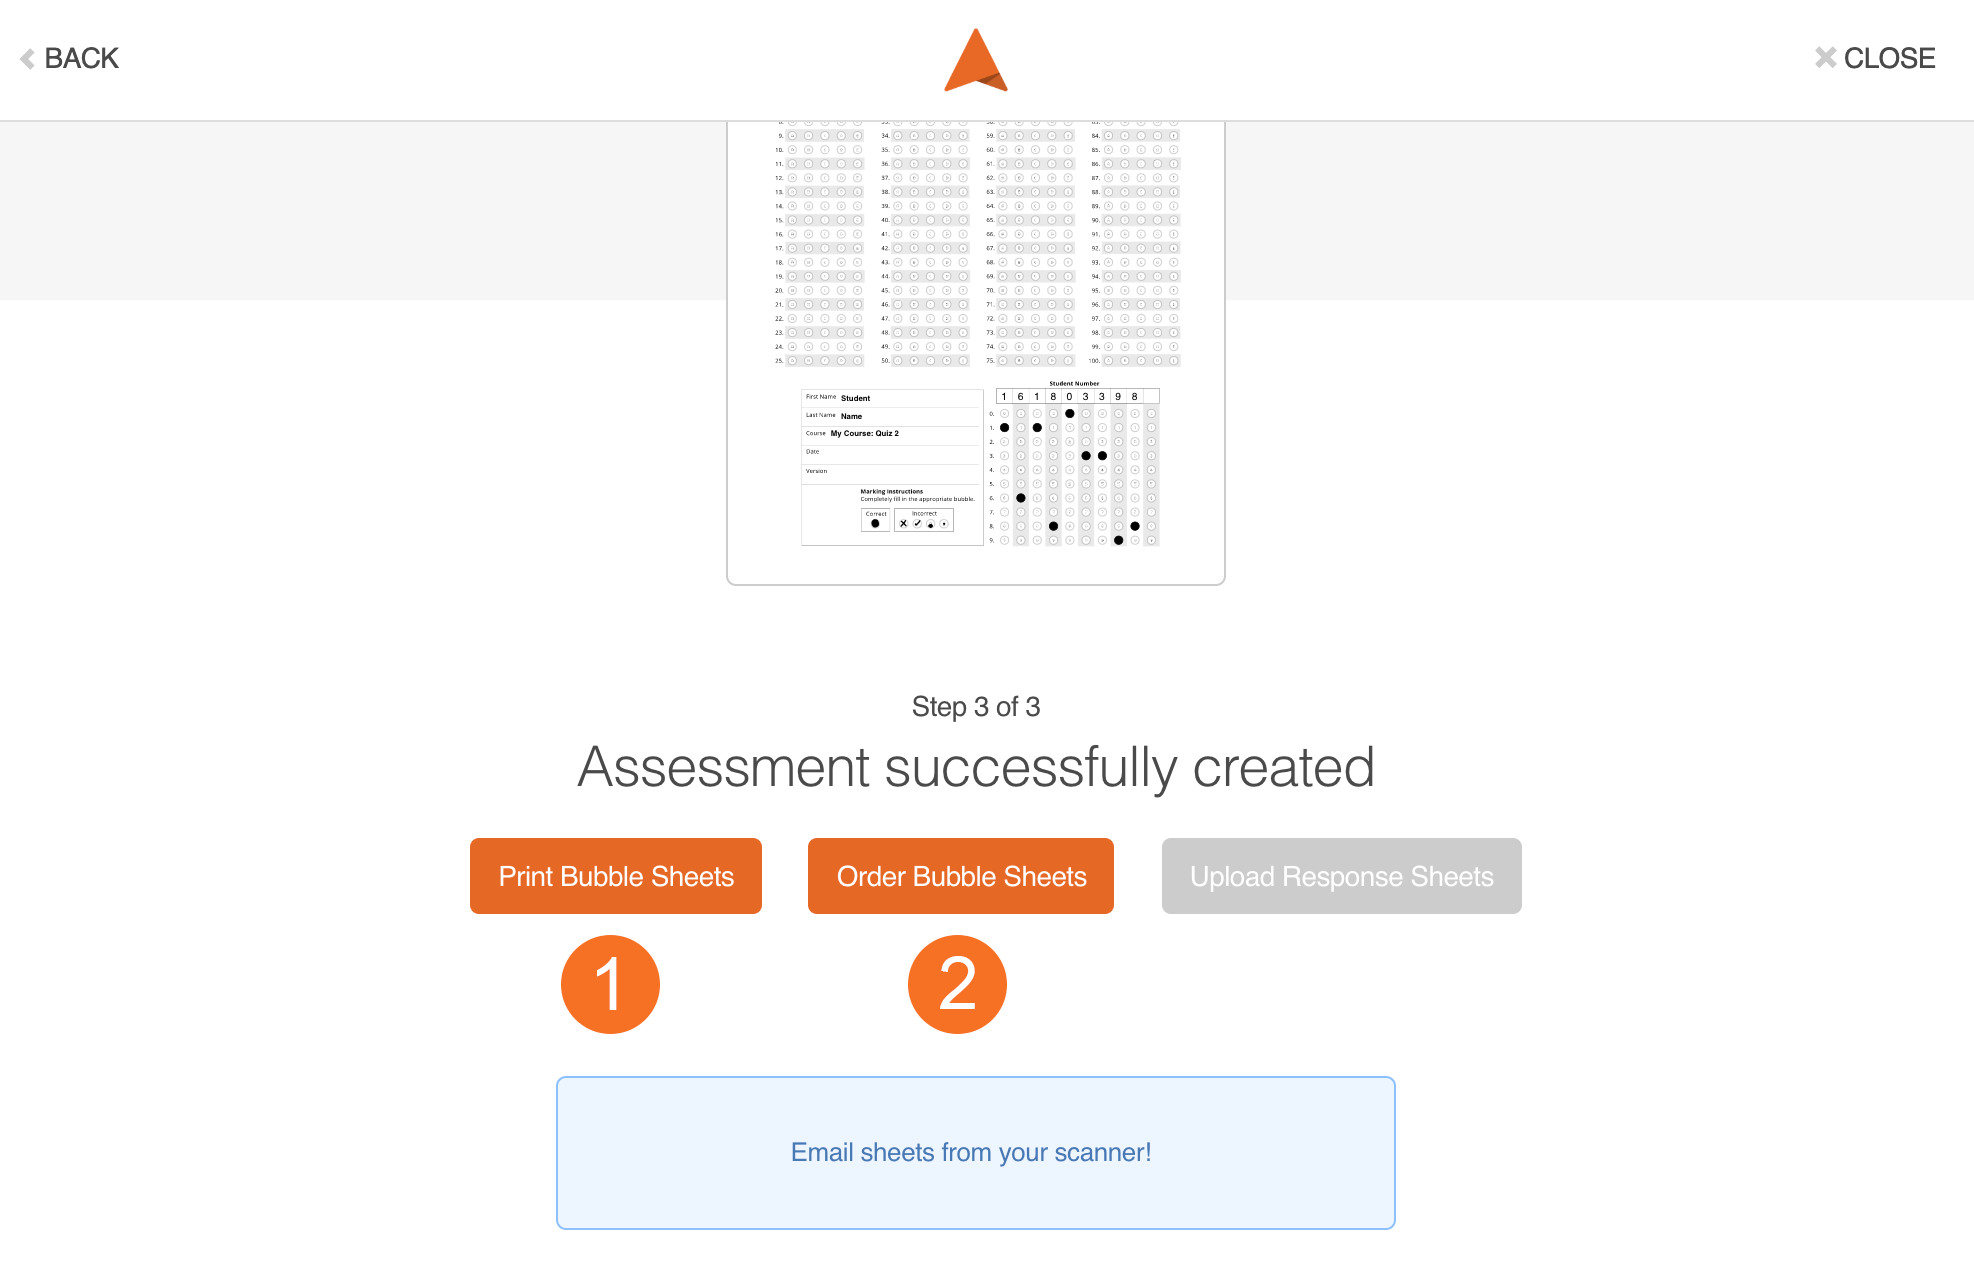
Option 2: From Step 3 of the Assignment Creation page (after the Answer Key), you can select:
1. Print Bubble Sheets on your own. A PDF off the response sheets will open in a new window, which you can print on any printer, on letter-sized paper.
2. Order Bubble Sheets from Duplicating and Printing Services on campus, at 105 Bond Street. A pop-up will appear with options for your Print Shop Order. After submitting, you will receive an email when the sheets are ready to be picked up.
Print bubble sheets yourself
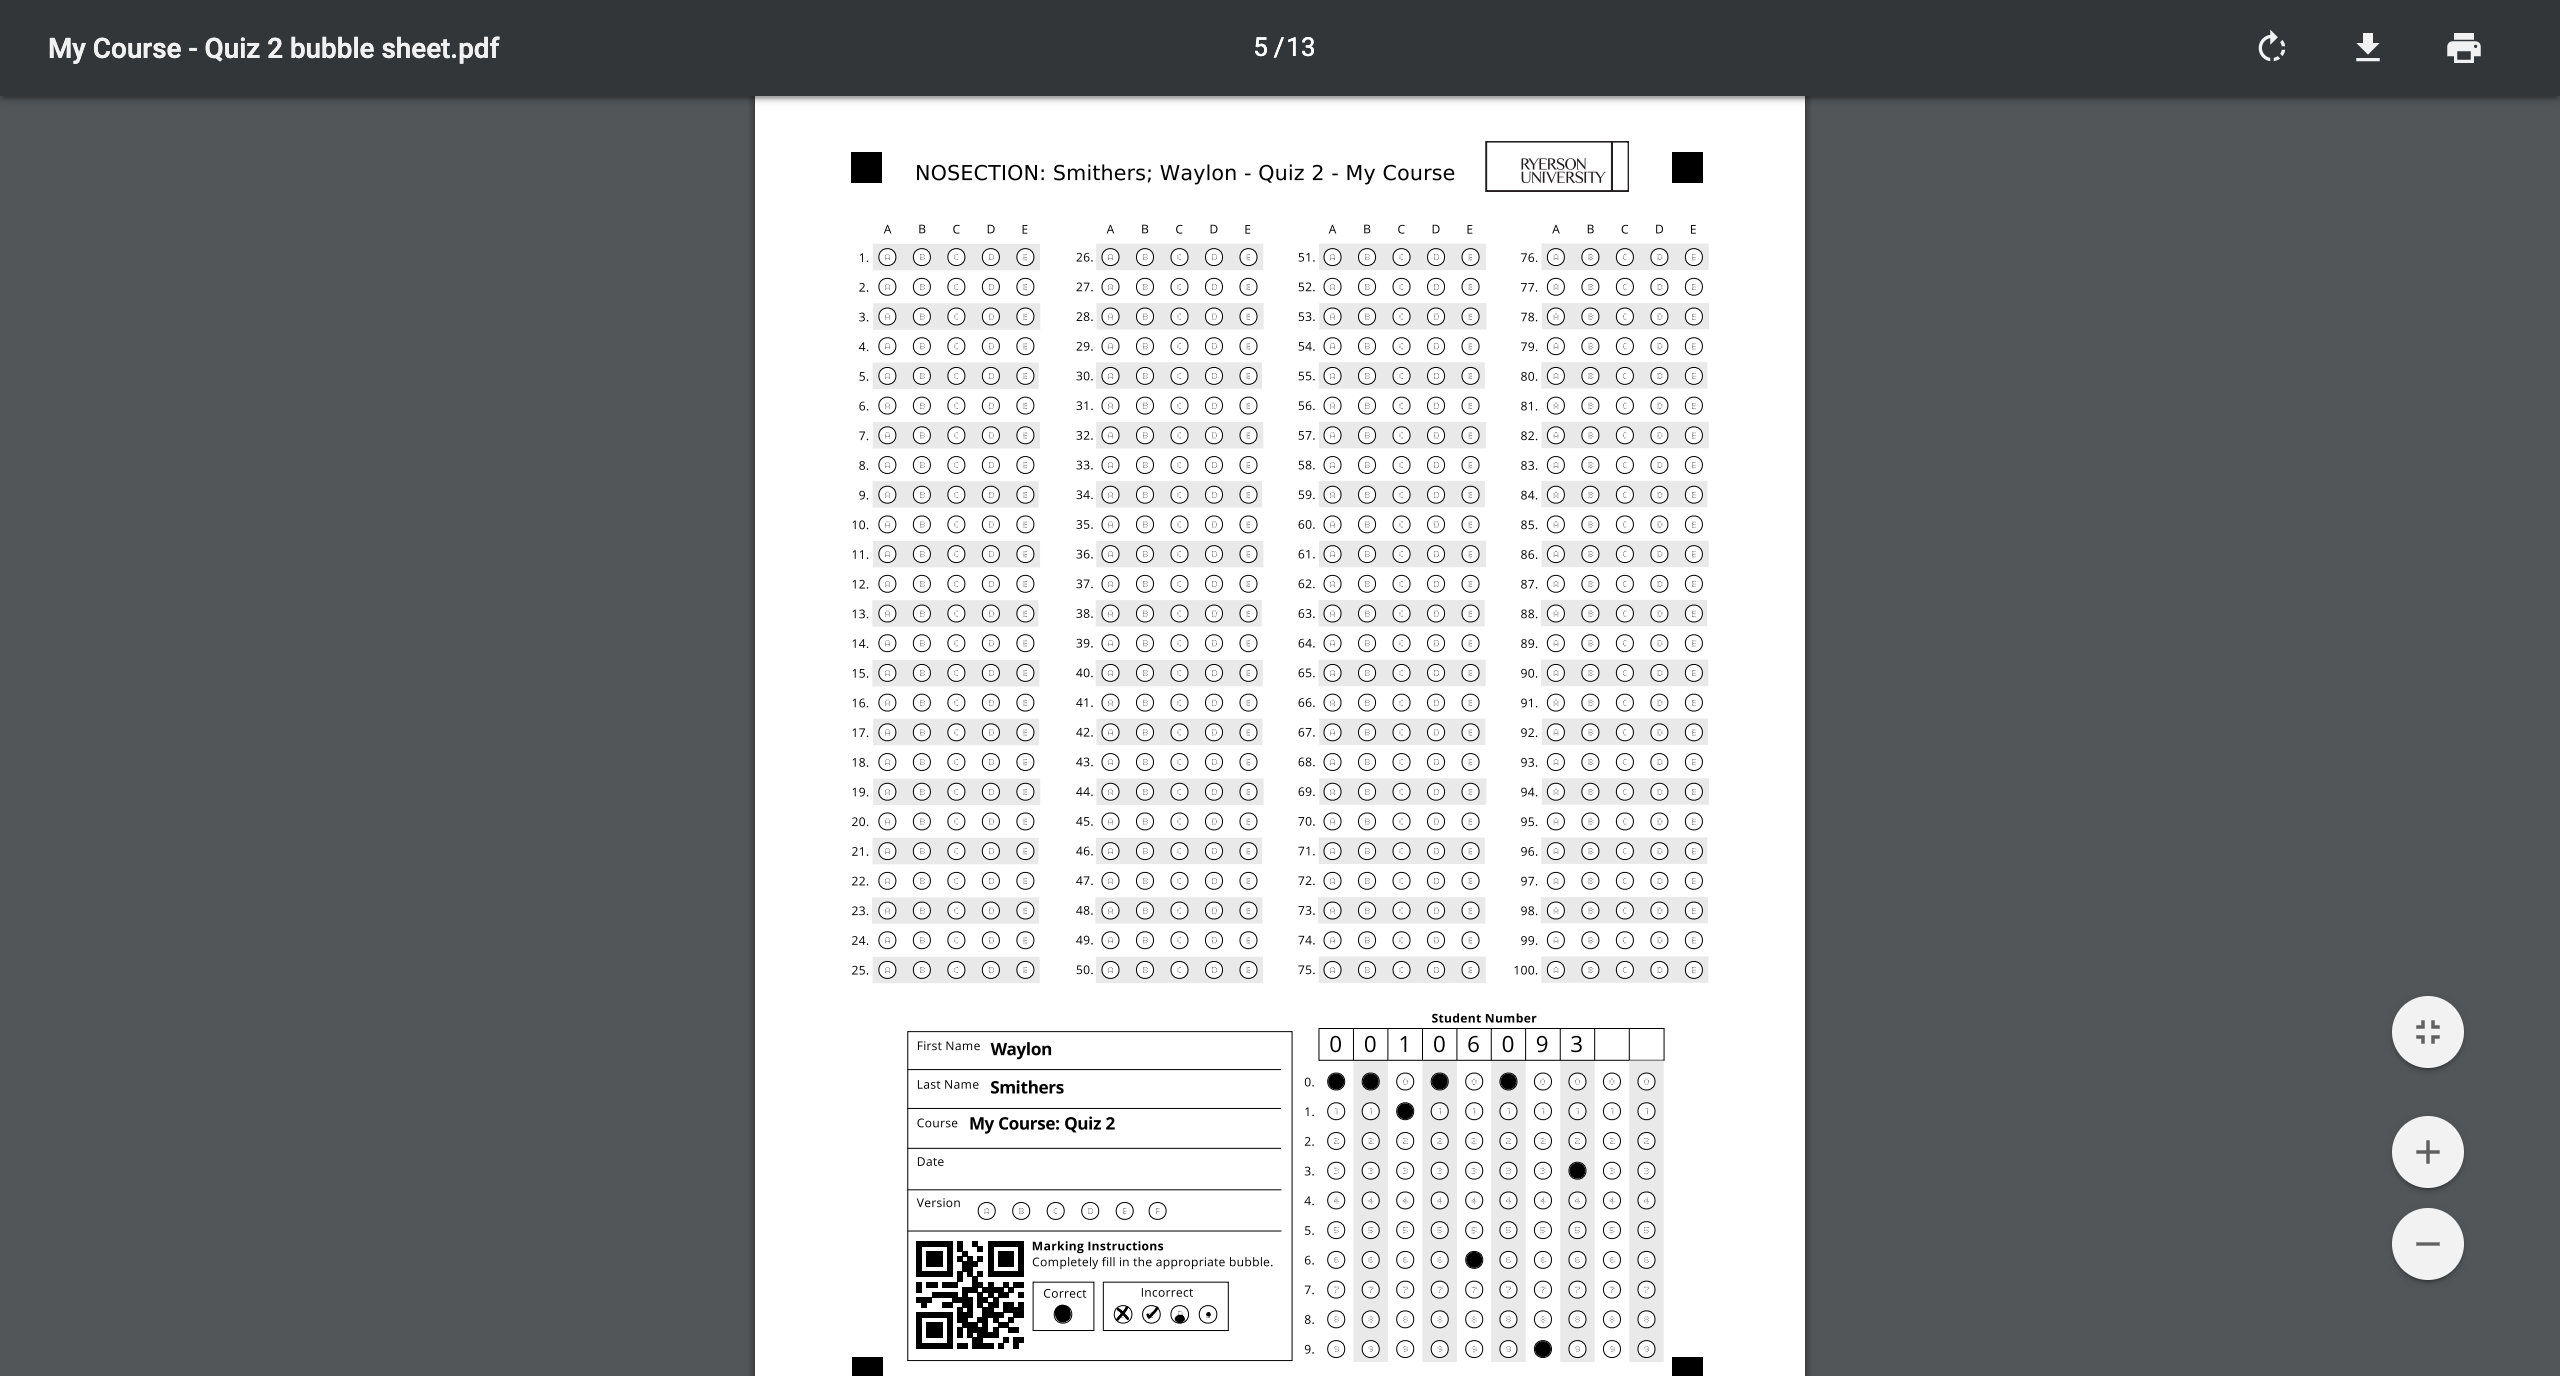
Selecting Print Bubble Sheets through either option will generate a PDF file, ready to print with everything you have selected.
- If the prefill student information option is enabled, individual pages will be created for each student.
- If you have prefilled student information turned off, Akindi will generate a single test page that you can print with as many single copies as you need.
You can print your bubble sheets directly from this window in your browser if your current computer is connected to a printer, or you can download it as a PDF file to print later.
Note: If you would like your response sheets printed by Duplicating and Printing Services, use the "Order Bubble Sheets" option.
Option 1: Get Scanned by Print Shop
To get the sheets scanned for you on campus, you can bring the sheets to the Duplicating and Printing Services (DPS) location at 105 Bond Street. There is no need to sort sheets by section or version, as Akindi will automatically sort them.
You will receive an email when the results are ready to be viewed.
Note: If a student recorded their responses on a generic sheet provided by The Test Centre, it cannot be scanned by DPS. Please use Option 2 for these sheets.
Option 2: Scan Using Scanner
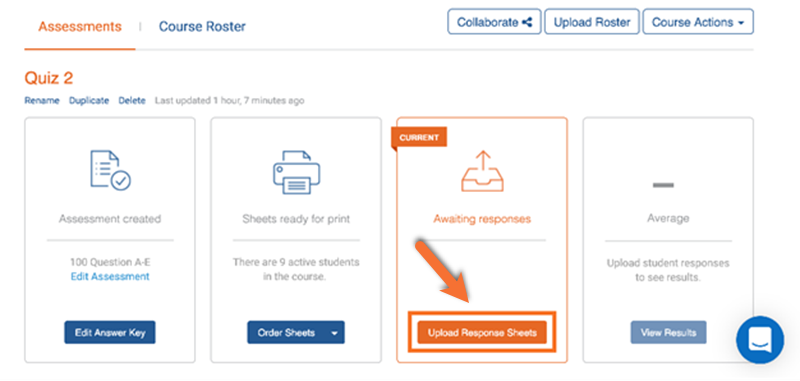
If you have access to a regular scanner, you can scan the sheets one by one in any order and upload the PDF to your Akindi Dashboard in the Upload Response Sheets option.
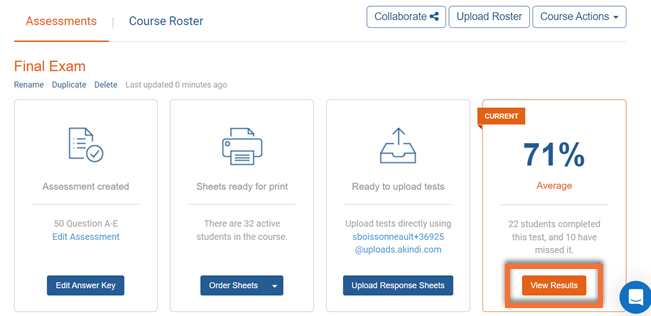
Once your tests are completed, you can view your results from the Akindi Dashboard by clicking on View Results under the relevant assessment.
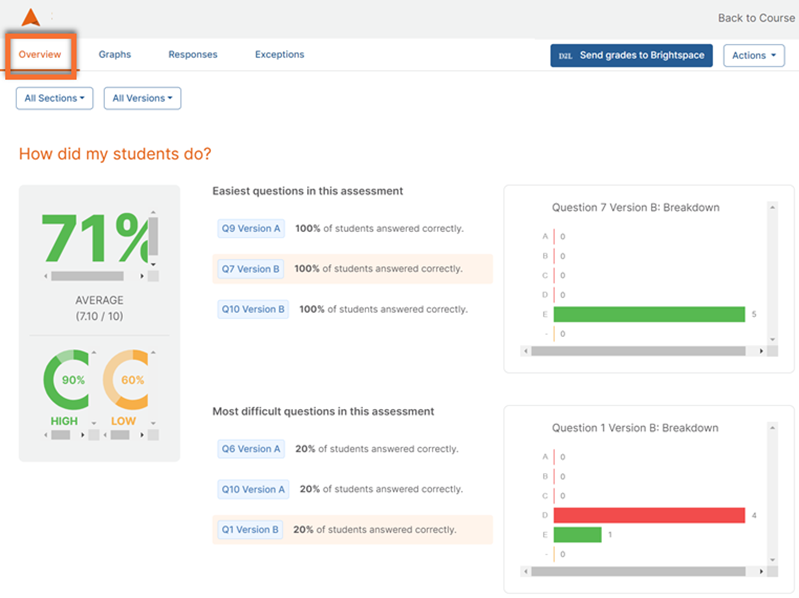
The first tab of your results is the Overview.
Here you can see:
- Statistics on how well your students did on the test
- Which questions were easiest and most difficult for them
- A breakdown of your Akindi discriminatory score, summarizing how well your test was designed based on the results
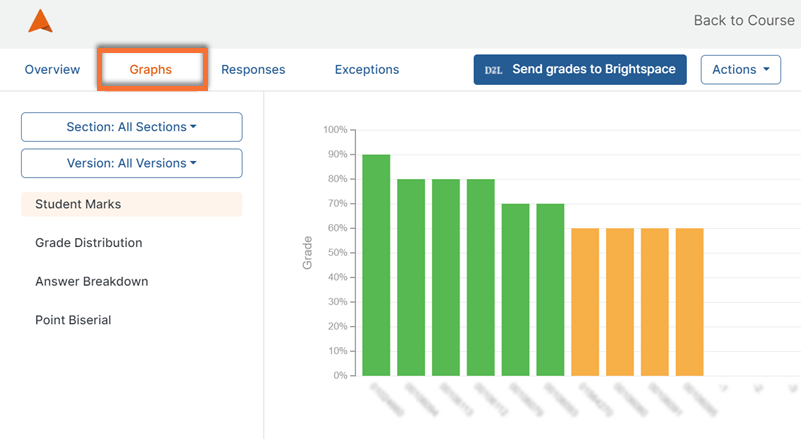
The second tab of your results is the Graphs tab.
This displays visualizations of your student marks, grade distribution, answer breakdown, and point biserial.
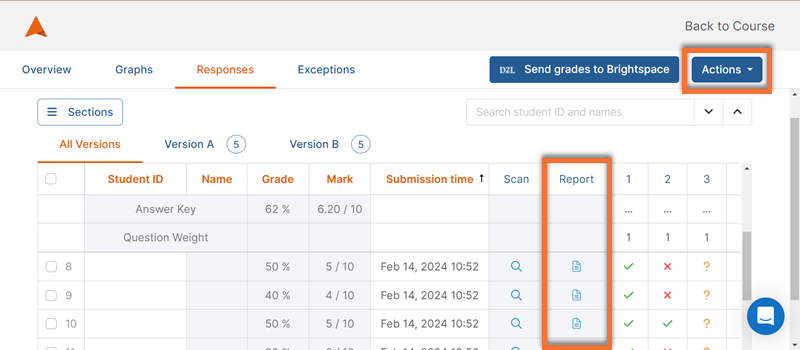
The third tab of your results is the Responses tab.
This will give you details of each student's completed attempts.
For each student, you can see their response to every question, and if it was correct or not. To view an annotated scan of their response sheet, click the corresponding icon in the “Reports” column.
Using the Actions dropdown menu in the top right corner, you can make changes to the assessment and answer key.
Akindi provides a detailed explanation of all the information presented on the "Results" page, including how to use it. Learn more at the Akindi Results Resource (external link) (external link) .

The fourth tab of your results identifies the Exceptions.
If any student responses were scanned with missing information or errors, Akindi will collect them here for manual review. This can include (but is not limited to):
- Ambigious answers
- Multiple selections
- Missing version information
- Missing/unclear Student Identification information
Be sure to reiview and address the Exceptions before syncing the grades to Brightspace, as they may impact grading.
Akindi provides detailed explanations of how to process Exceptions. Learn more at the Akindi Resolving Exceptions Resource (external link) .
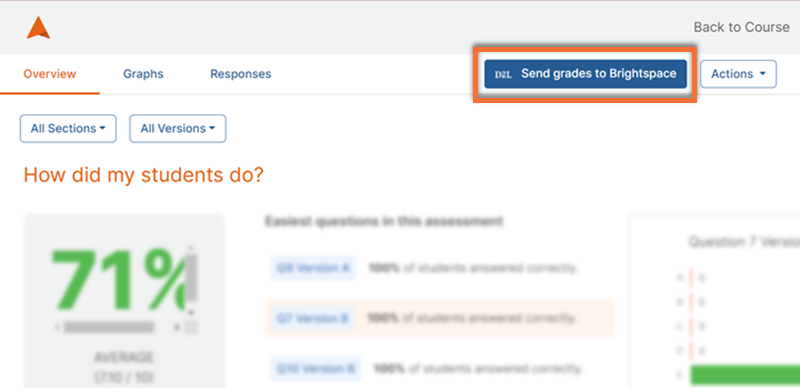
When you are ready to export the grades to your D2L Brightspace course shell, click Send Grades to Brightspace in the top right corner of your "Results" page to send grades to all students.
Please ensure that you have resolved all exceptions before beginning this process.

You can also send grades to select individual students by navigating to the "Responses" tab and selecting individual students using the left column, before clicking Send Grades to Brightspace.
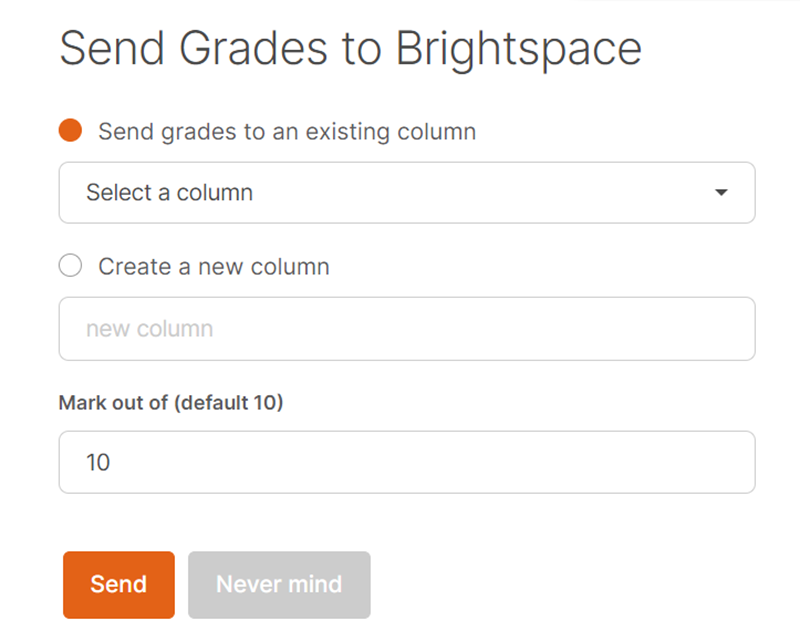
You can choose to:
- Create a new column (which will automatically be visible to students)
- Select an existing column from your Brightspace course
It is recommended to create your intended column in advance, as a "Numeric Grade" in the Brightspace Grades tool. This allows you to set visibility options and the intended overall course weight of the assessment before syncing the scores from Akindi.