How to host a meeting in Zoom
We have reconfigured Zoom to improve its security and privacy beyond its defaults to make it safer for the Toronto Metropolitan University community. We recommend scheduling meetings in advance with the following settings.
These settings are designed for hosting online classes. Different settings may be required for hosting confidential virtual meetings.
Learn how to setup recurring tutorial sessions for TAs/GAs.
Review all safety and security tips for meeting hosts.
We recommend scheduling Zoom meetings through the Zoom web portal.
- Go to torontomu.zoom.us (external link)
- Click “Sign In” and login using your TMU credentials.
- Go to the "Meetings" page, click “Schedule a Meeting” and fill out the form.
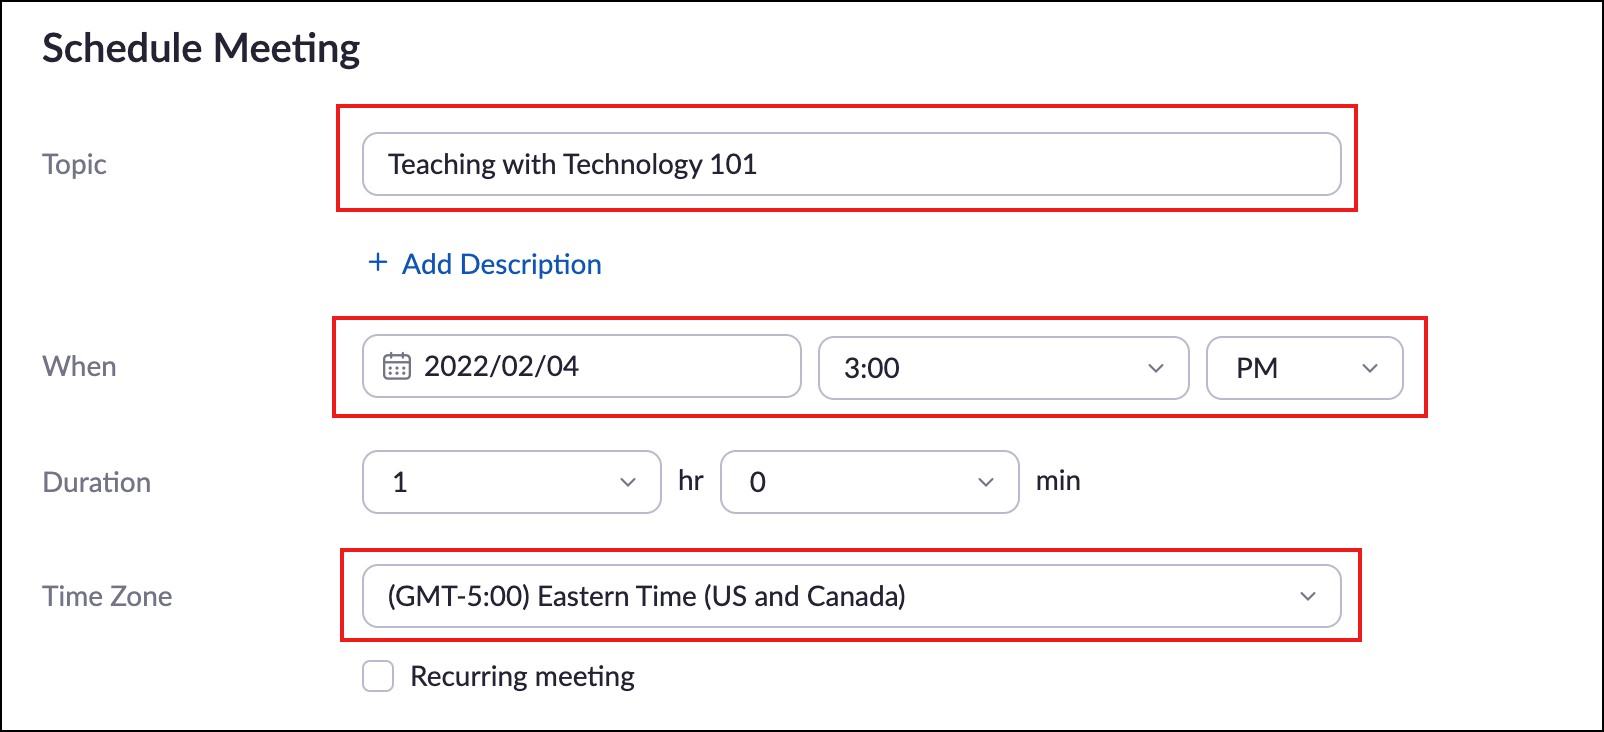
- Fill out the basics such as the title of your meeting (e.g. name of course) and the date when the meeting takes place.
- Ensure you have the correct time zone set.
- If your class is meeting on a weekly basis, you can enable "Recurring meeting".
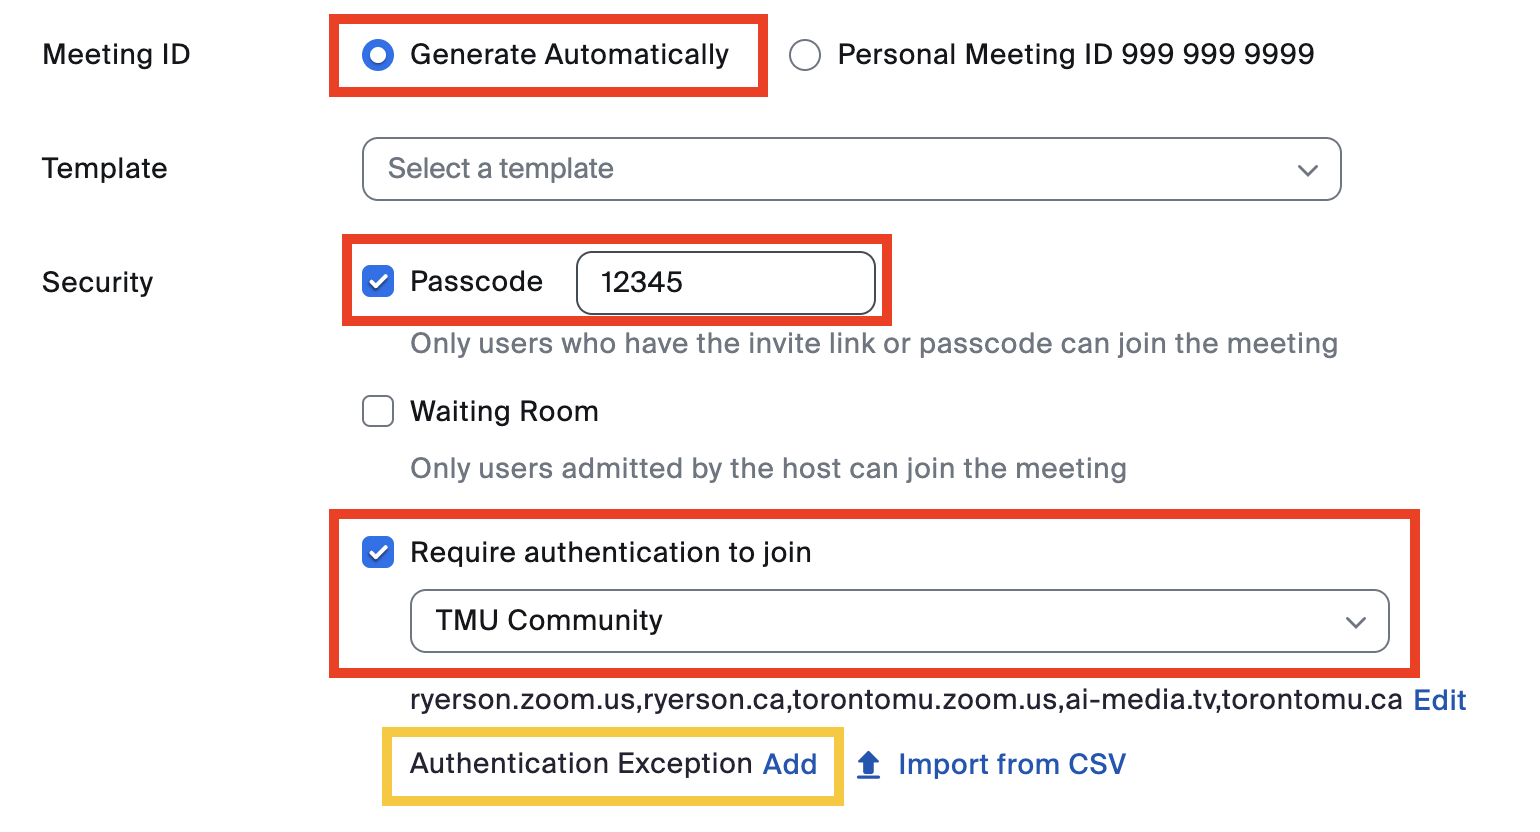
- The "Meeting ID" should be set to "Generate Automatically" (and not Personal Meeting ID).
- All scheduled meetings automatically include a passcode.
Note: It is possible that participants will share the passcode with unwanted guests, but this will prevent unknown intruders from entering the meeting. - Make sure the "Require authentication to join" option is checked.
Important note about the "Require authentication to join" option
This option will require participants to sign-in to Zoom with their my.torontomu credentials, minimizing the risk of unwanted guests joining the room. Before joining a meeting, your participants must sign in to the Zoom desktop or mobile app using Single Sign On (SSO).
External attendees
For external attendees, you can pre-select an authentication exception option. Invited guests will then be able to join your session without needing to authenticate their Zoom account with the university’s Zoom system.
Find instructions on how to add authentication exceptions (external link) . The screengrab above illustrates step five in the setup process—please click “Add” to enter any non-Toronto Metropolitan University guests’ names and email addresses.
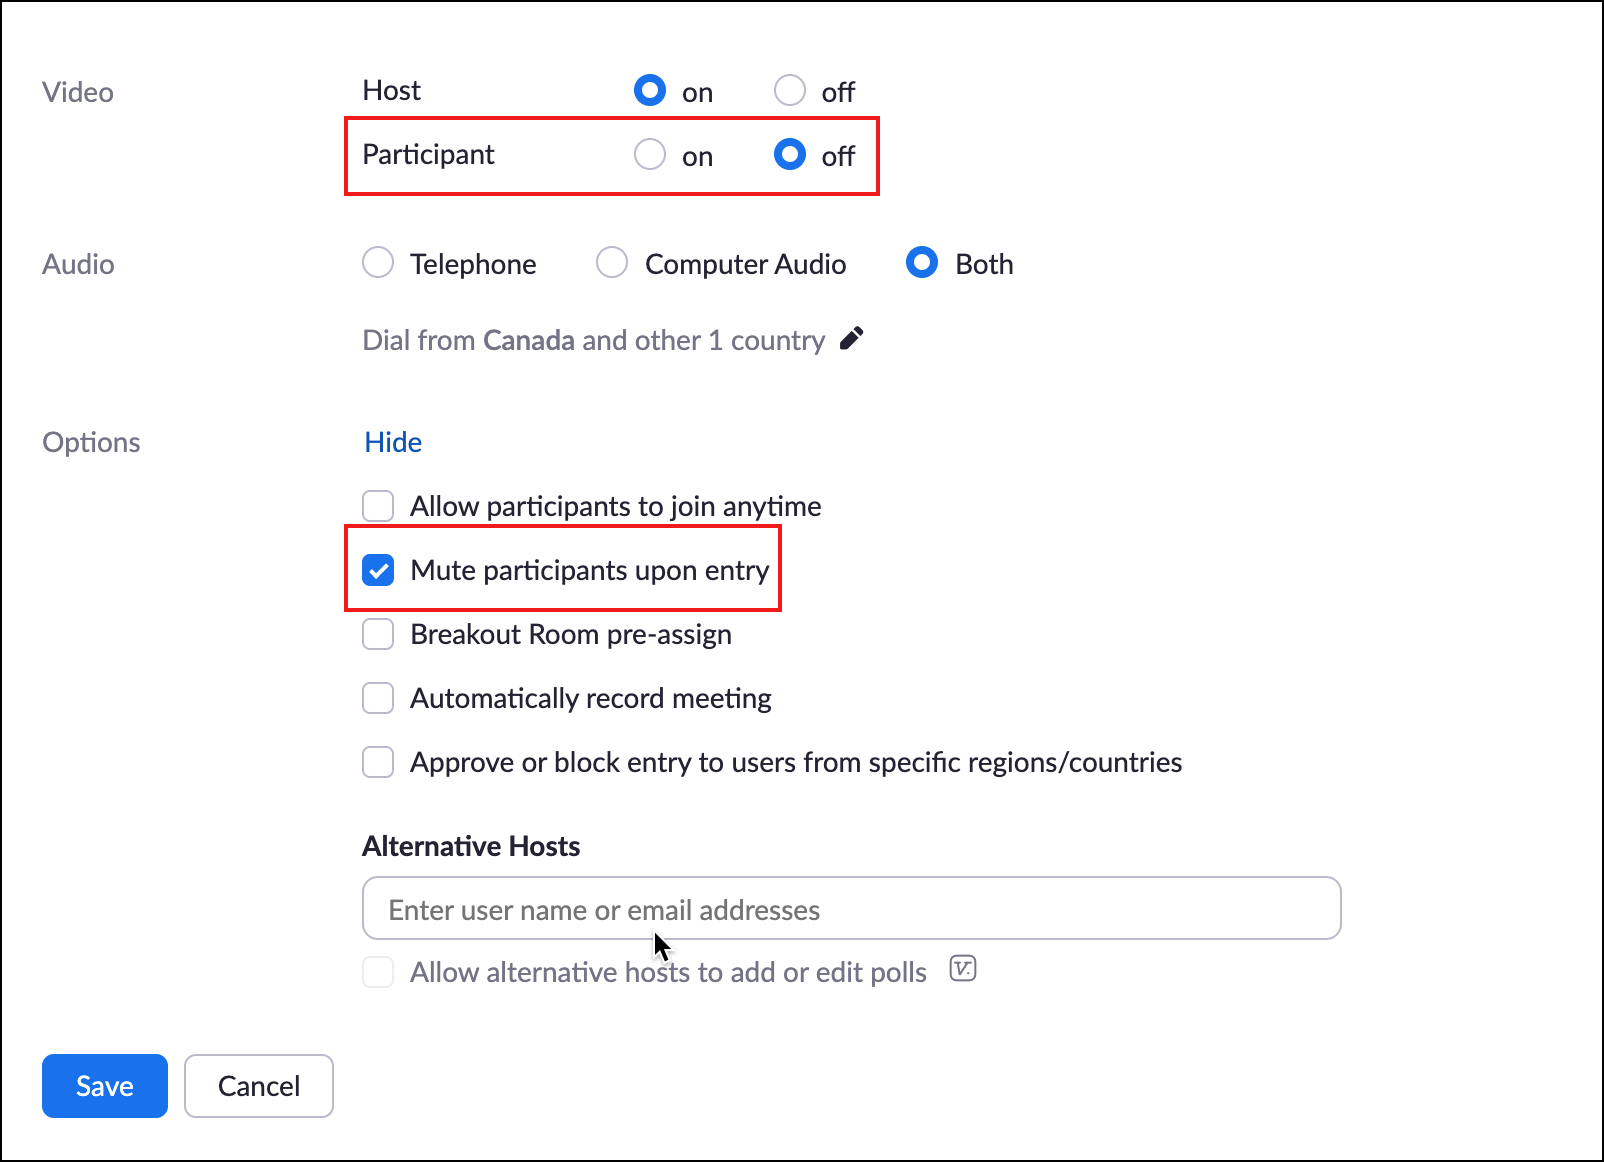
- Ensure that participant video is set to "off"
- Check "Mute participants upon entry", to prevent background noise.
- Optional: set up pre-assigned breakout rooms and/or set the meeting to automatically record.
- You can add teaching assistants to the "Alternative Hosts" field which will give them some administrative controls over the meeting.
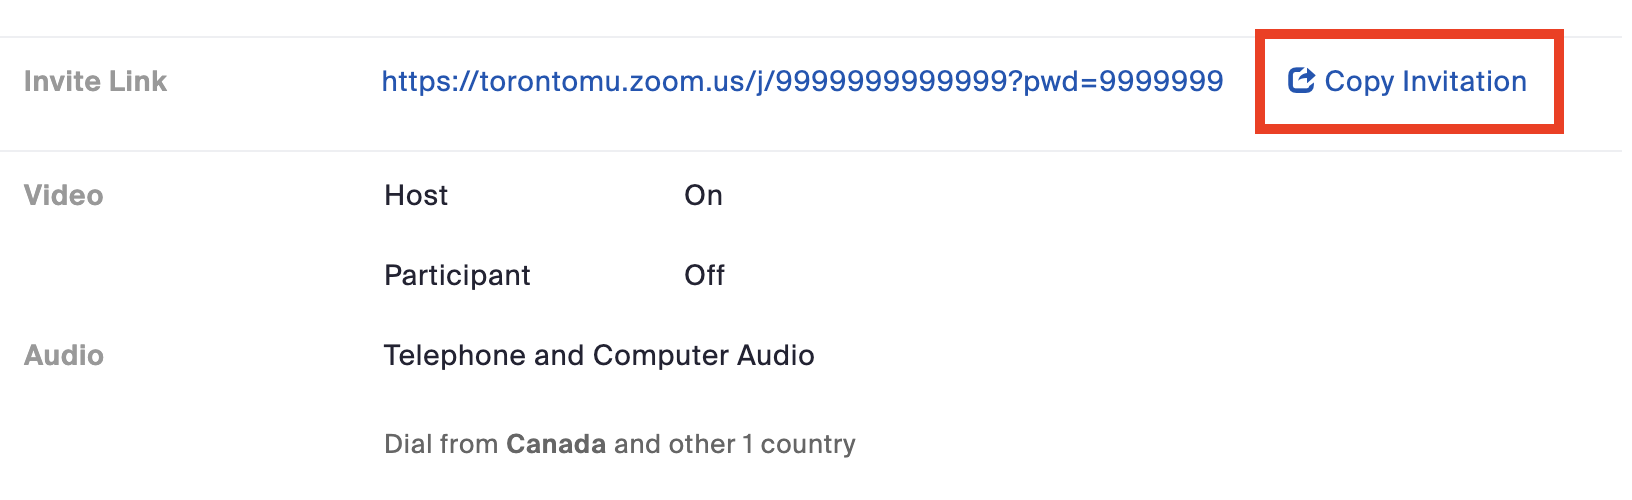
Click "Copy invitation" and share all details with your participants.
Share the meeting invitation using one of the following methods:
- Add to an announcement or content item in your D2L Brightspace course shell.
- Email it to your participants/students.
- Create a Google Calendar invitation and add the invitation to the body of the meeting.
For instructions on how to join and online meeting room etiquette, please share the Continuity of Learning guide with your students.
![]()
During the meeting
- You must notify participants if the online meeting will be recorded. Before recording, please instruct participants to turn off their microphone and webcam if they do not wish to be seen or heard.
- To share your computer screen or document, click “Share”.
- If participants need to ask questions, tell them to type it in the Chat or use the "raise hand" feature.
- Participants can enable their microphone and camera - but remind them not to, unless you ask them.
- For closed captioning, you need to first enable closed captioning (external link) and assign someone to type. Please note, there is no live captioning feature. However, you can view an audio transcription for meetings recorded to the Zoom Cloud.
Other considerations
- Participants can share the meeting link with anyone, and anyone with the link will be able to join the meeting.
- If the "Require authentication to join" option is disabled; students can type in whatever name they desire. If the participation in the online meeting is “graded” or attendance is required, you should enable this recommended option.
![]()
Issues that may affect participants from joining meetings
Over the holiday break, Zoom was updated to reflect the new university name. Some meetings that were created before January 11, 2023 may contain issues that prevent participants from joining:
- Issue #1: Meetings that "require authentication to join."
- Issue #2: Meetings that have alternative hosts with an @torontomu.ca email address.
Please review your meeting settings.
Issue #1: Updating authentication options in Zoom for scheduled and recurring meetings
Zoom meetings scheduled before January 11, 2023 that "Require authentication to join" using the "TMU Community" profile will not allow meeting participants to join. Meeting hosts must edit the meeting and change the authentication profile to "TMU Community" before the meeting starts.
Step 1: Edit your upcoming meeting
Navigate to Upcoming Meetings (external link) within the Zoom web portal. Find all scheduled meetings requiring authentication before January 11, and click on the Edit button. For recurring meetings, select "edit all occurrences."

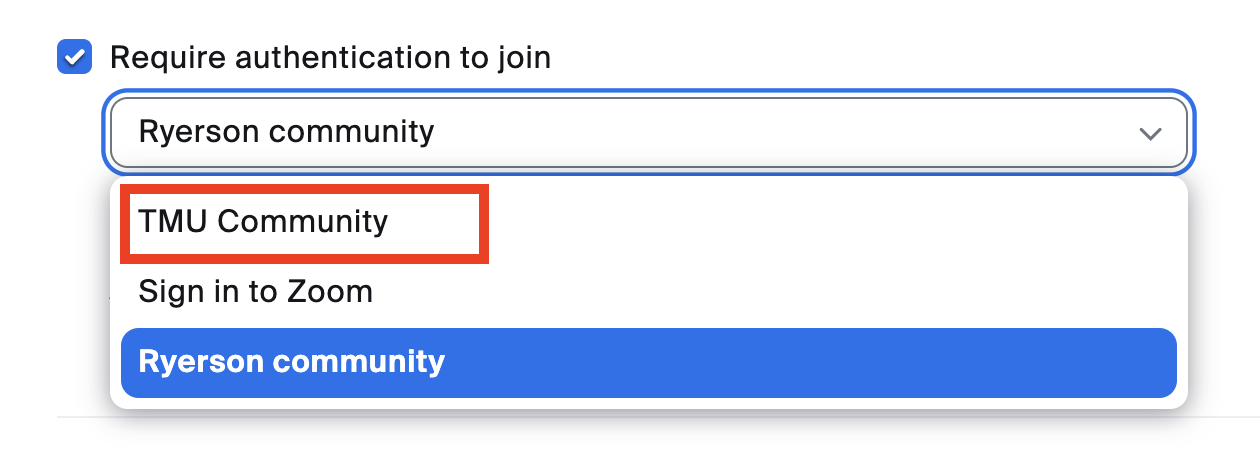
Step 2: Change authentication profile to “TMU Community”
Navigate to the “Require authentication to join” checkbox. Select “TMU Community” from the dropdown. If “TMU Community” is already selected, please disregard this step.
Step 3: Save changes
Press the Save button.
Step 1: Edit your upcoming meeting
Navigate to Upcoming Meetings (external link) within the Zoom web portal. Find all scheduled meetings requiring authentication before January 11, and click on the Edit button. For recurring meetings, select "edit all occurrences."
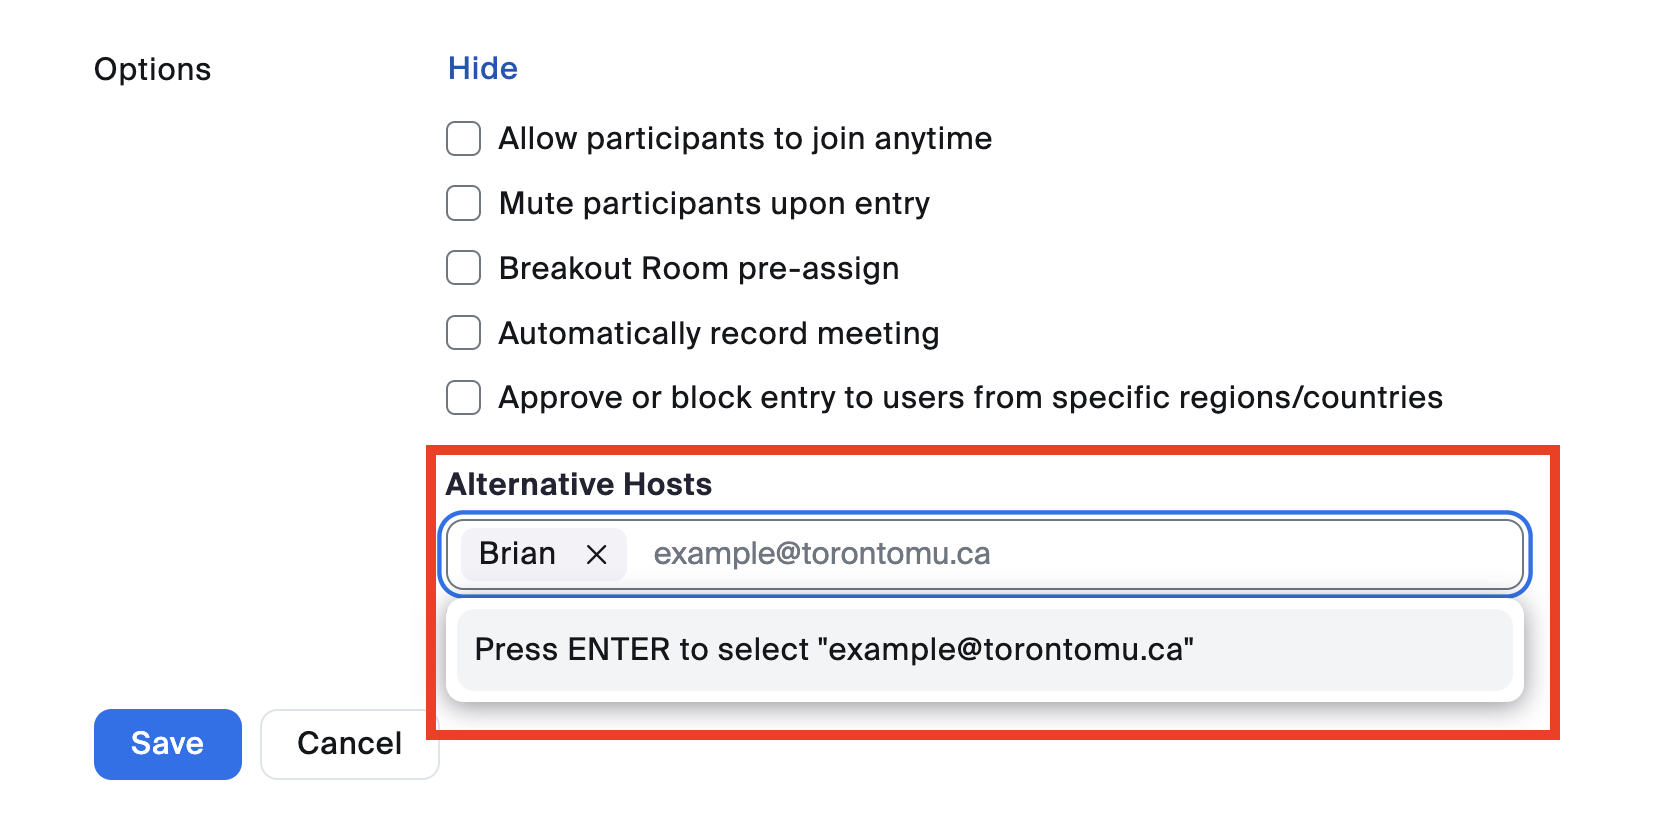
Step 2: Navigate to Options
Navigate to Options, and click on the Show button.
Step 3: Add your alternative host’s @torontomu.ca email address
Add your alternative host’s @torontomu.ca email address and press ENTER.
Step 4: Save changes
Press the Save button.