Zoom for Google Workspace add-on
With the Zoom for Google Workspace add-on, (external link) you can use Zoom to easily schedule, join, manage, and customize meetings from GMail and Google Calendar.
Important: If you currently use the Zoom Scheduler Google Chrome extension, (external link) we recommend uninstalling the extension and use the Zoom for Google Workspace add-on instead. The add-on provides the same user experience across all web browsers and the Google Calendar mobile application. For more information on how to uninstall a Chrome extension, visit Google’s Help Center. (external link)
How to install
-
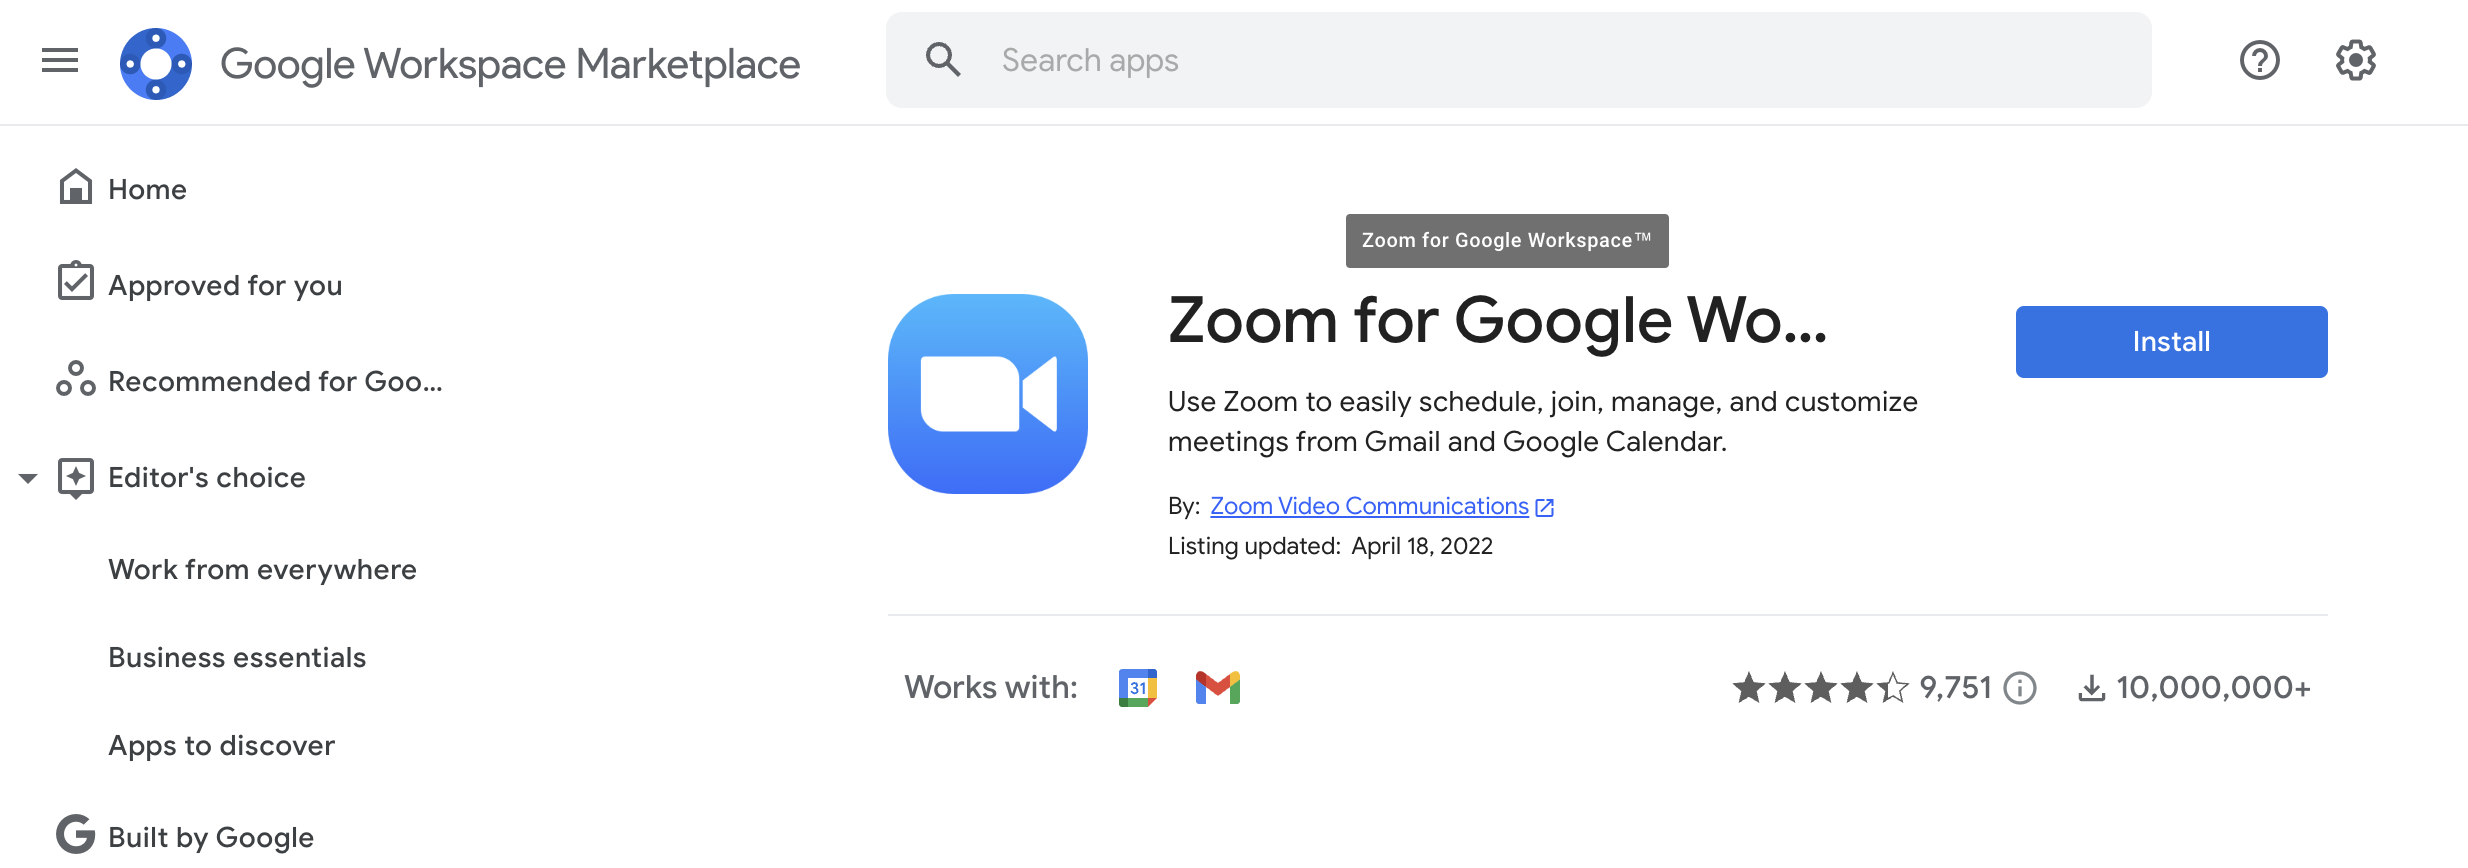
Go to the Zoom for Google Workspace (external link) add-on in the Google Workspace Marketplace, and select Install.
-
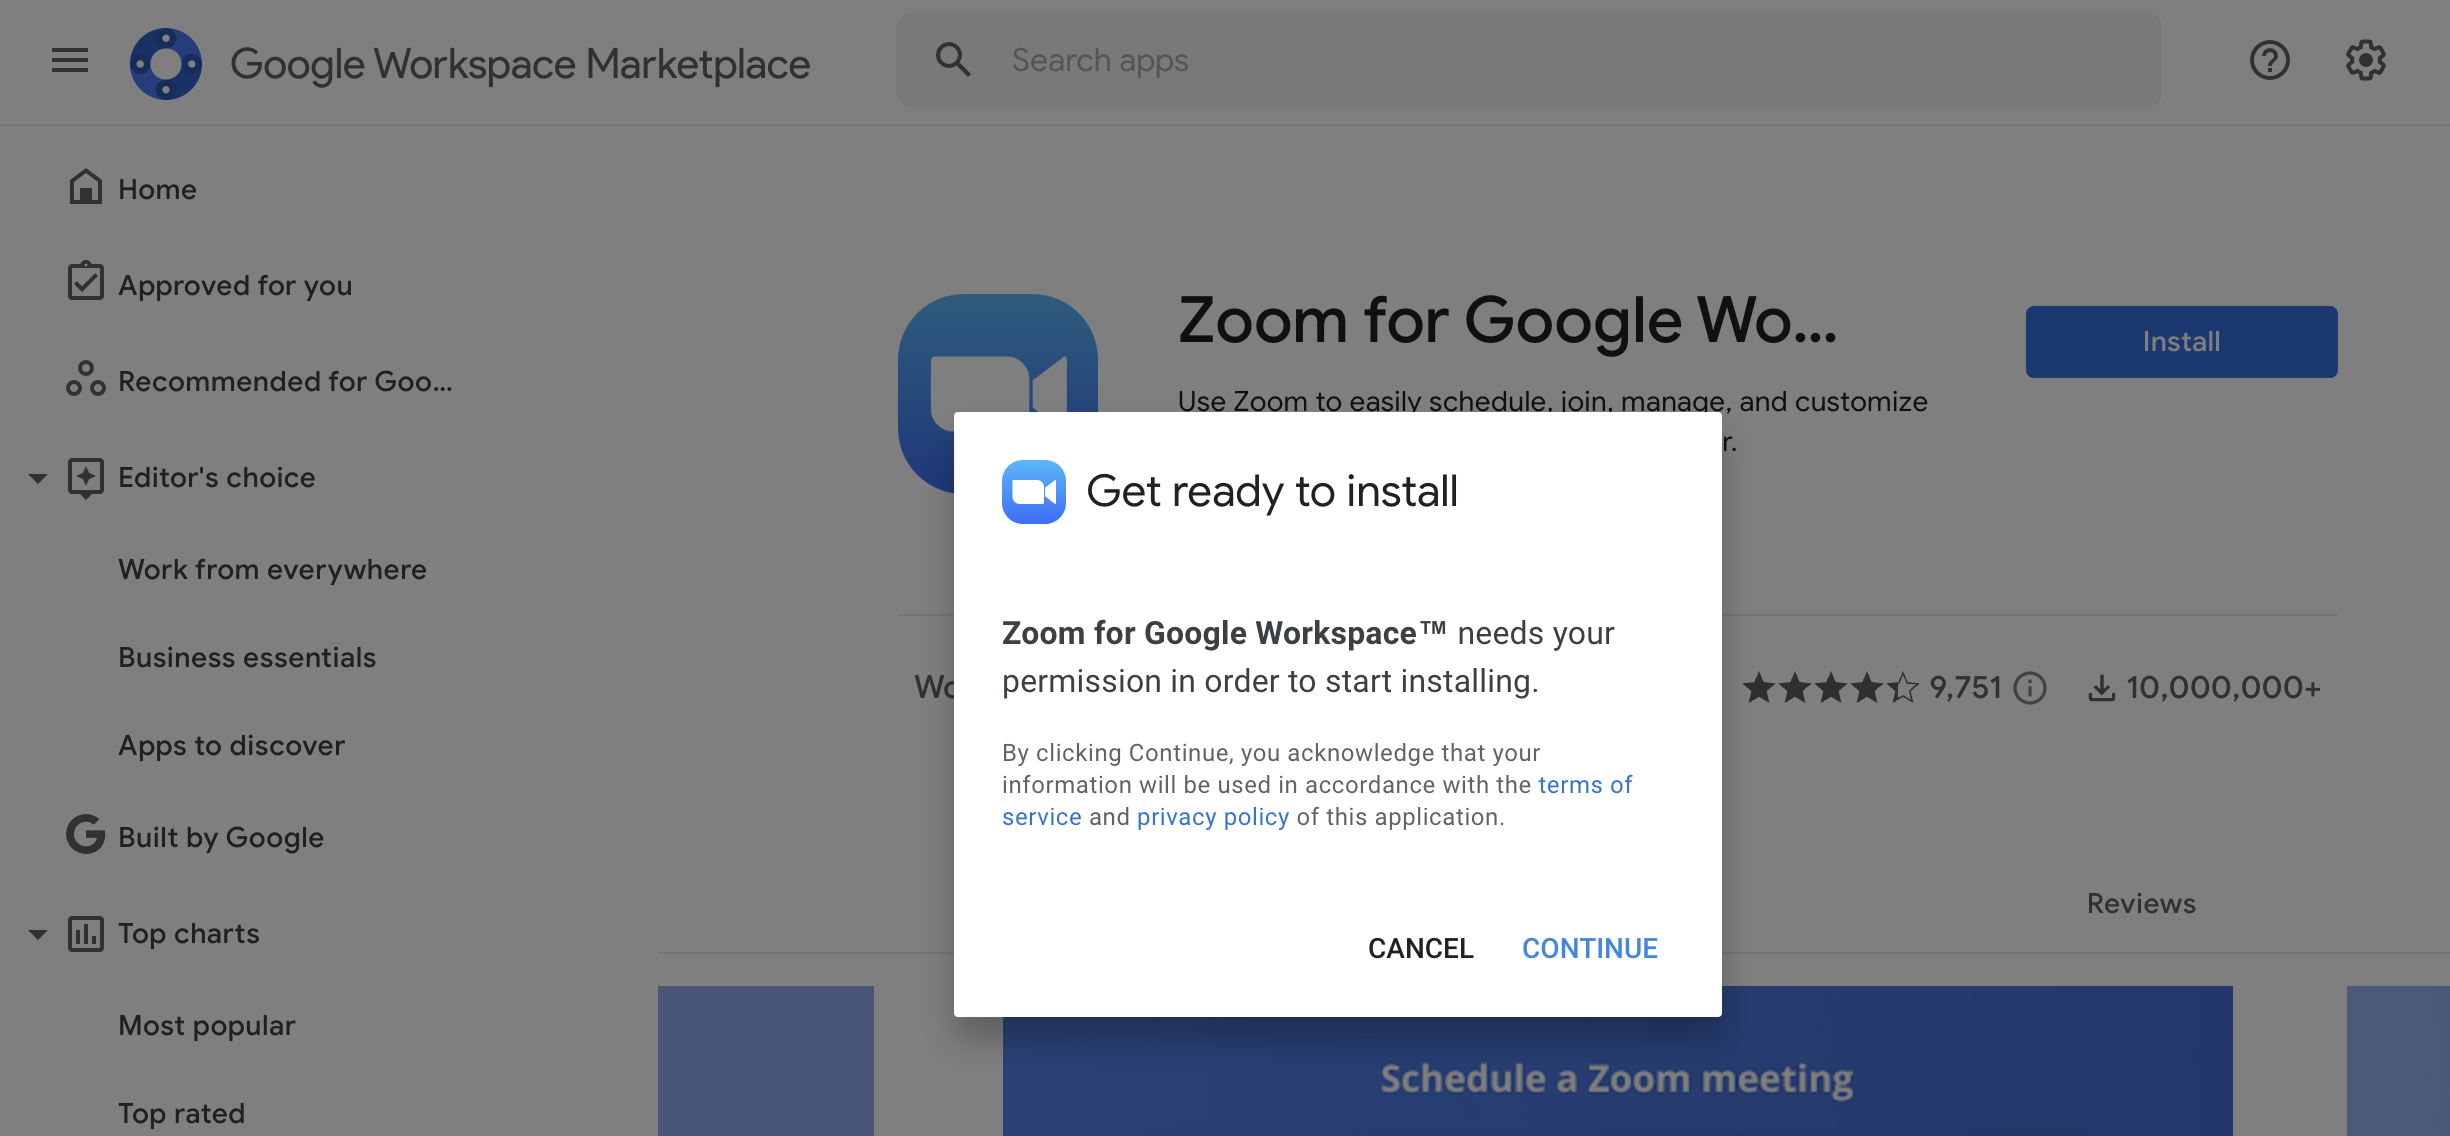
Zoom will ask for permission to access your TMU Google account. This integration requires access to several permissions.
A pop-up will appear asking for permission. Select Continue.
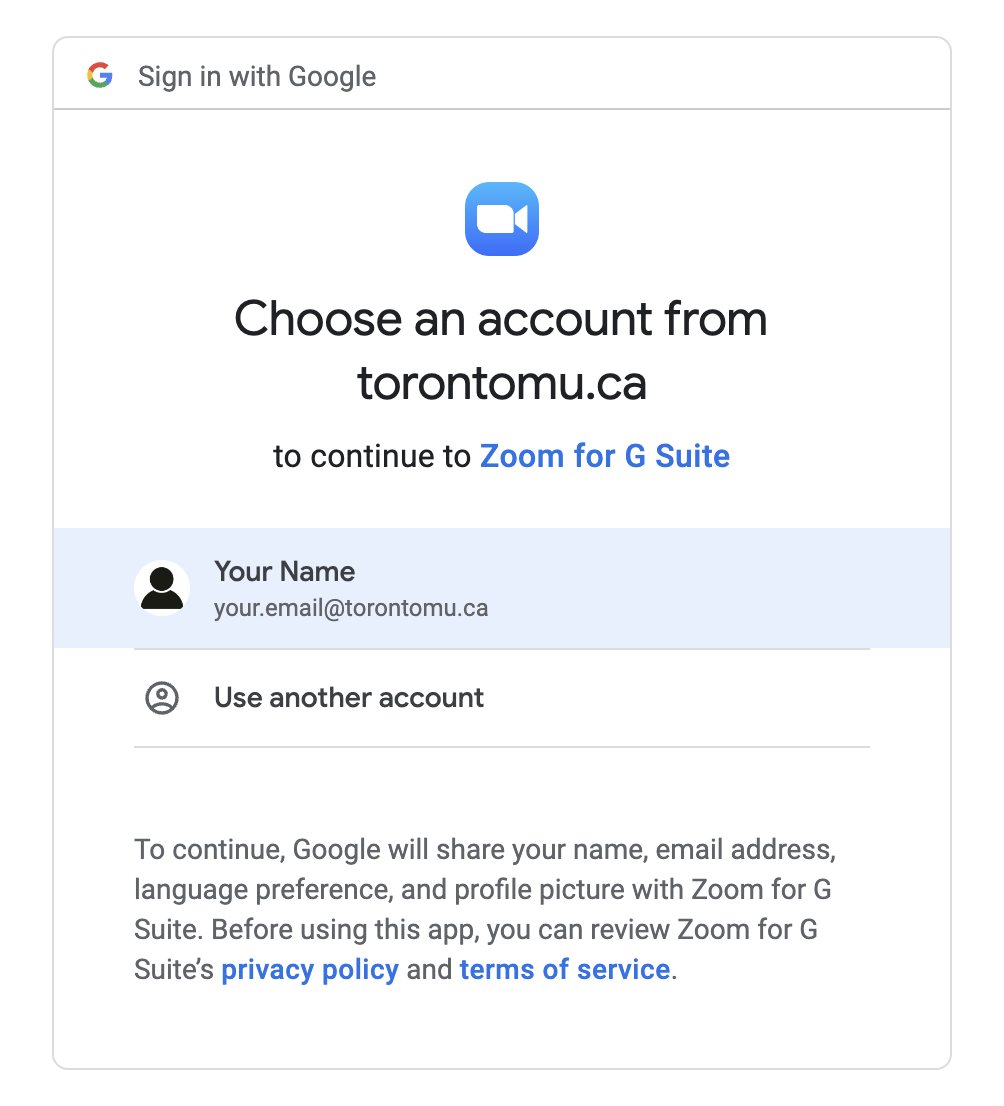
Select your TMU email when prompted by the Sign in with Google dialog.
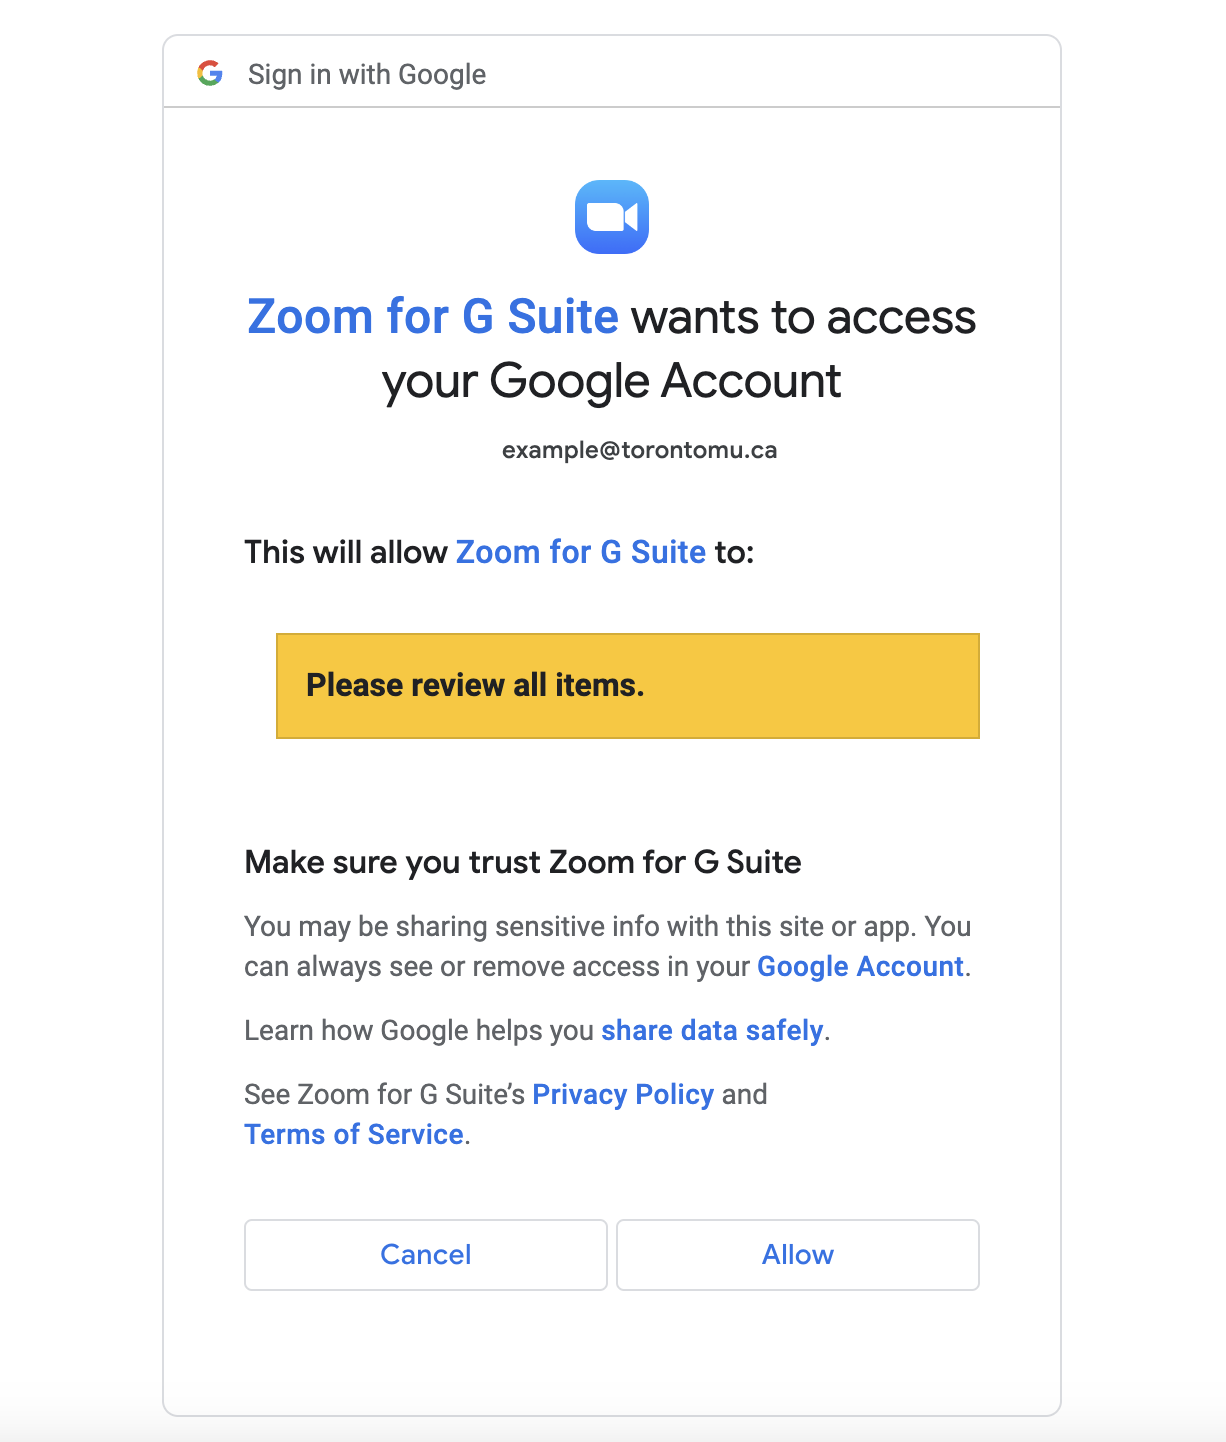
Review all permissions, and then select Allow.
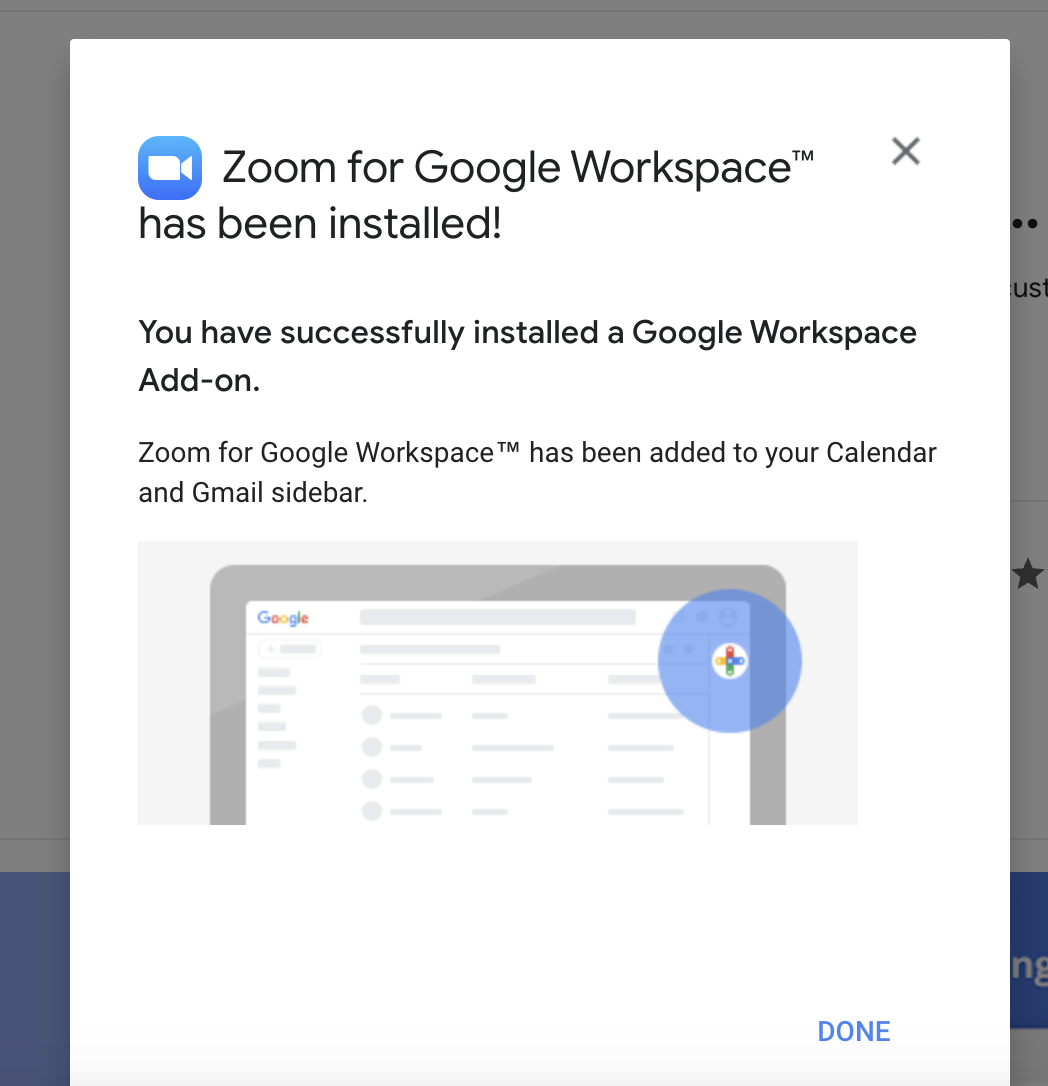
You will then receive a pop-up stating that Zoom for Google Workspace was installed. Select Done.
-
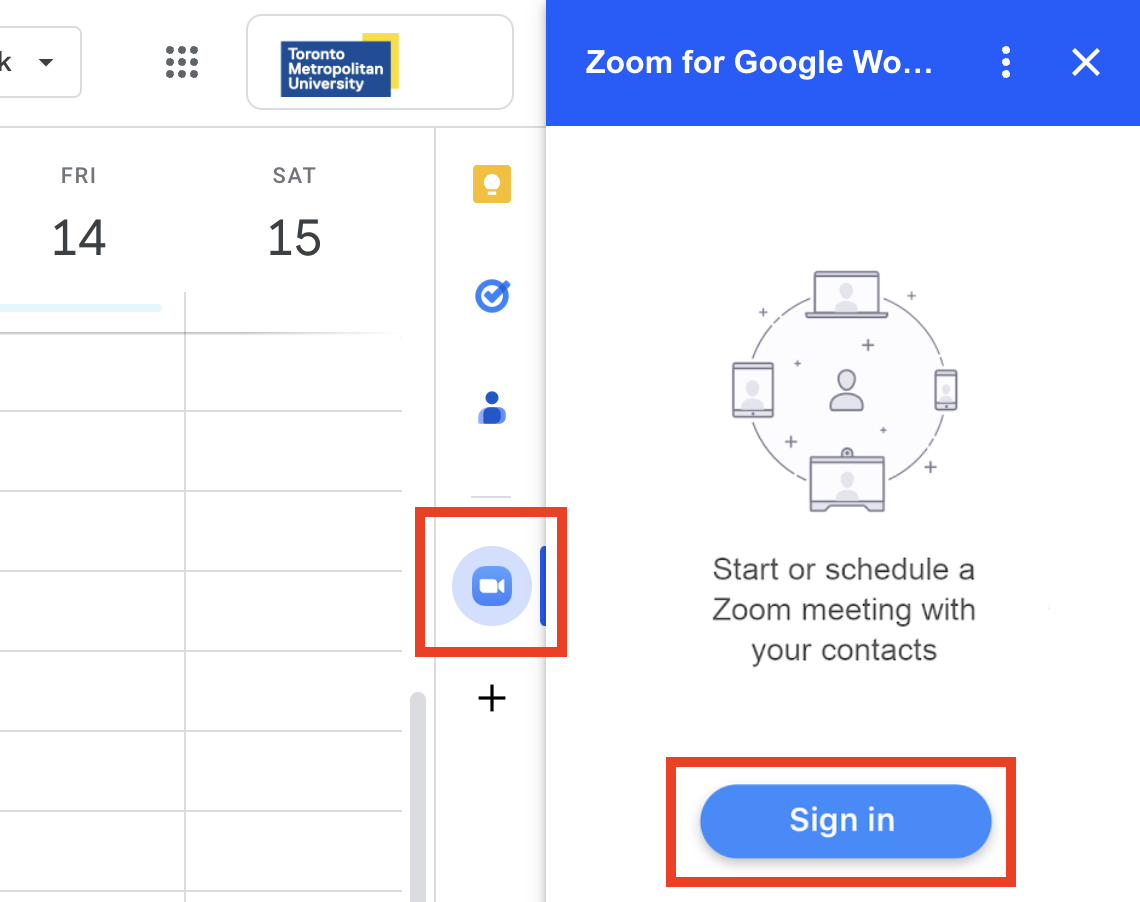
Navigate to your Google Calendar and open the Zoom for Google Workspace add-on from the right-side panel after installation.
-
You will be asked to sign in to your TMU Zoom account once you have opened the add-on. Select Sign in. This will open a pop-up.
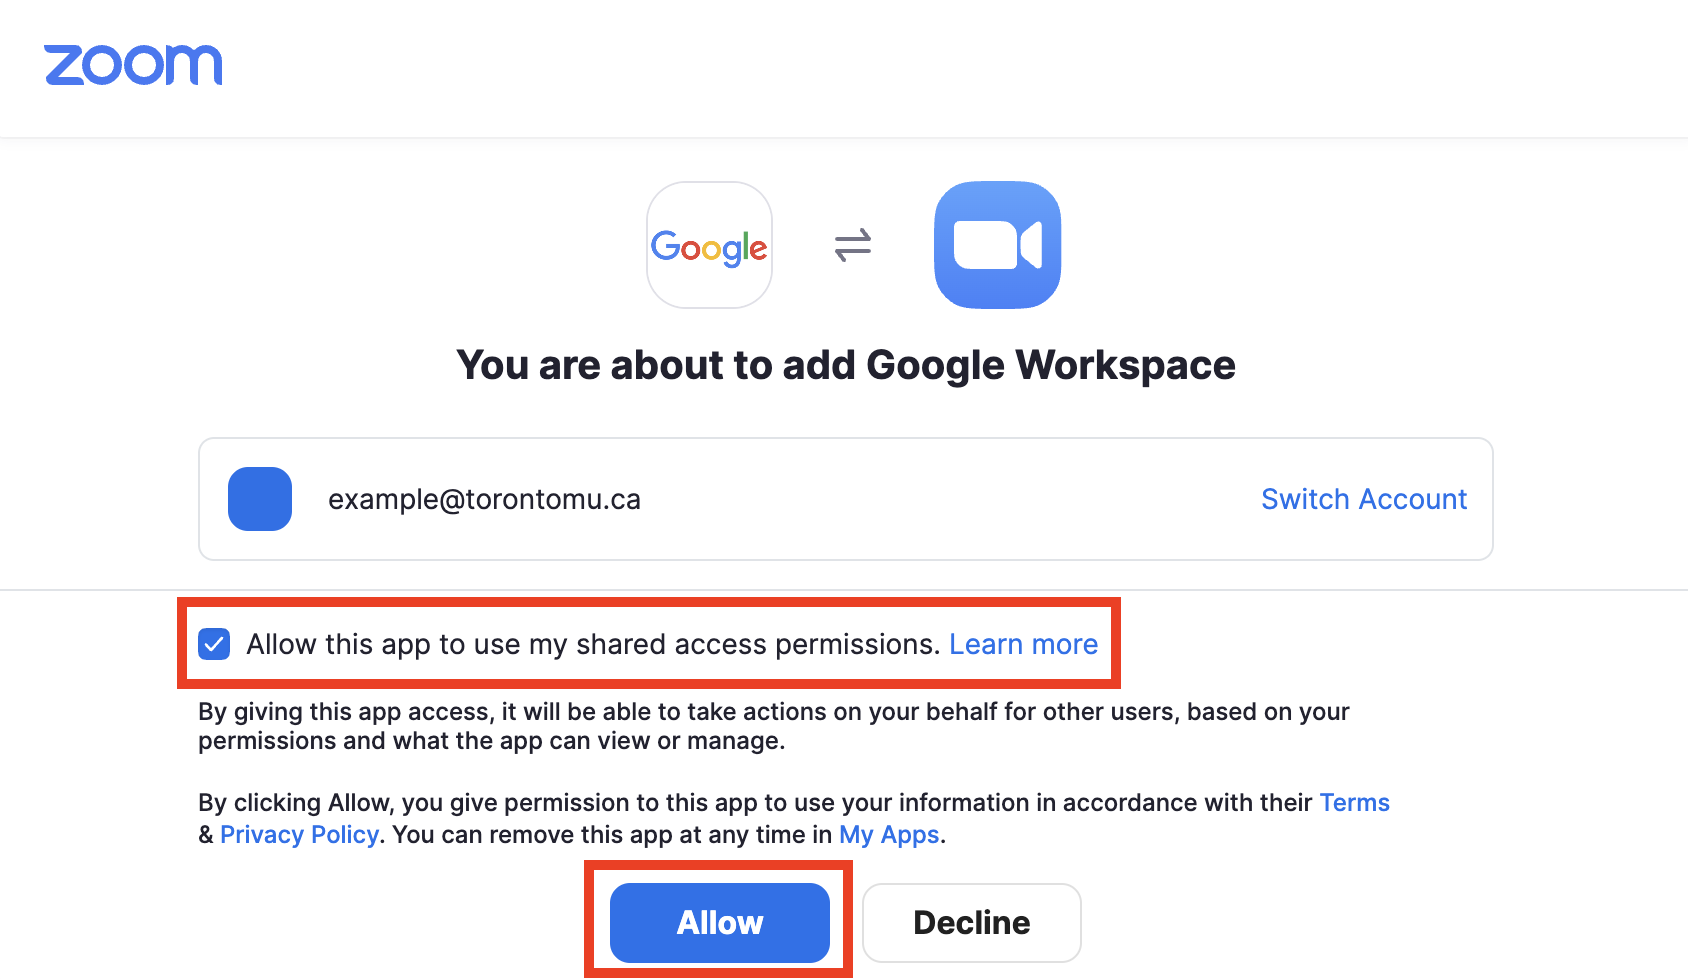
Within the pop-up, select the checkbox "Allow this app to use my shared access permissions." Then select Allow.
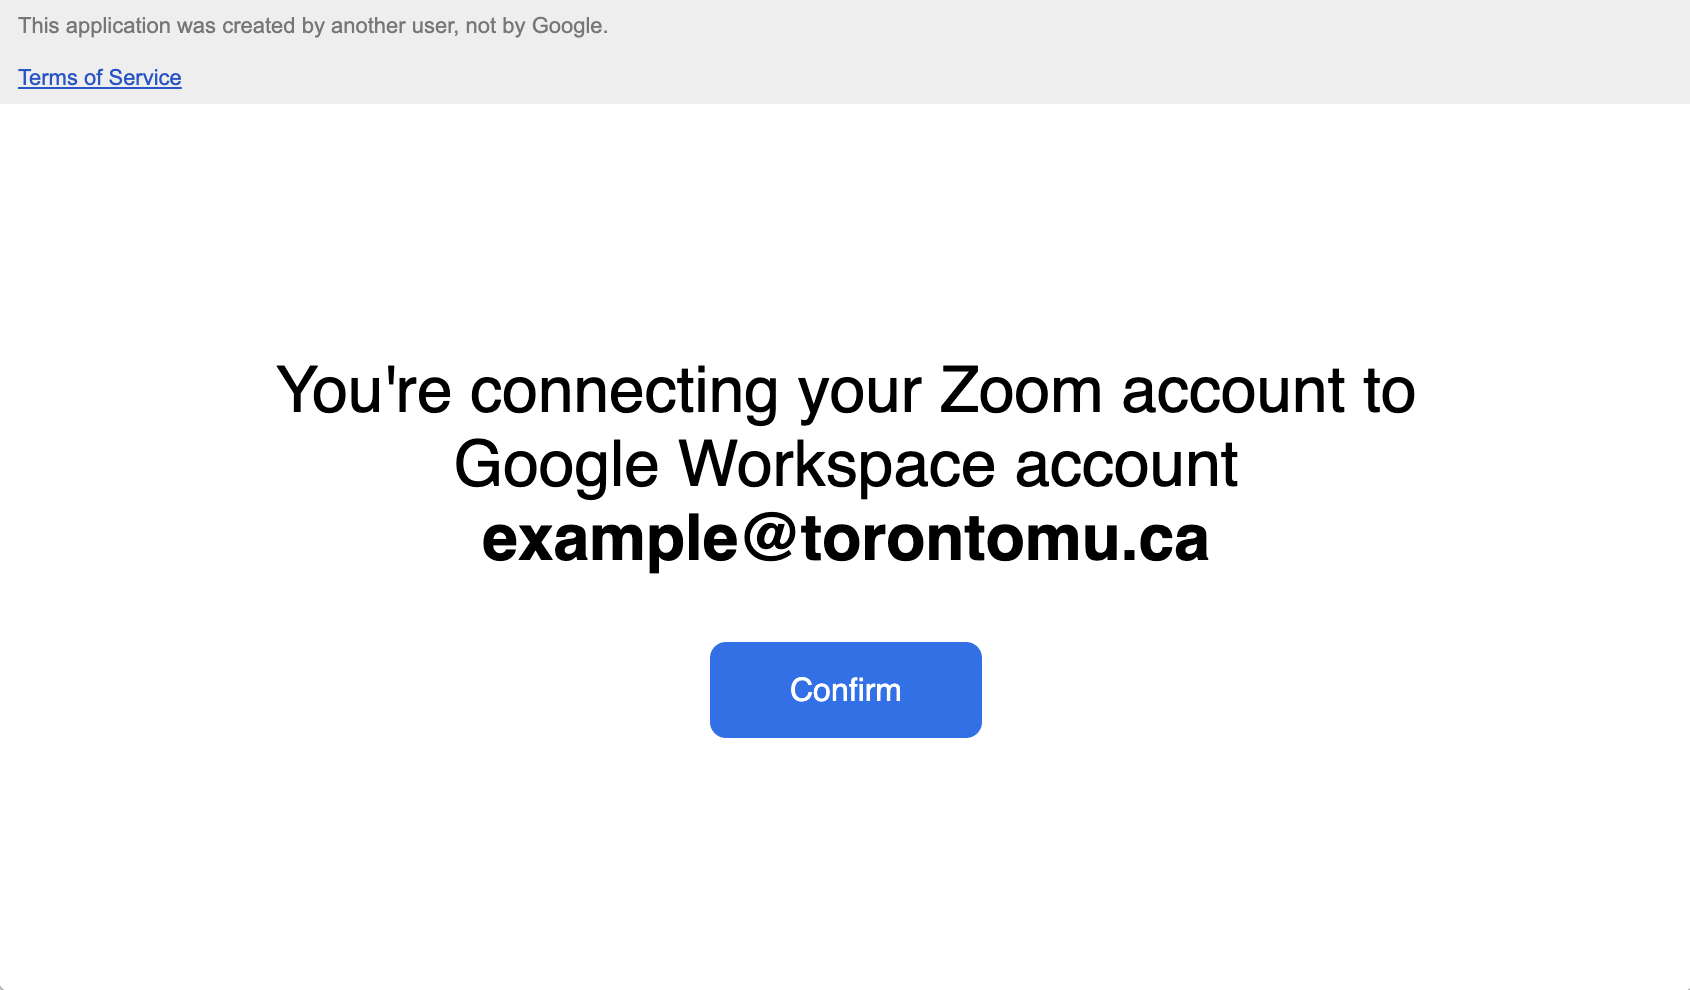
Another pop-up will appear confirming that you are connecting your Zoom account to Google Workspace. Select Confirm.
-
You should now be able to use the add-on. The add-on will appear on your Google Calendar and GMail right-side panel.
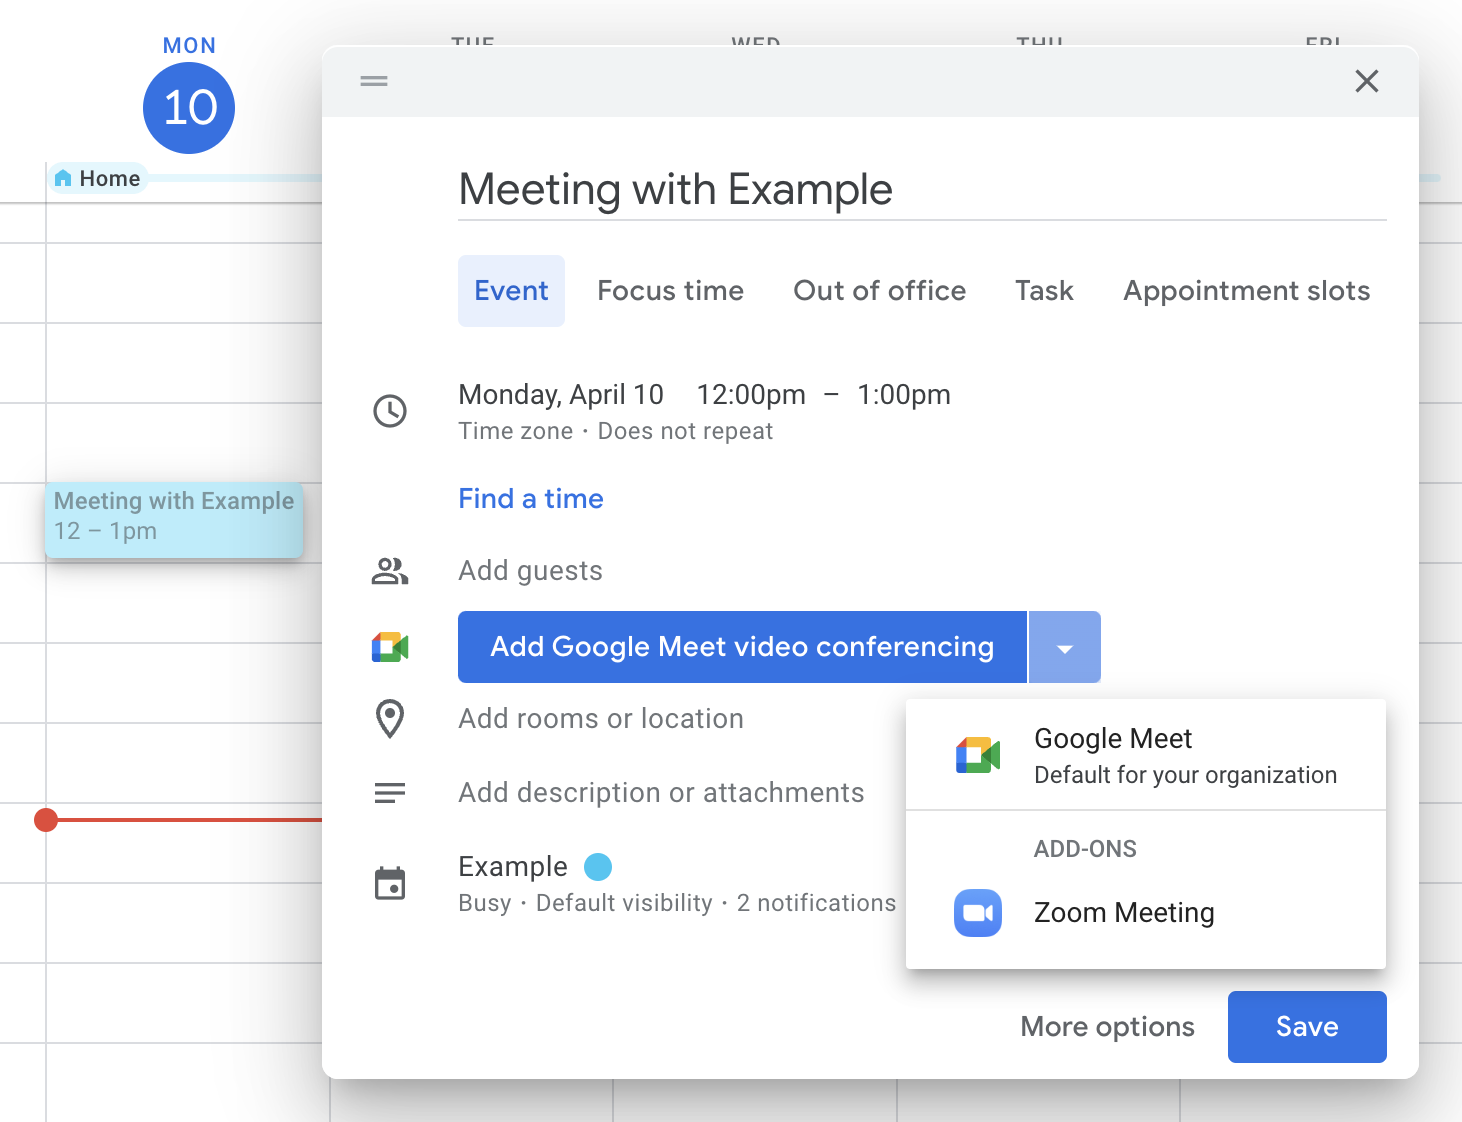
When creating a calendar invitation, you will now have the option to pick between creating a Google Meet or Zoom meeting.
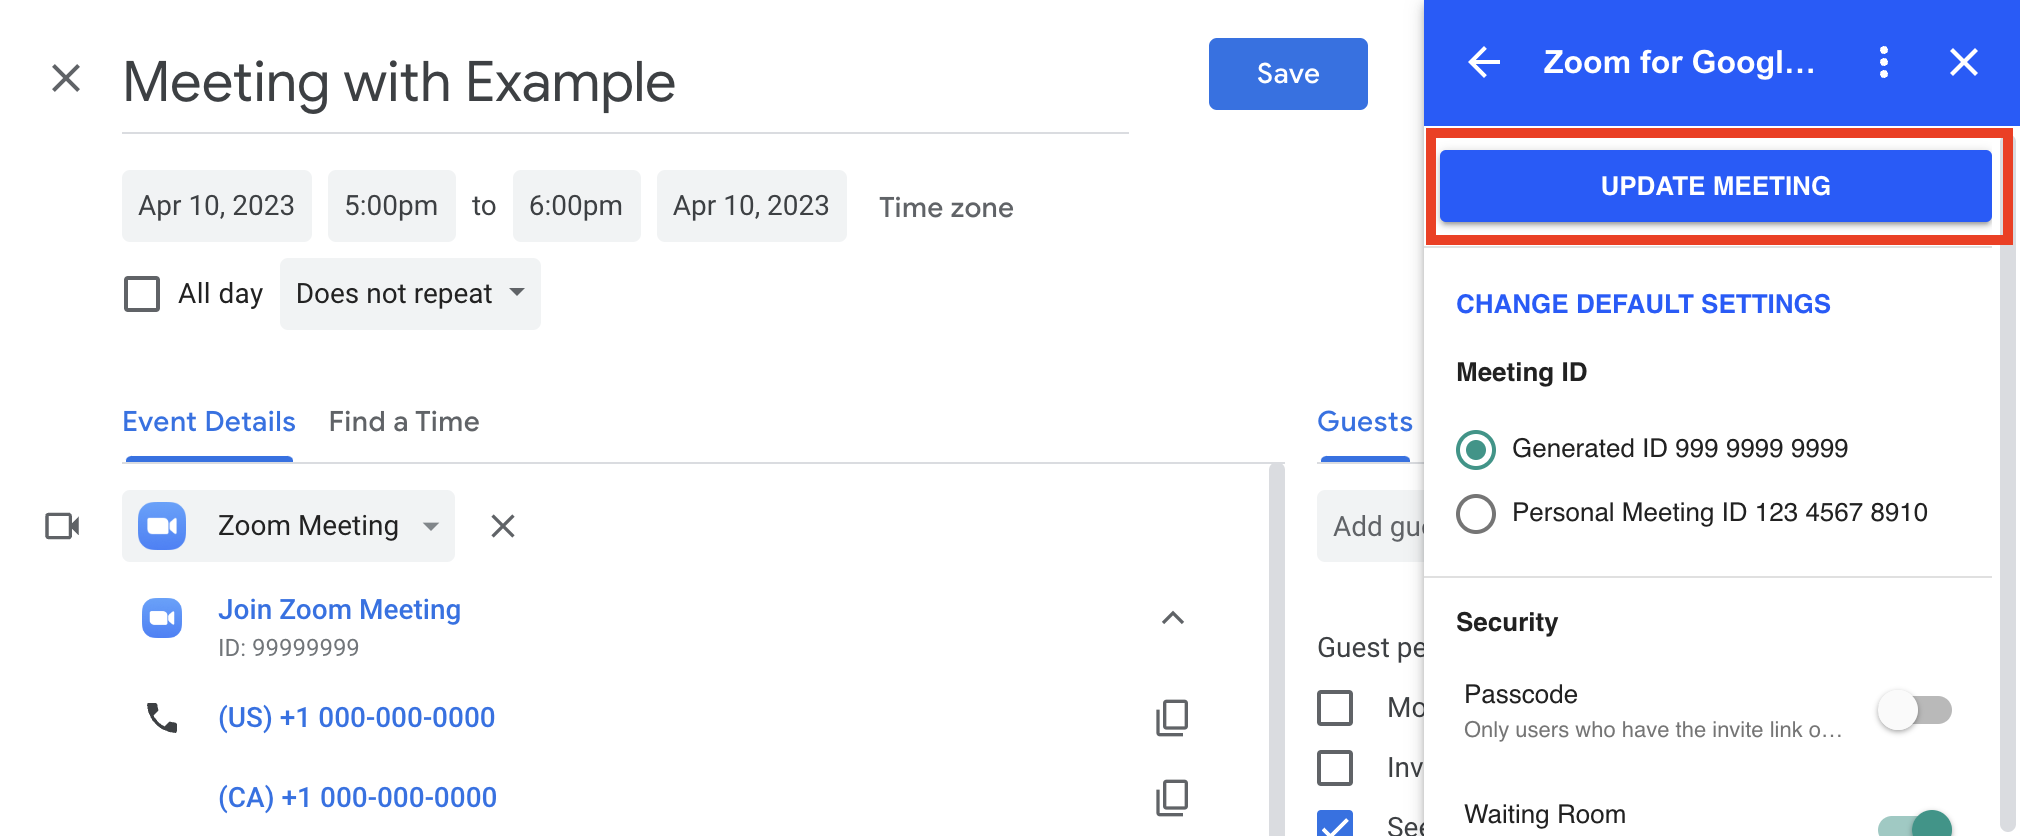
To change the meeting settings or to add an alternative host, open up the Zoom app from the right sidebar. Make your changes, and select Update Meeting.
Select the Save button when you are done.
Support
For support, please contact: help@torontomu.ca
"Failed to create conference" error
If you encounter the error "Failed to create conference" when trying to add Zoom conferencing to your Google Calendar invitation, it could be because there are unlicensed alternative hosts listed in your Zoom web portal.
- Sign in to the Zoom web portal (external link) .
- In the navigation panel, click Meetings.
- Go to Personal Meeting Room.
- Select Edit under Details.
- Select Show under Options.
- Clear the names under Alternative Hosts.
- Select Save.