How to create polls in Zoom
The polling feature in Zoom allows you to create single choice or multiple choice polling questions during your meeting.
This feature allows instructors to ask their students questions before or during their online presentation.
This guide will teach you:
- how to get started.
- how to create Zoom polls.
- how to launch and end Zoom polls.
Limitations:
- The meeting or webinar must be scheduled in advance.
- Only the original meeting host can edit or add polls during a meeting. If host control is transferred to another participant, the new host will not have polling ability.
- Attendees must use the desktop application or the Zoom mobile app to participate in polls.

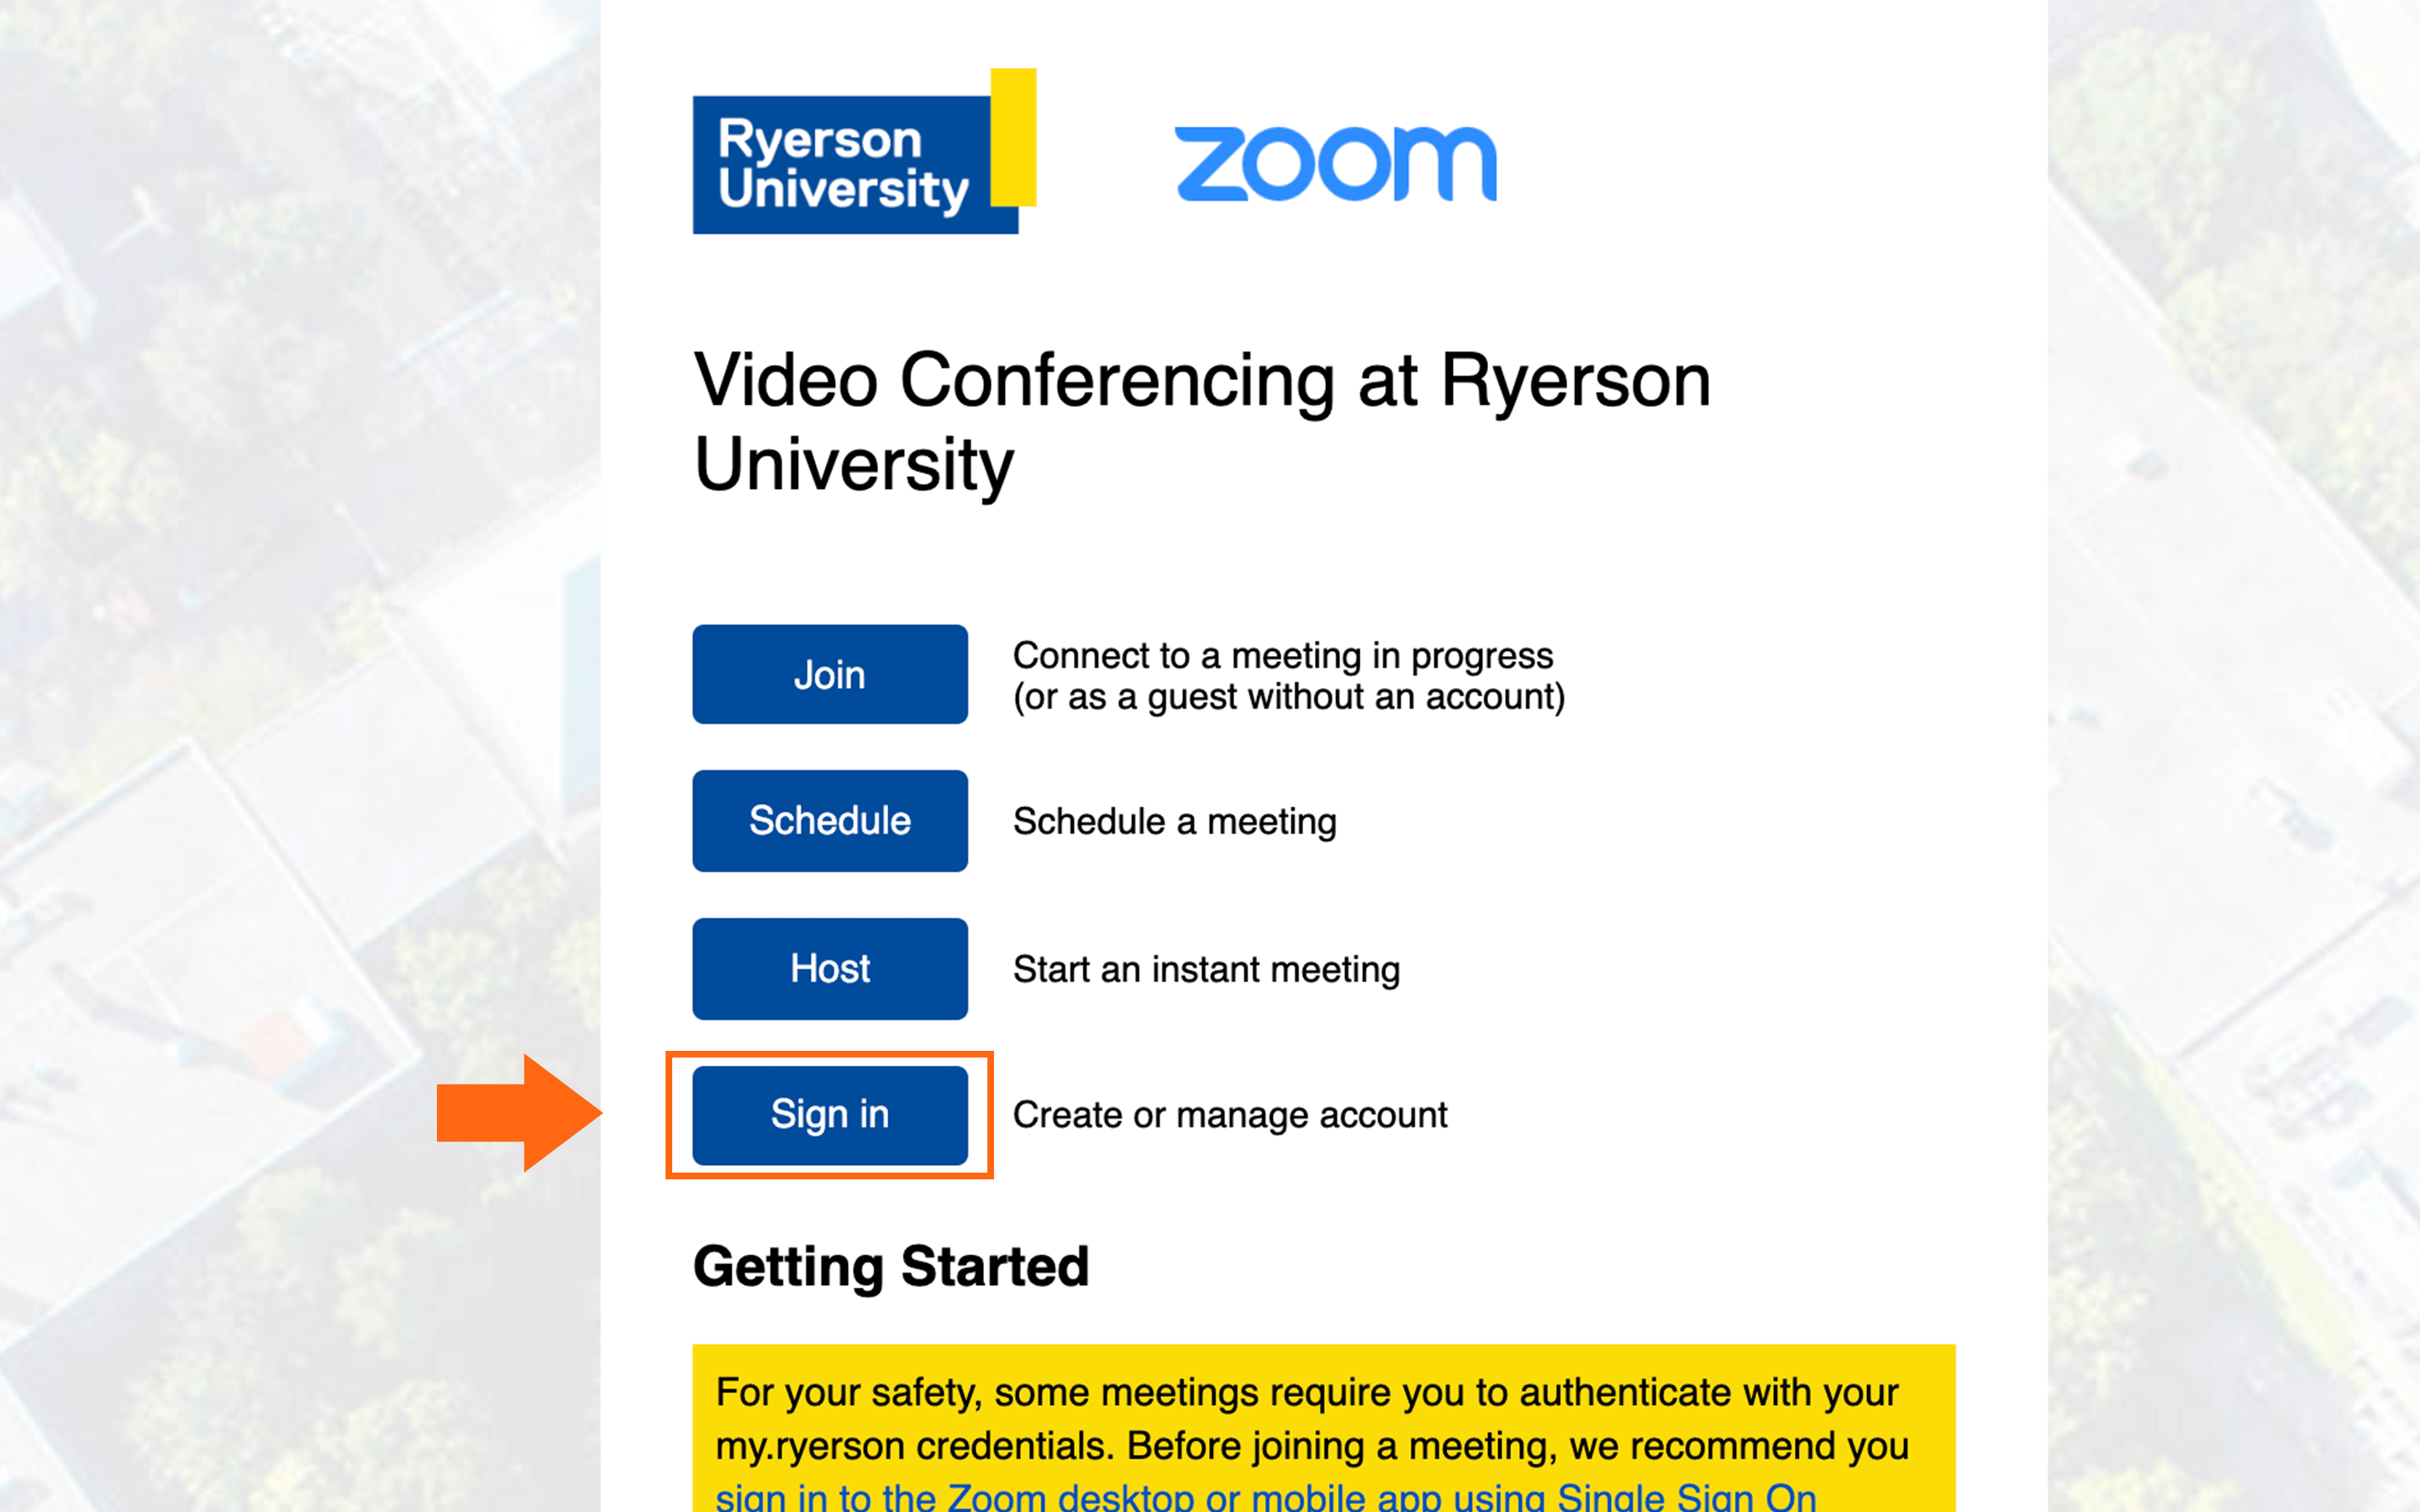
Signing into Zoom
Visit torontomu.zoom.us (external link, opens in new window) and click on 'Sign in.'
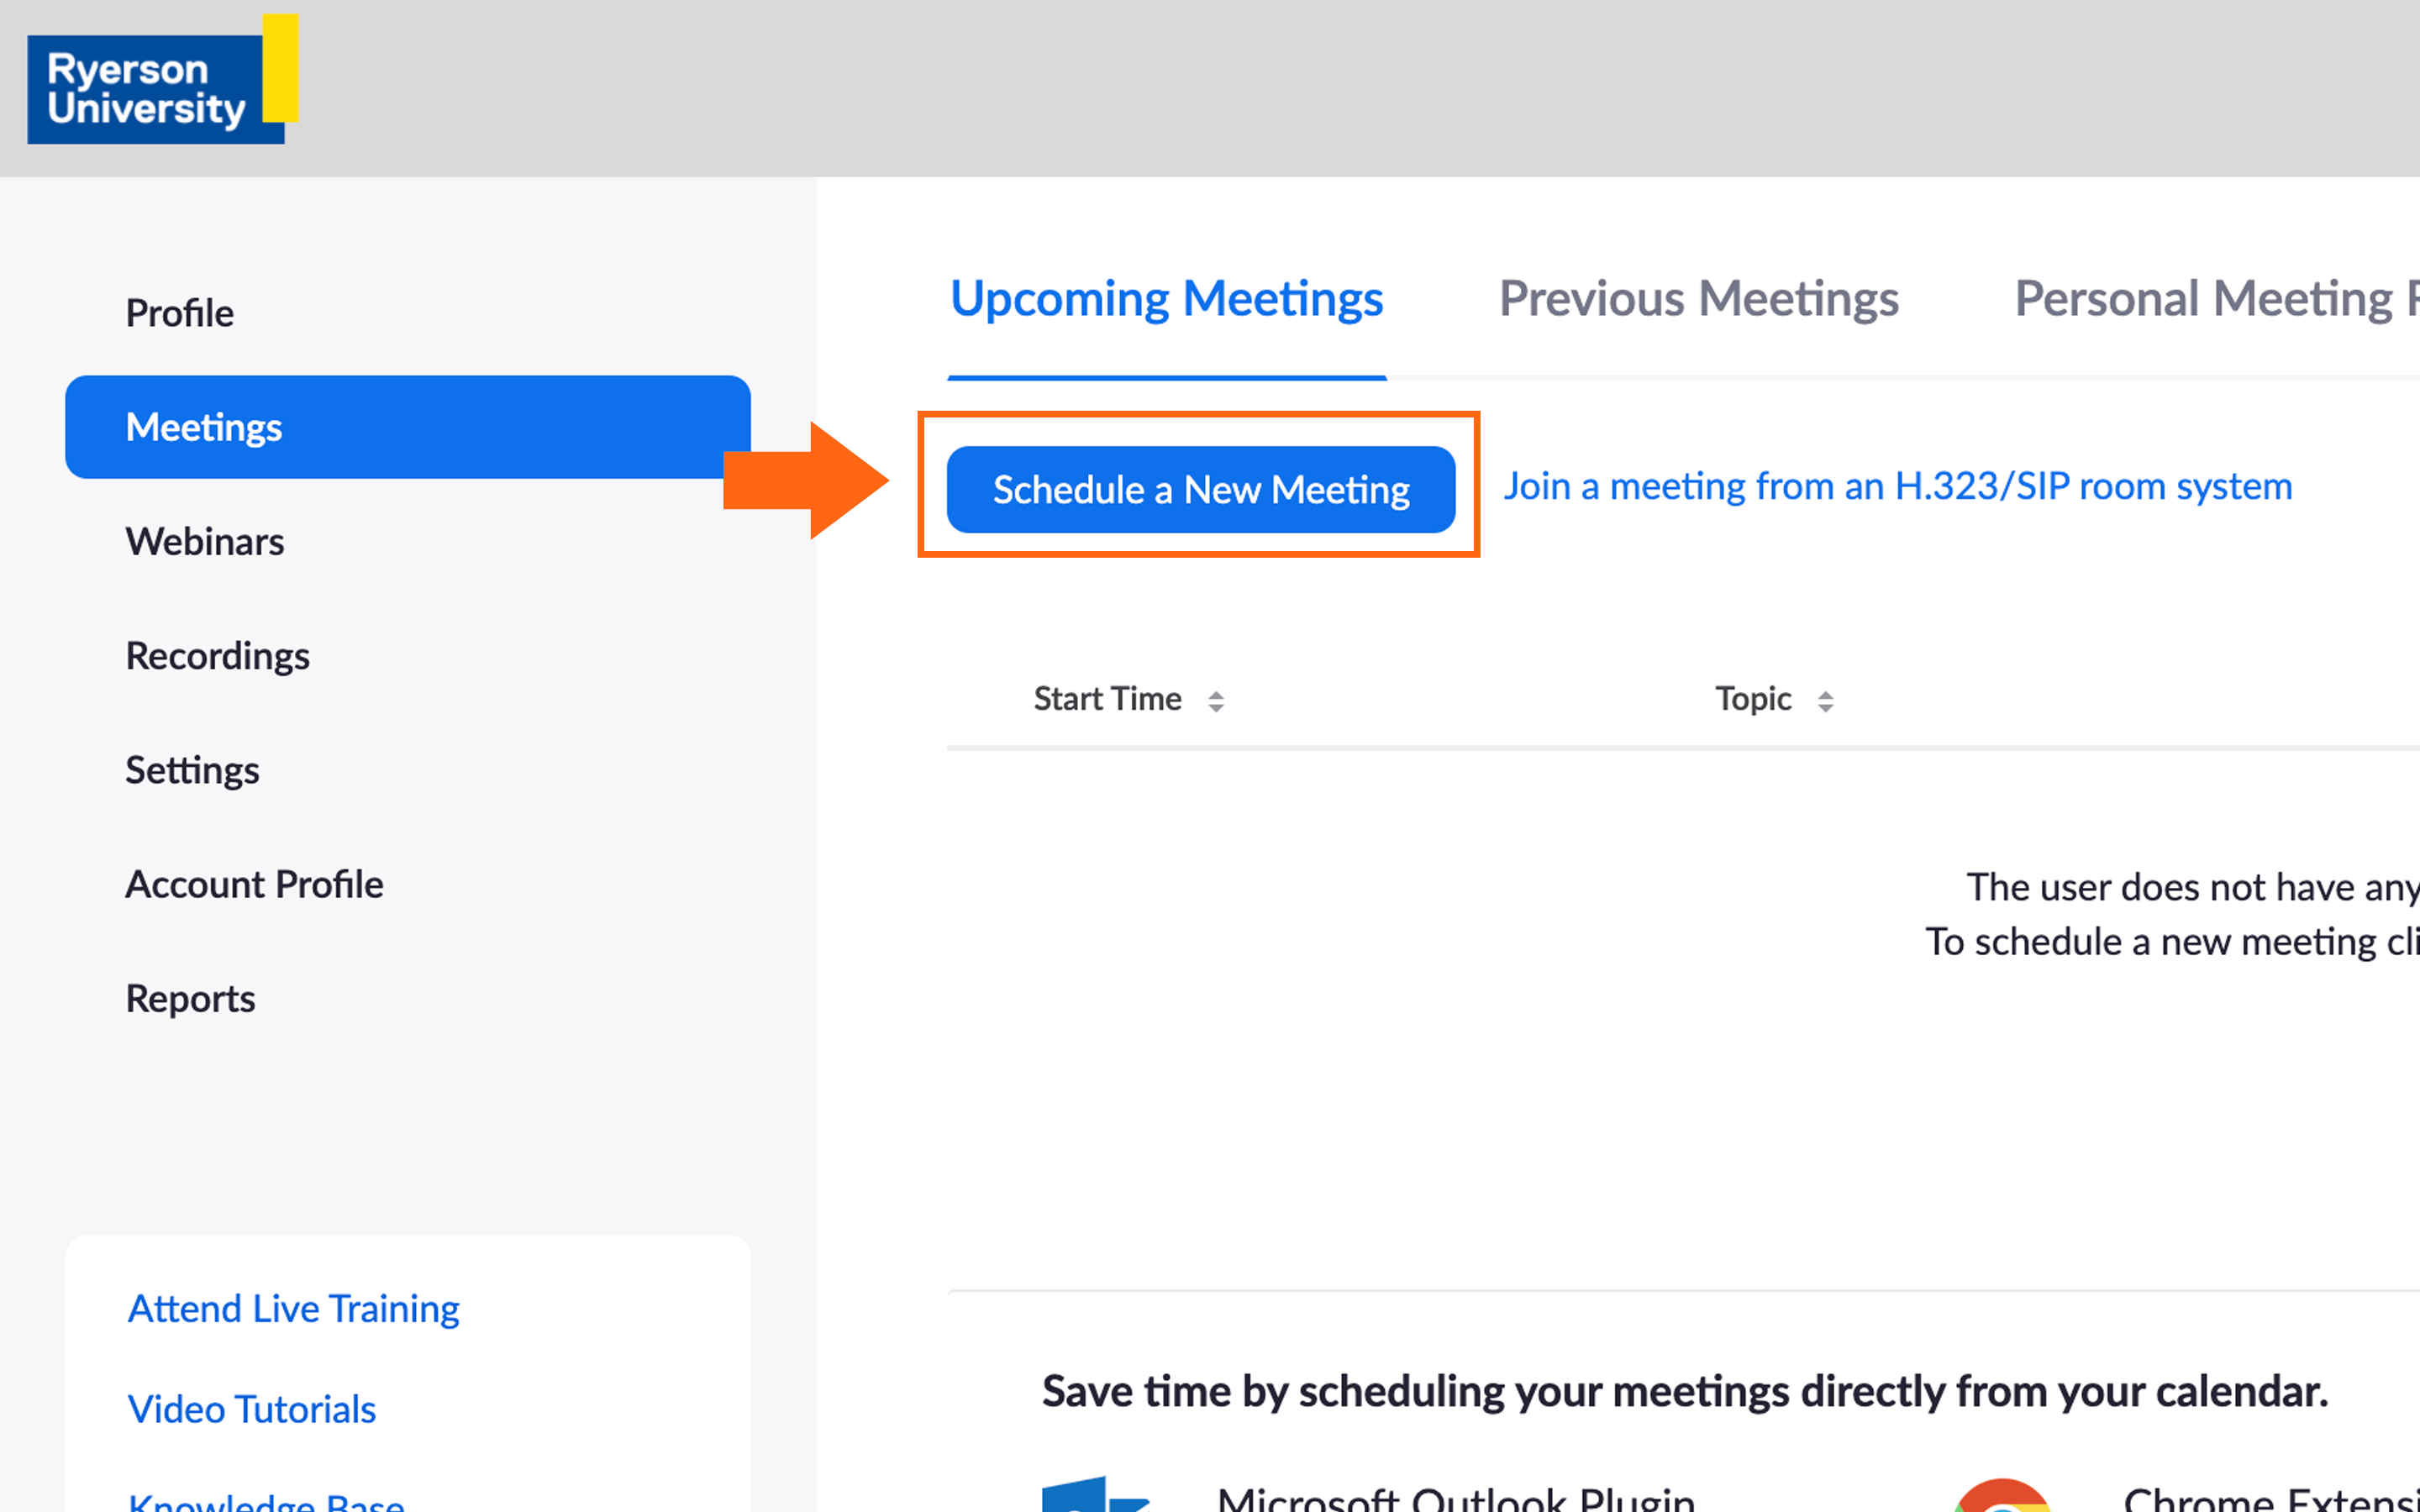
Scheduling a New Meeting
Click 'Schedule a New Meeting.' Fill in the prompts and click 'Save' once you are done.
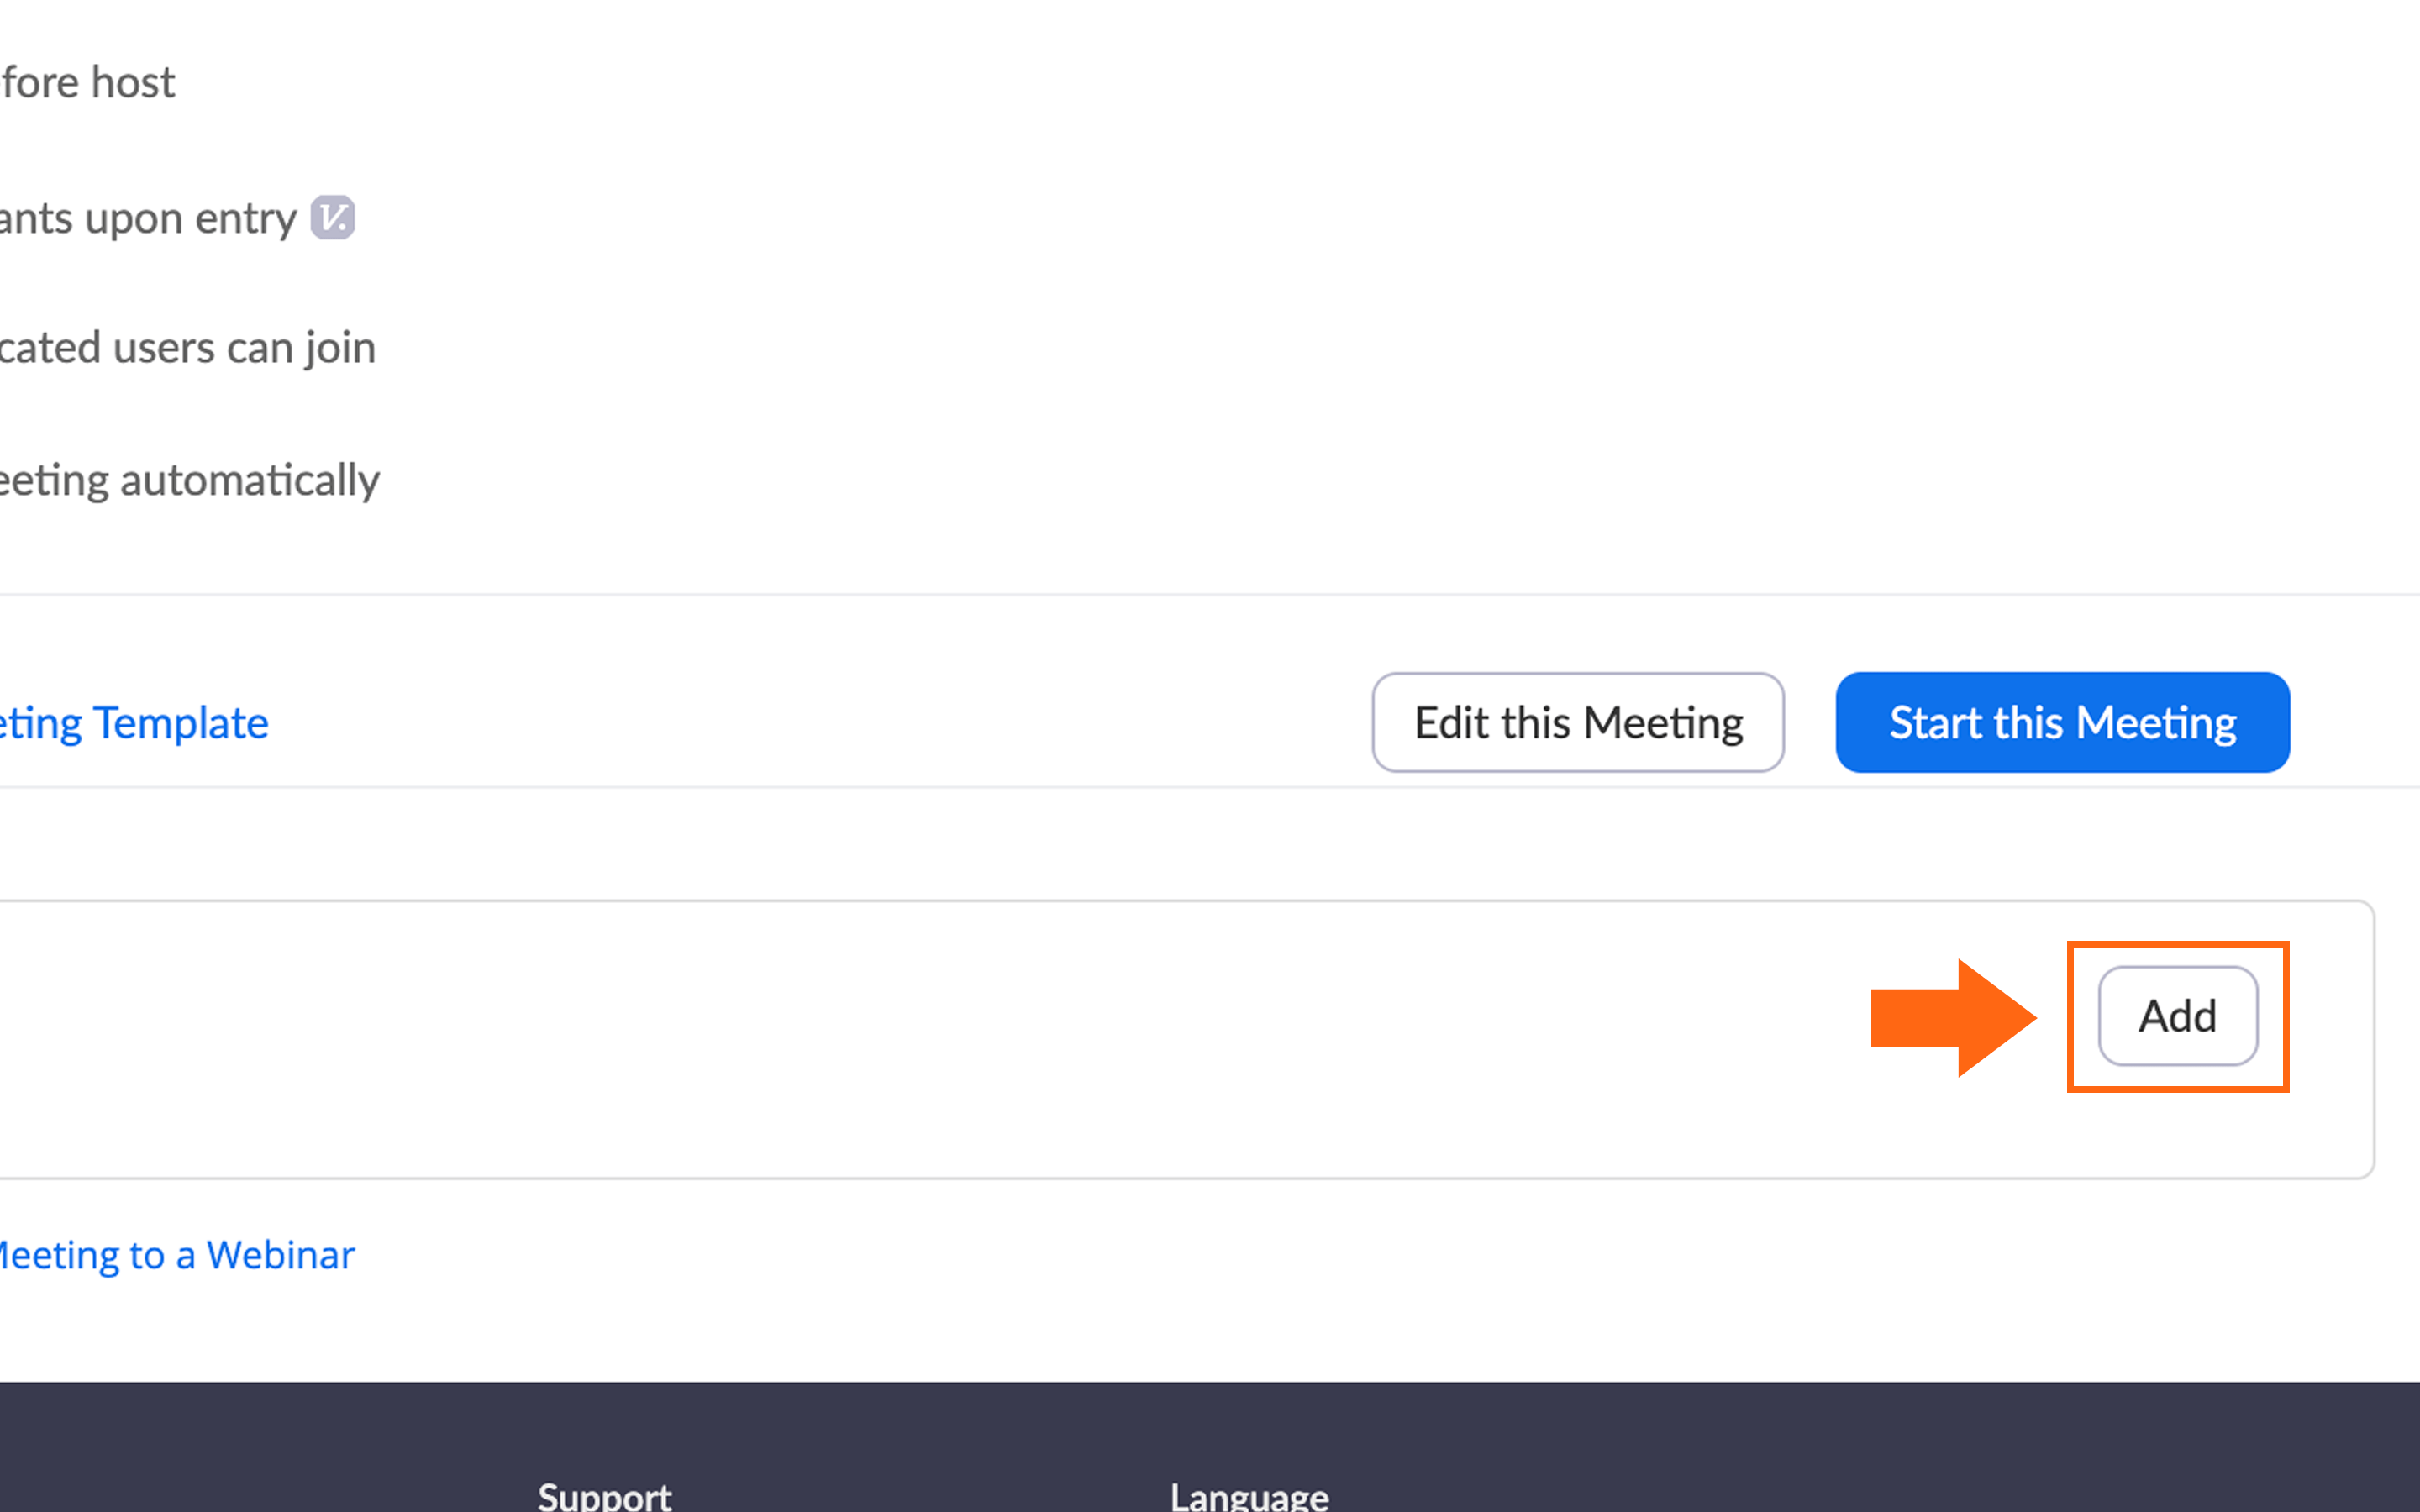
Adding Polls
Once saved, the page will reload. Scroll to the bottom of the page to find the polling function. Click 'Add' to begin adding polling questions.
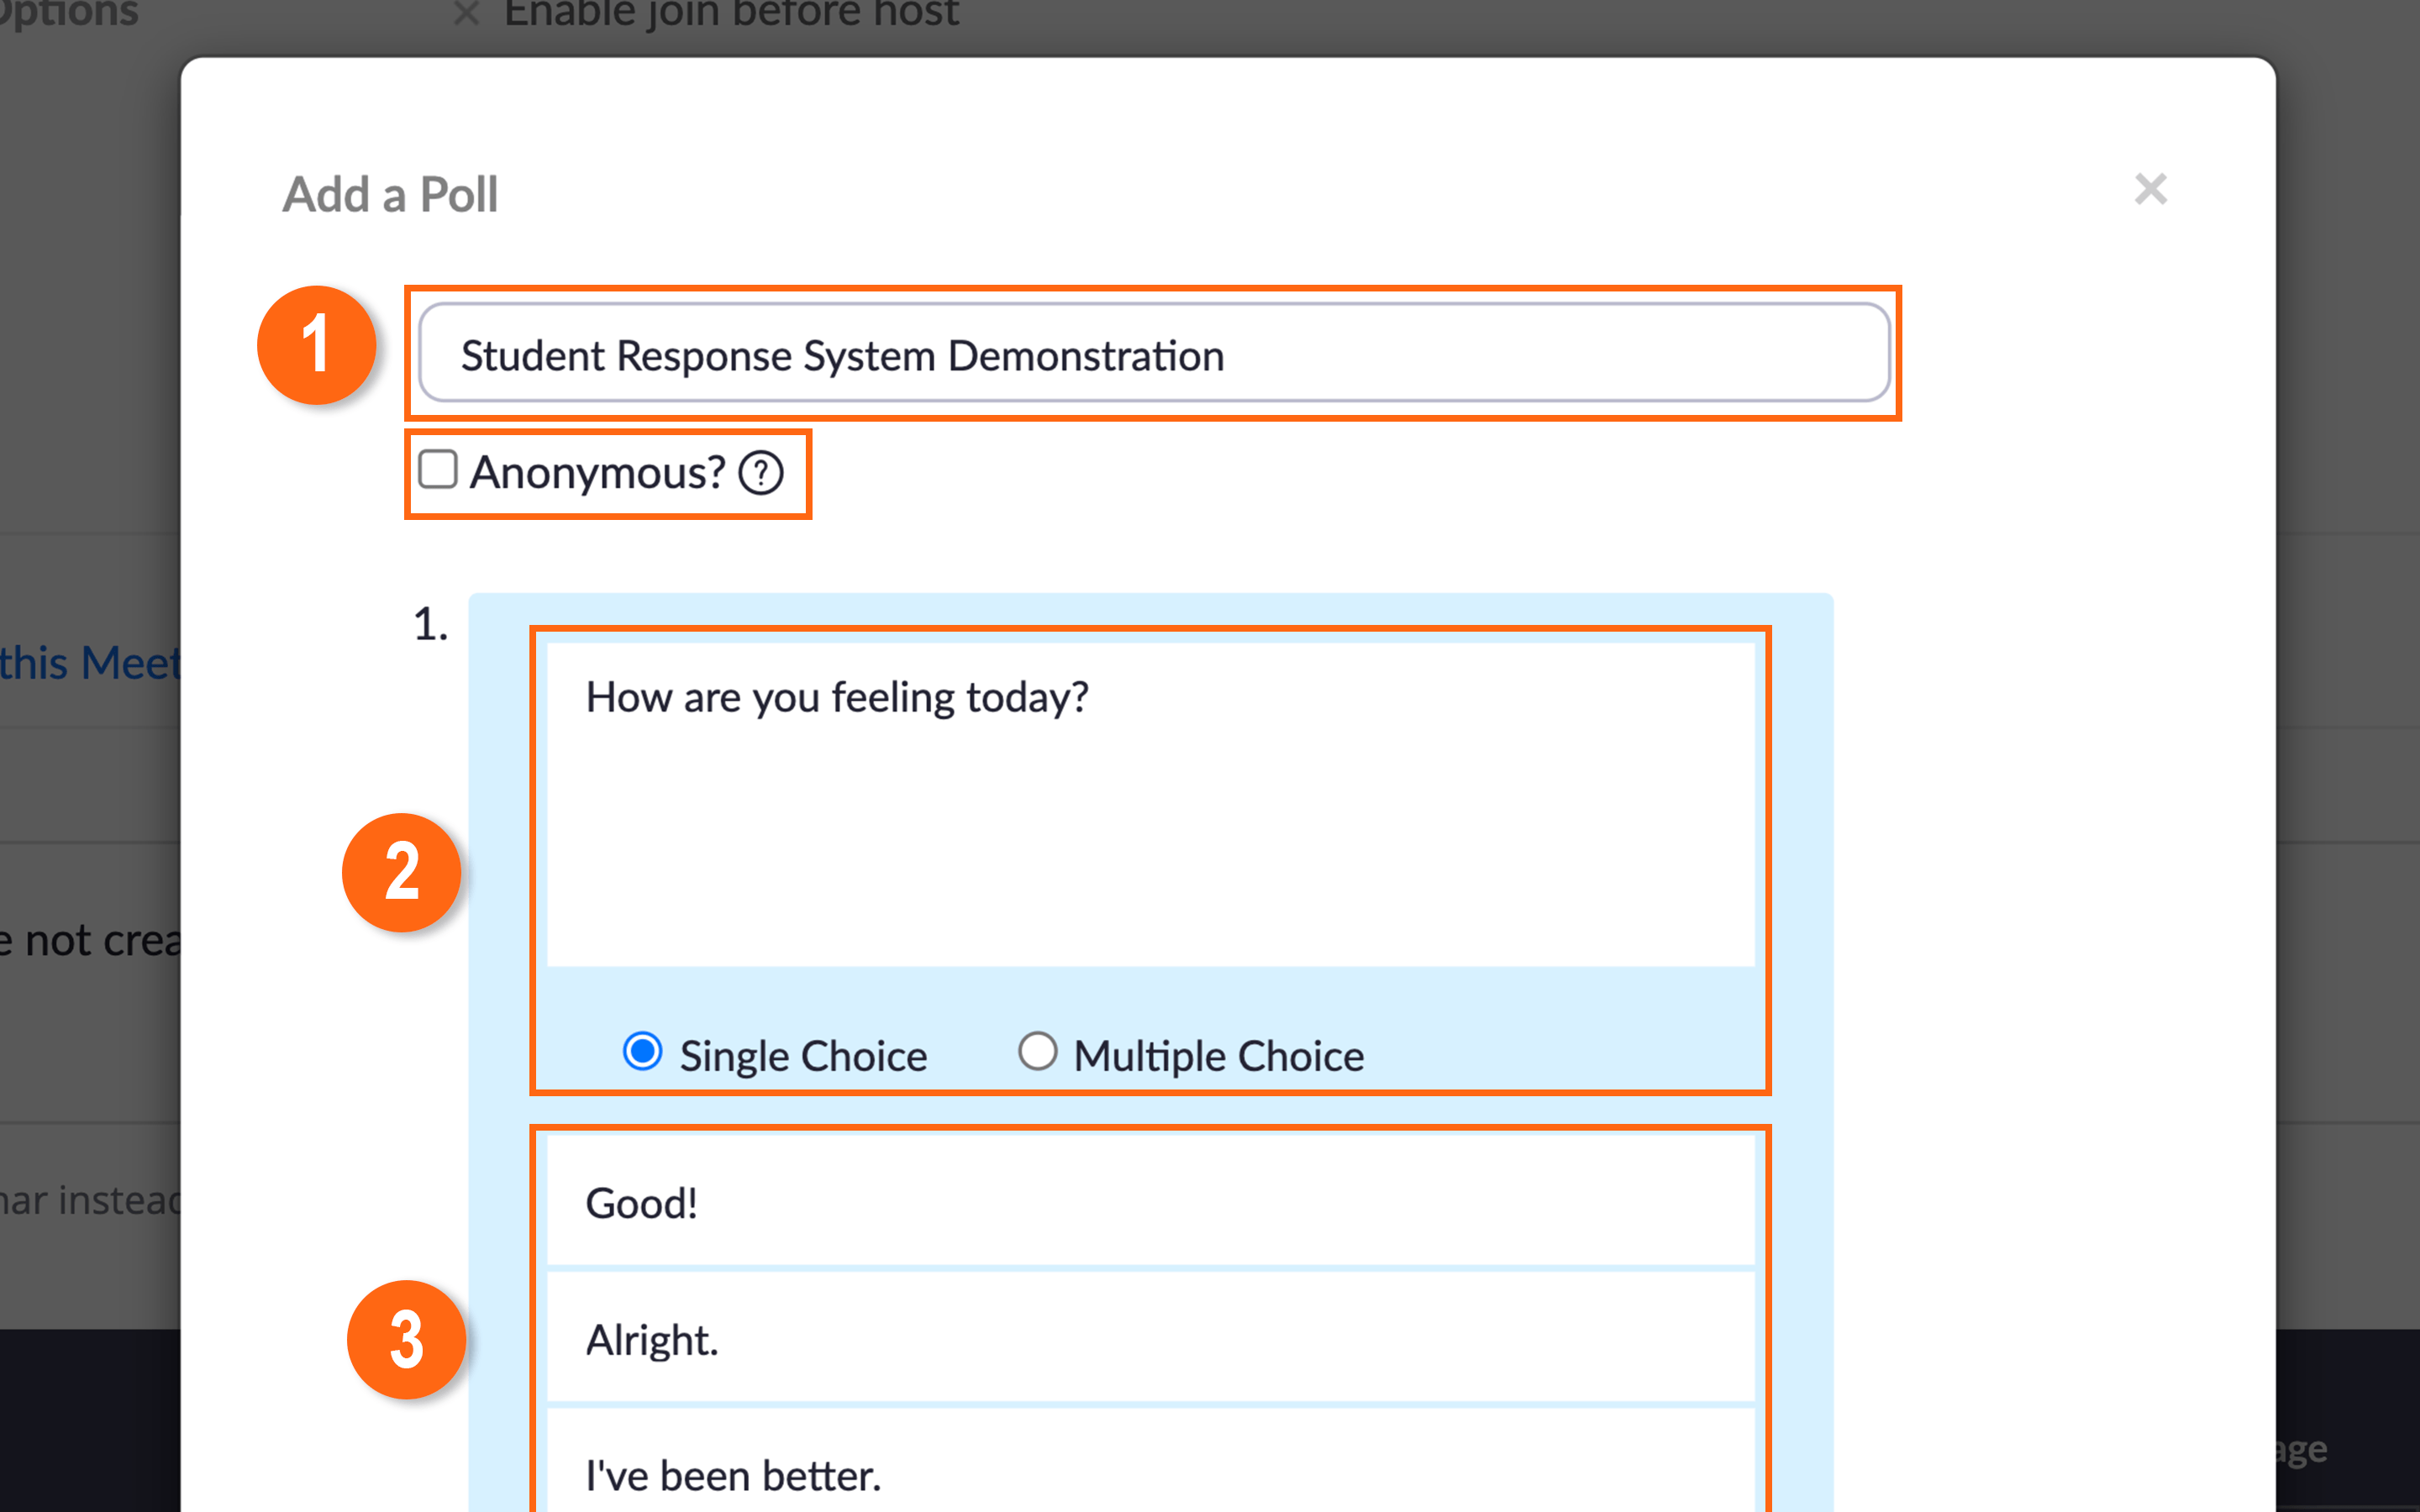
Adding Titles and Questions
- Enter a title for your poll.
- Optional: Checking off anonymous will make the user information in poll reports anonymous.
- Enter in your question and then select if students can answer with a 'Single Choice' or with 'Multiple Choice.'
- Enter in the answers that your students can select from.
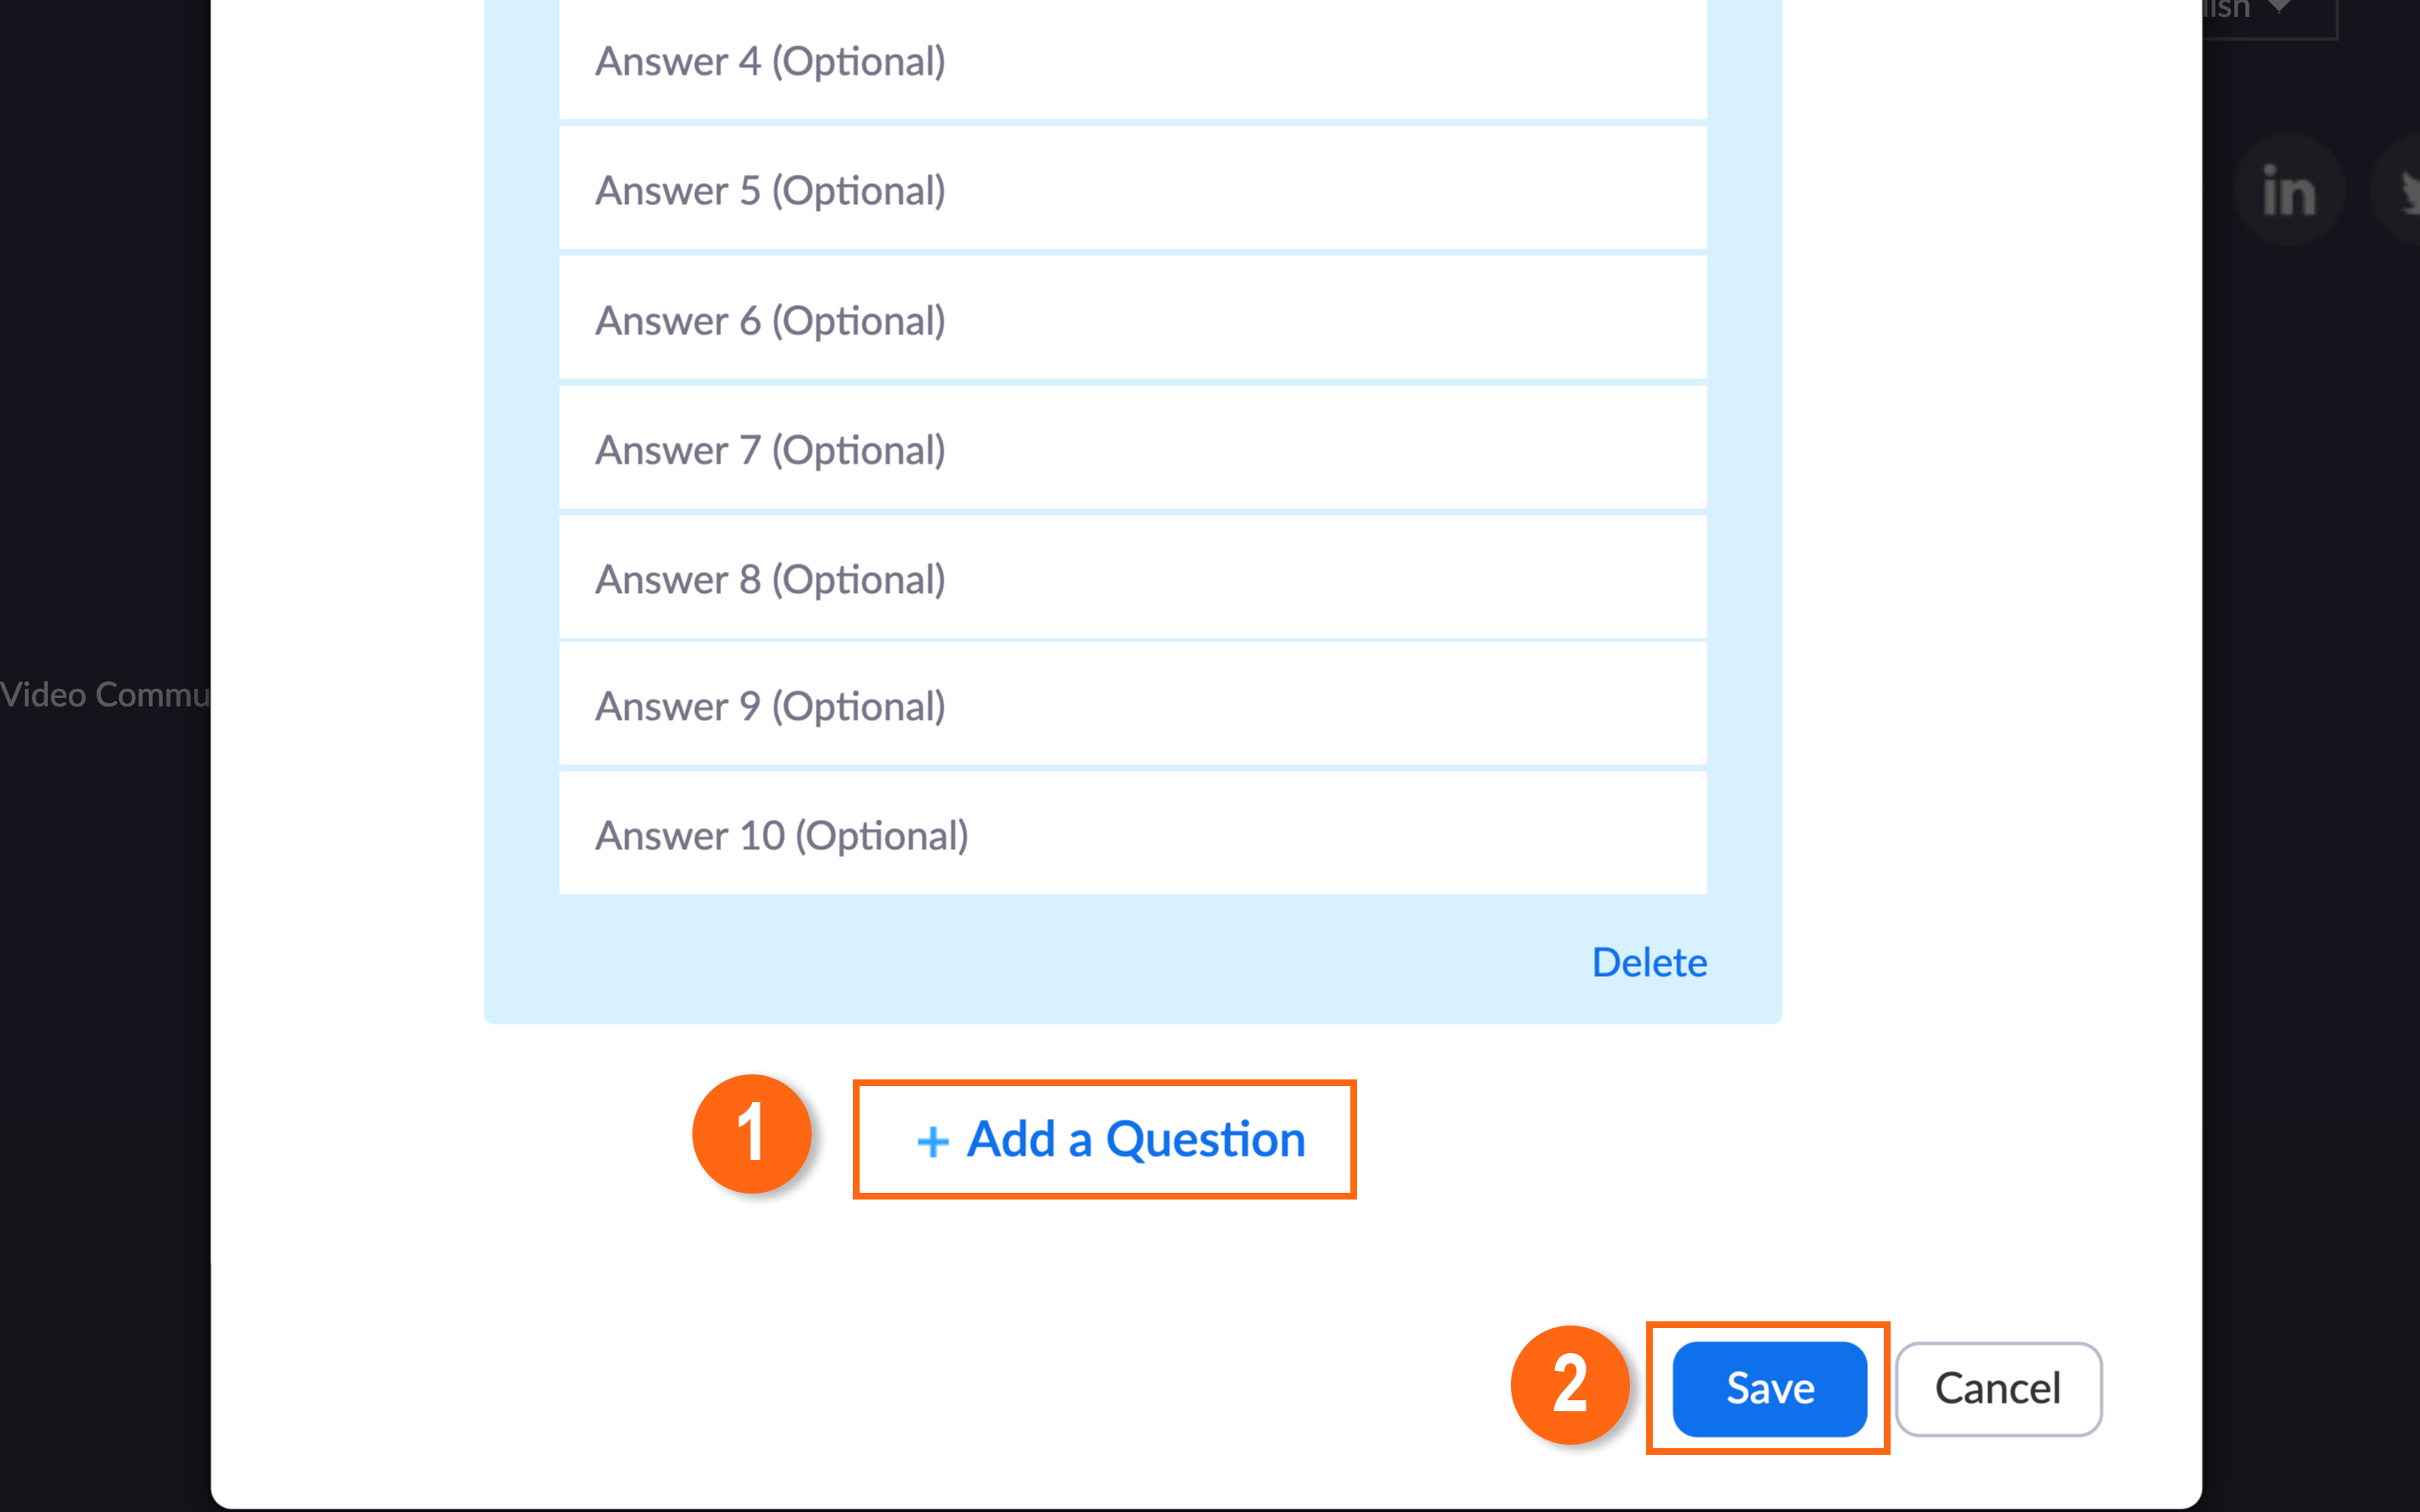
Additional Questions and Saving
- To add another question to the same poll, click 'Add a Question.'
- Click 'Save' once you are done.
Note: When you create a poll and add additional questions to the poll, those questions will be added to the same poll and be presented to students in sequential order.
If you would like to have different polls appear at different times in your lecture, you must create multiple polls. To do this, click 'Add' at the bottom of your scheduled meeting page.
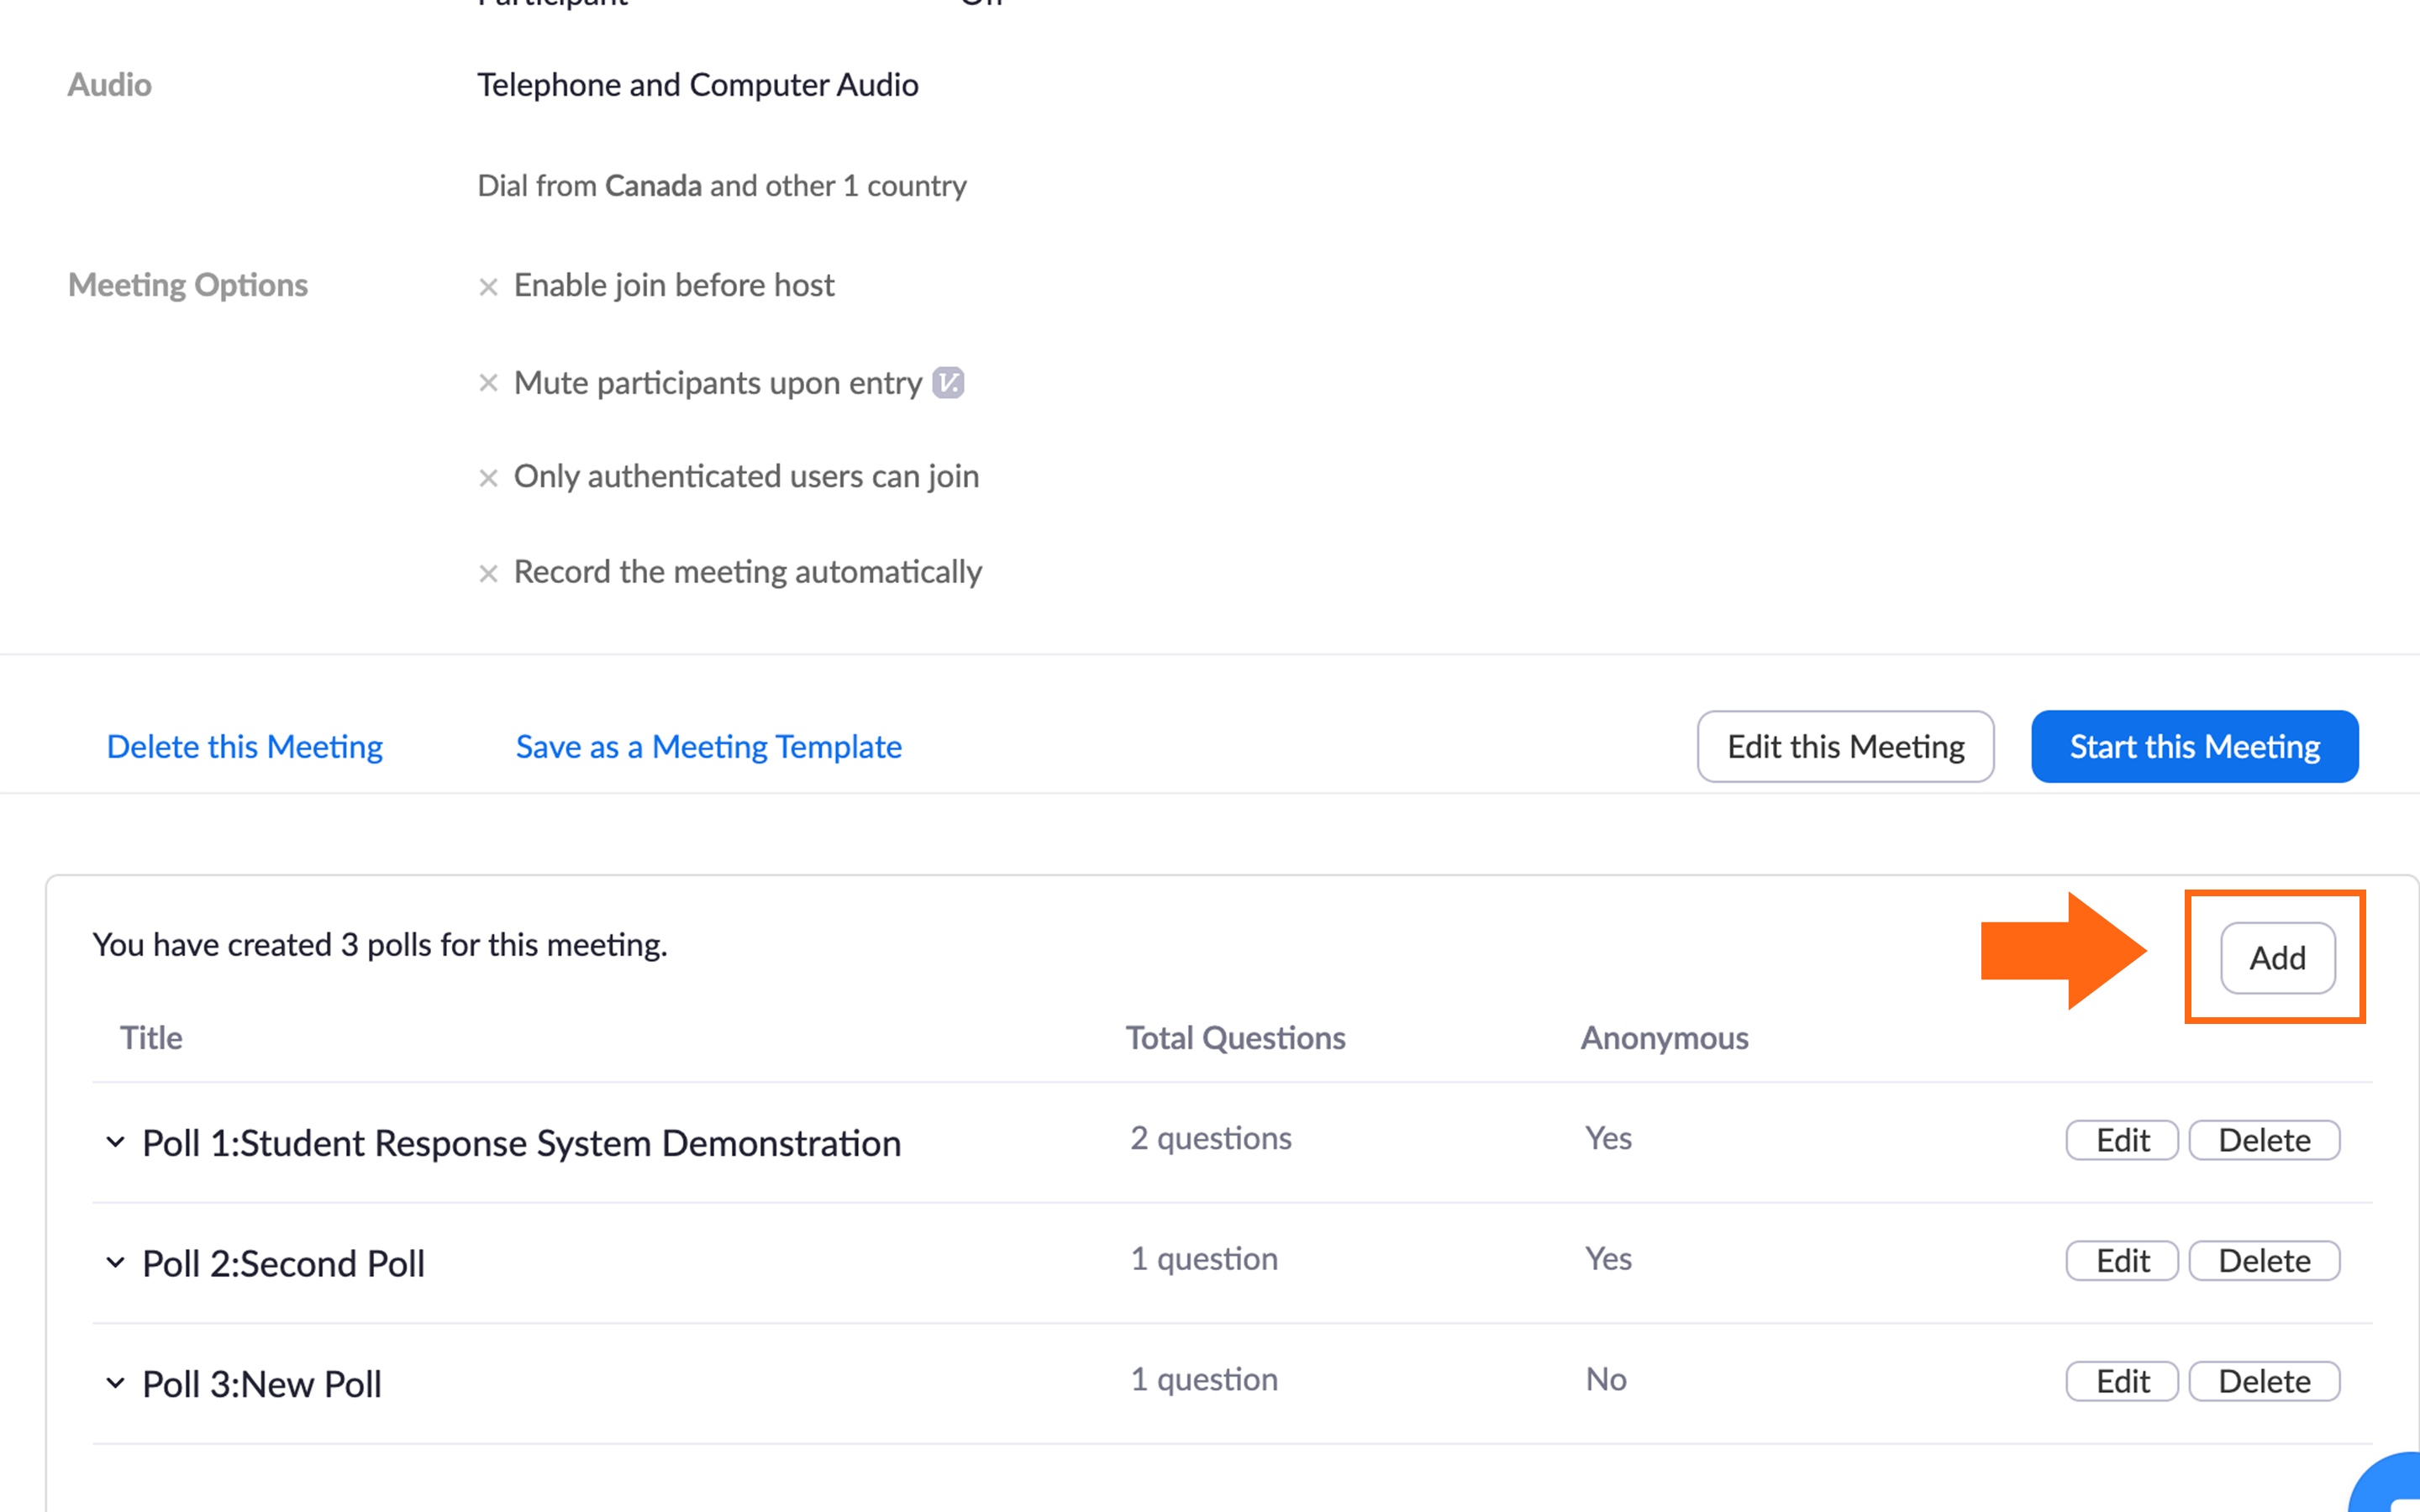
Adding Additional Polls
If adding new polls, click 'Add' again within the polling section, located at the bottom of the scheduled meeting page in your Zoom account.
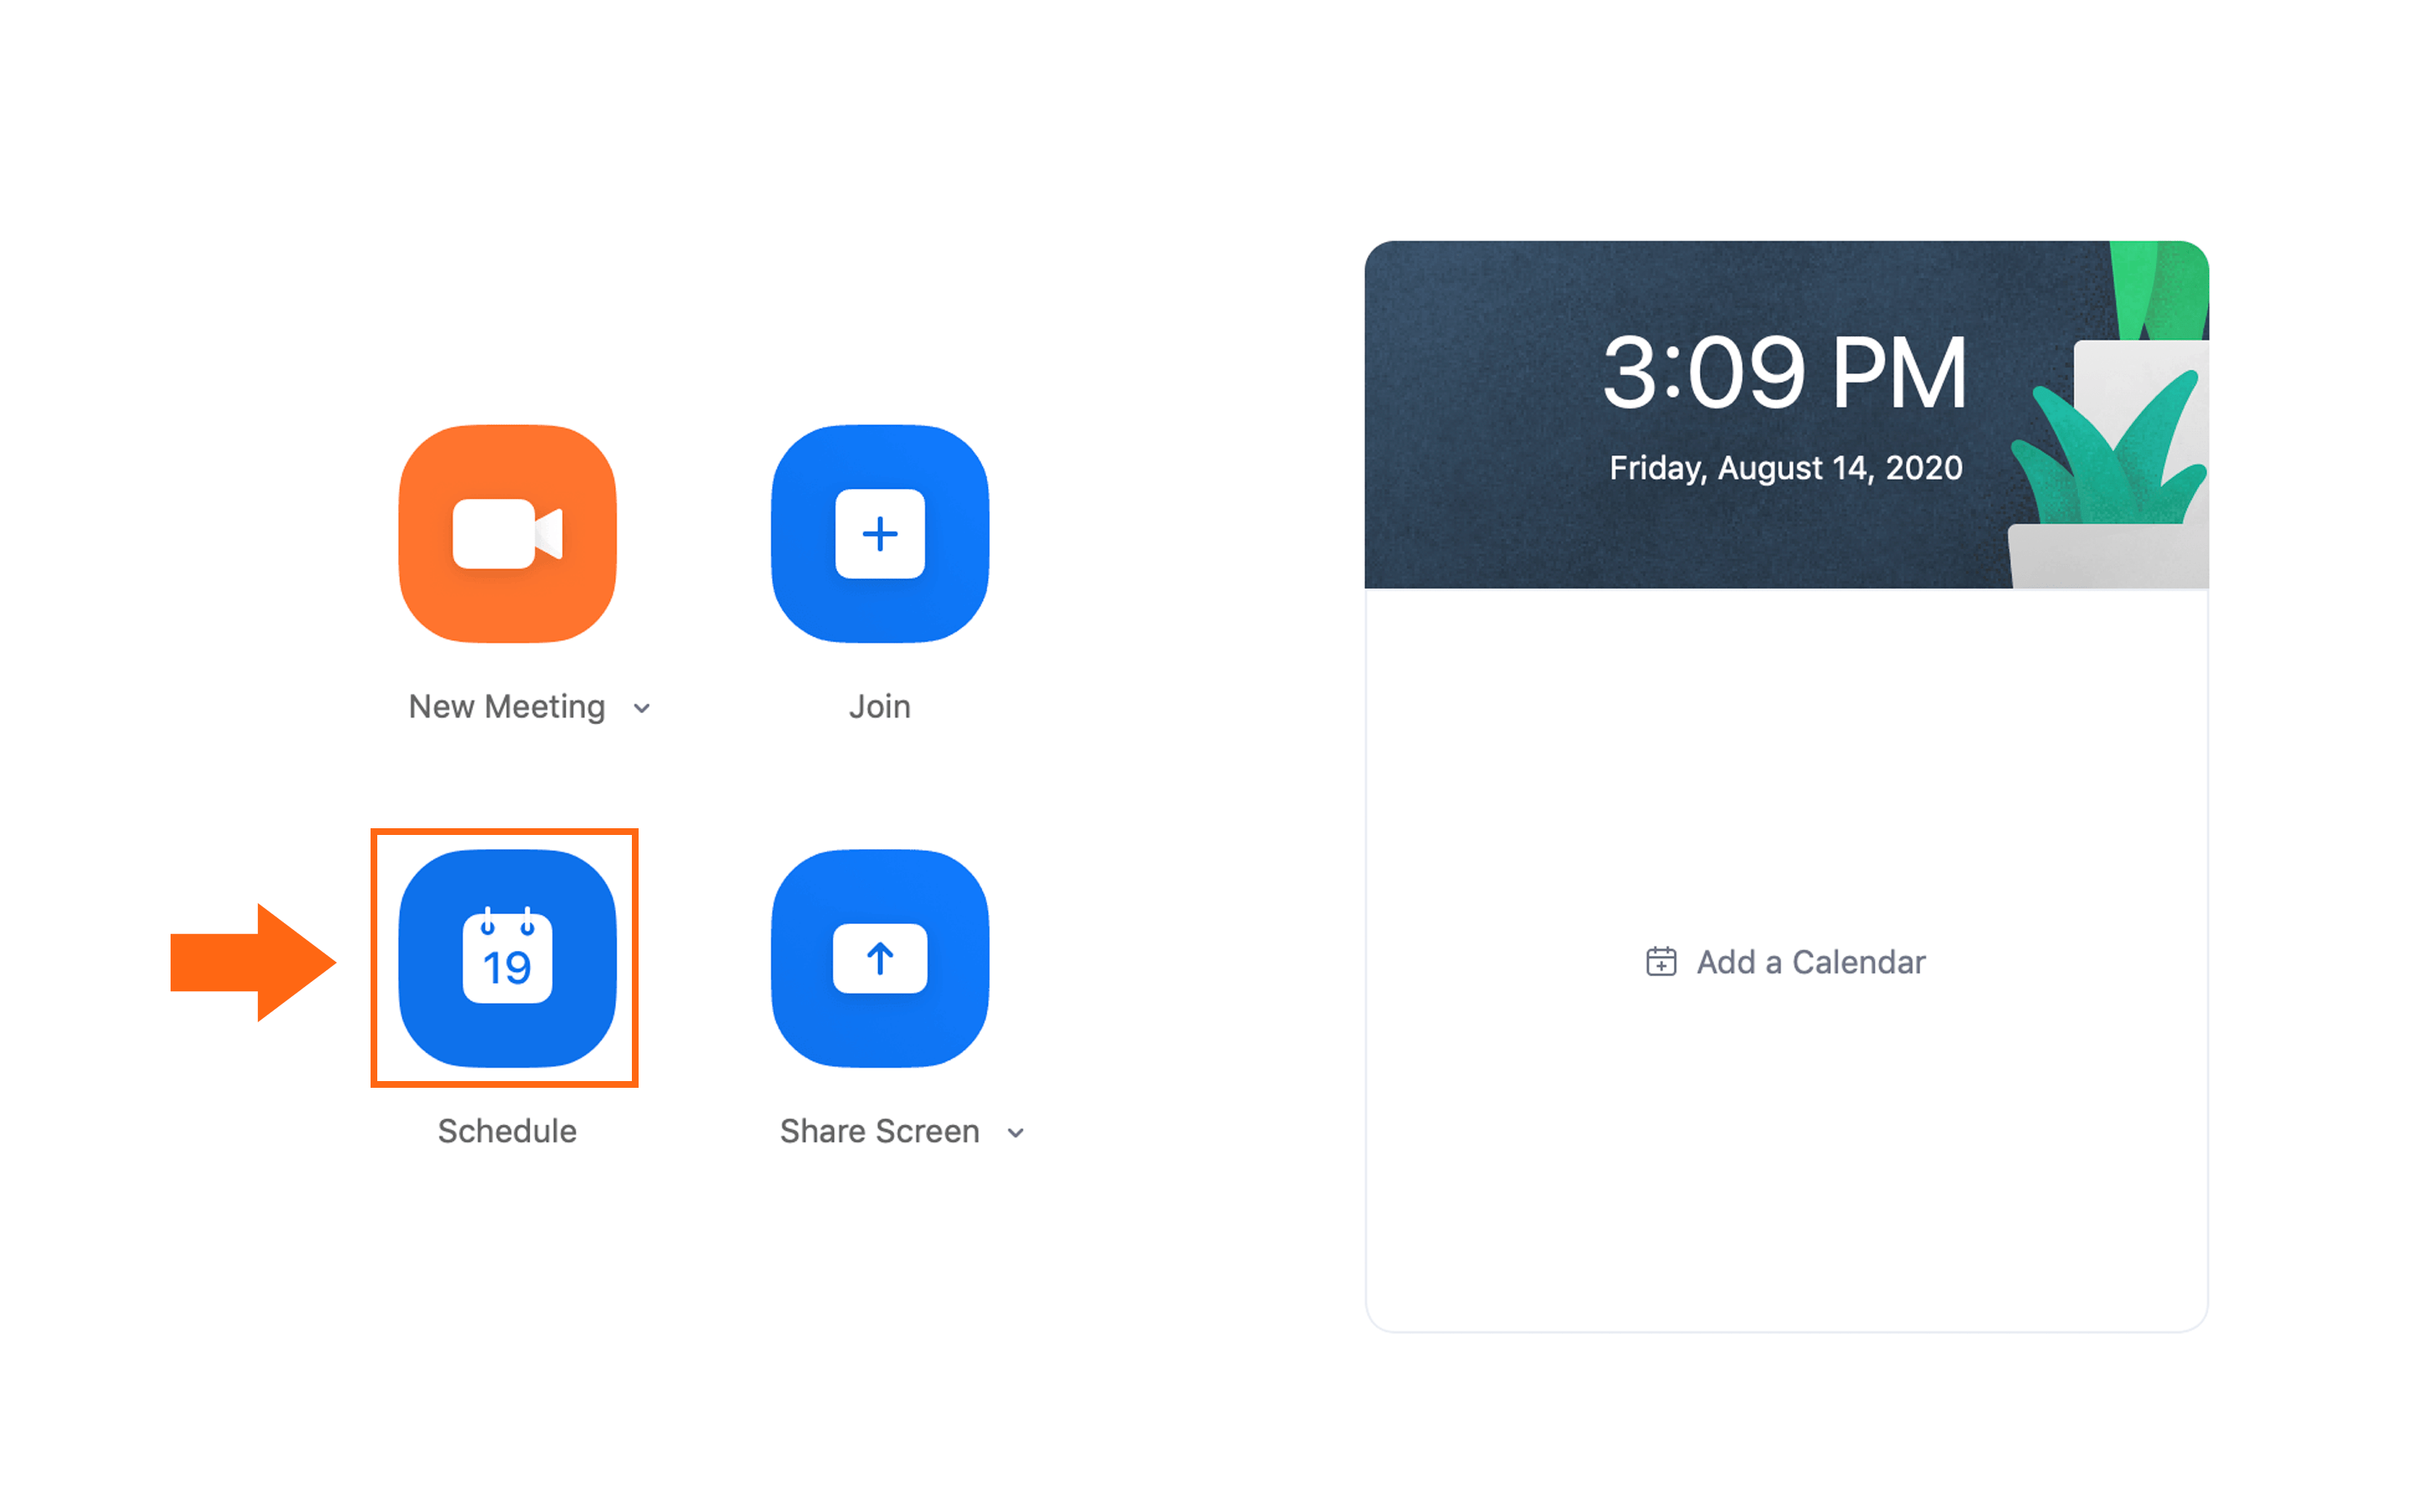
Launching Zoom and Scheduling a Meeting
Launch the Zoom Application located on your device. Click 'Schedule' on the home page to schedule a new meeting.
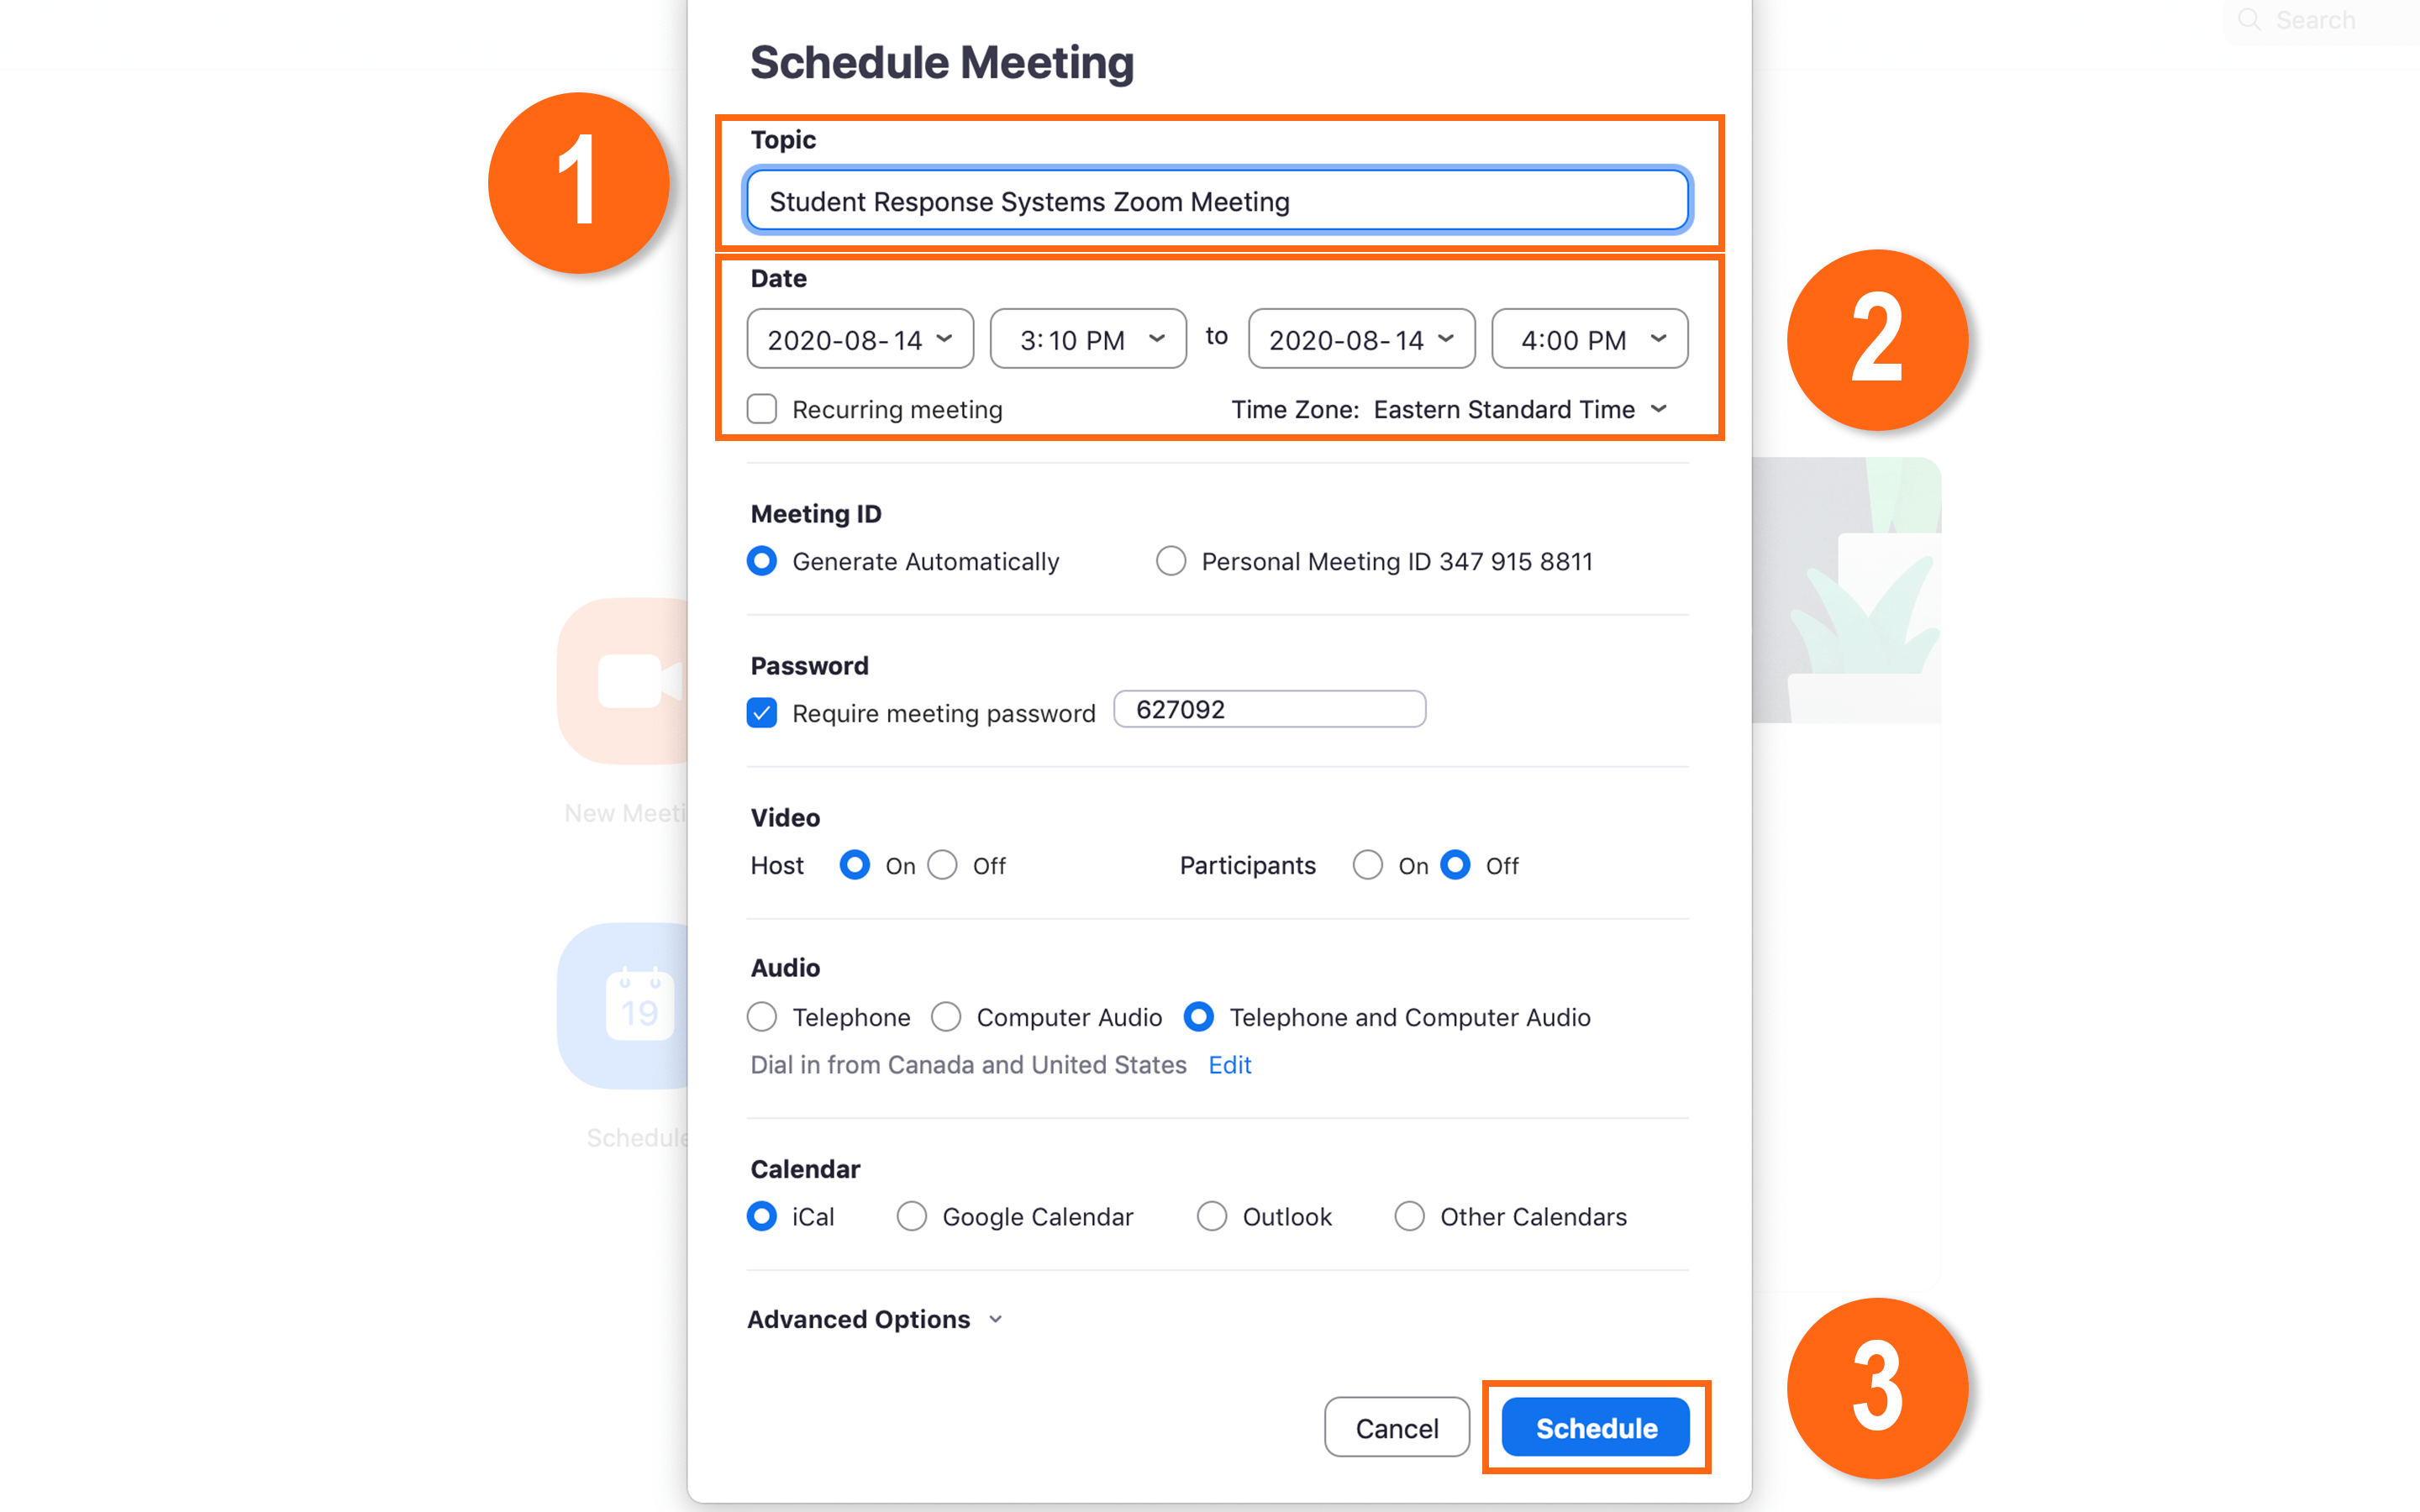
Scheduling Meeting Options
- Enter in a title for your meeting.
- Set a date and time for your meeting to occur.
- Click 'Schedule' to finalize the meeting once you have adjusted the meeting options to your preference.
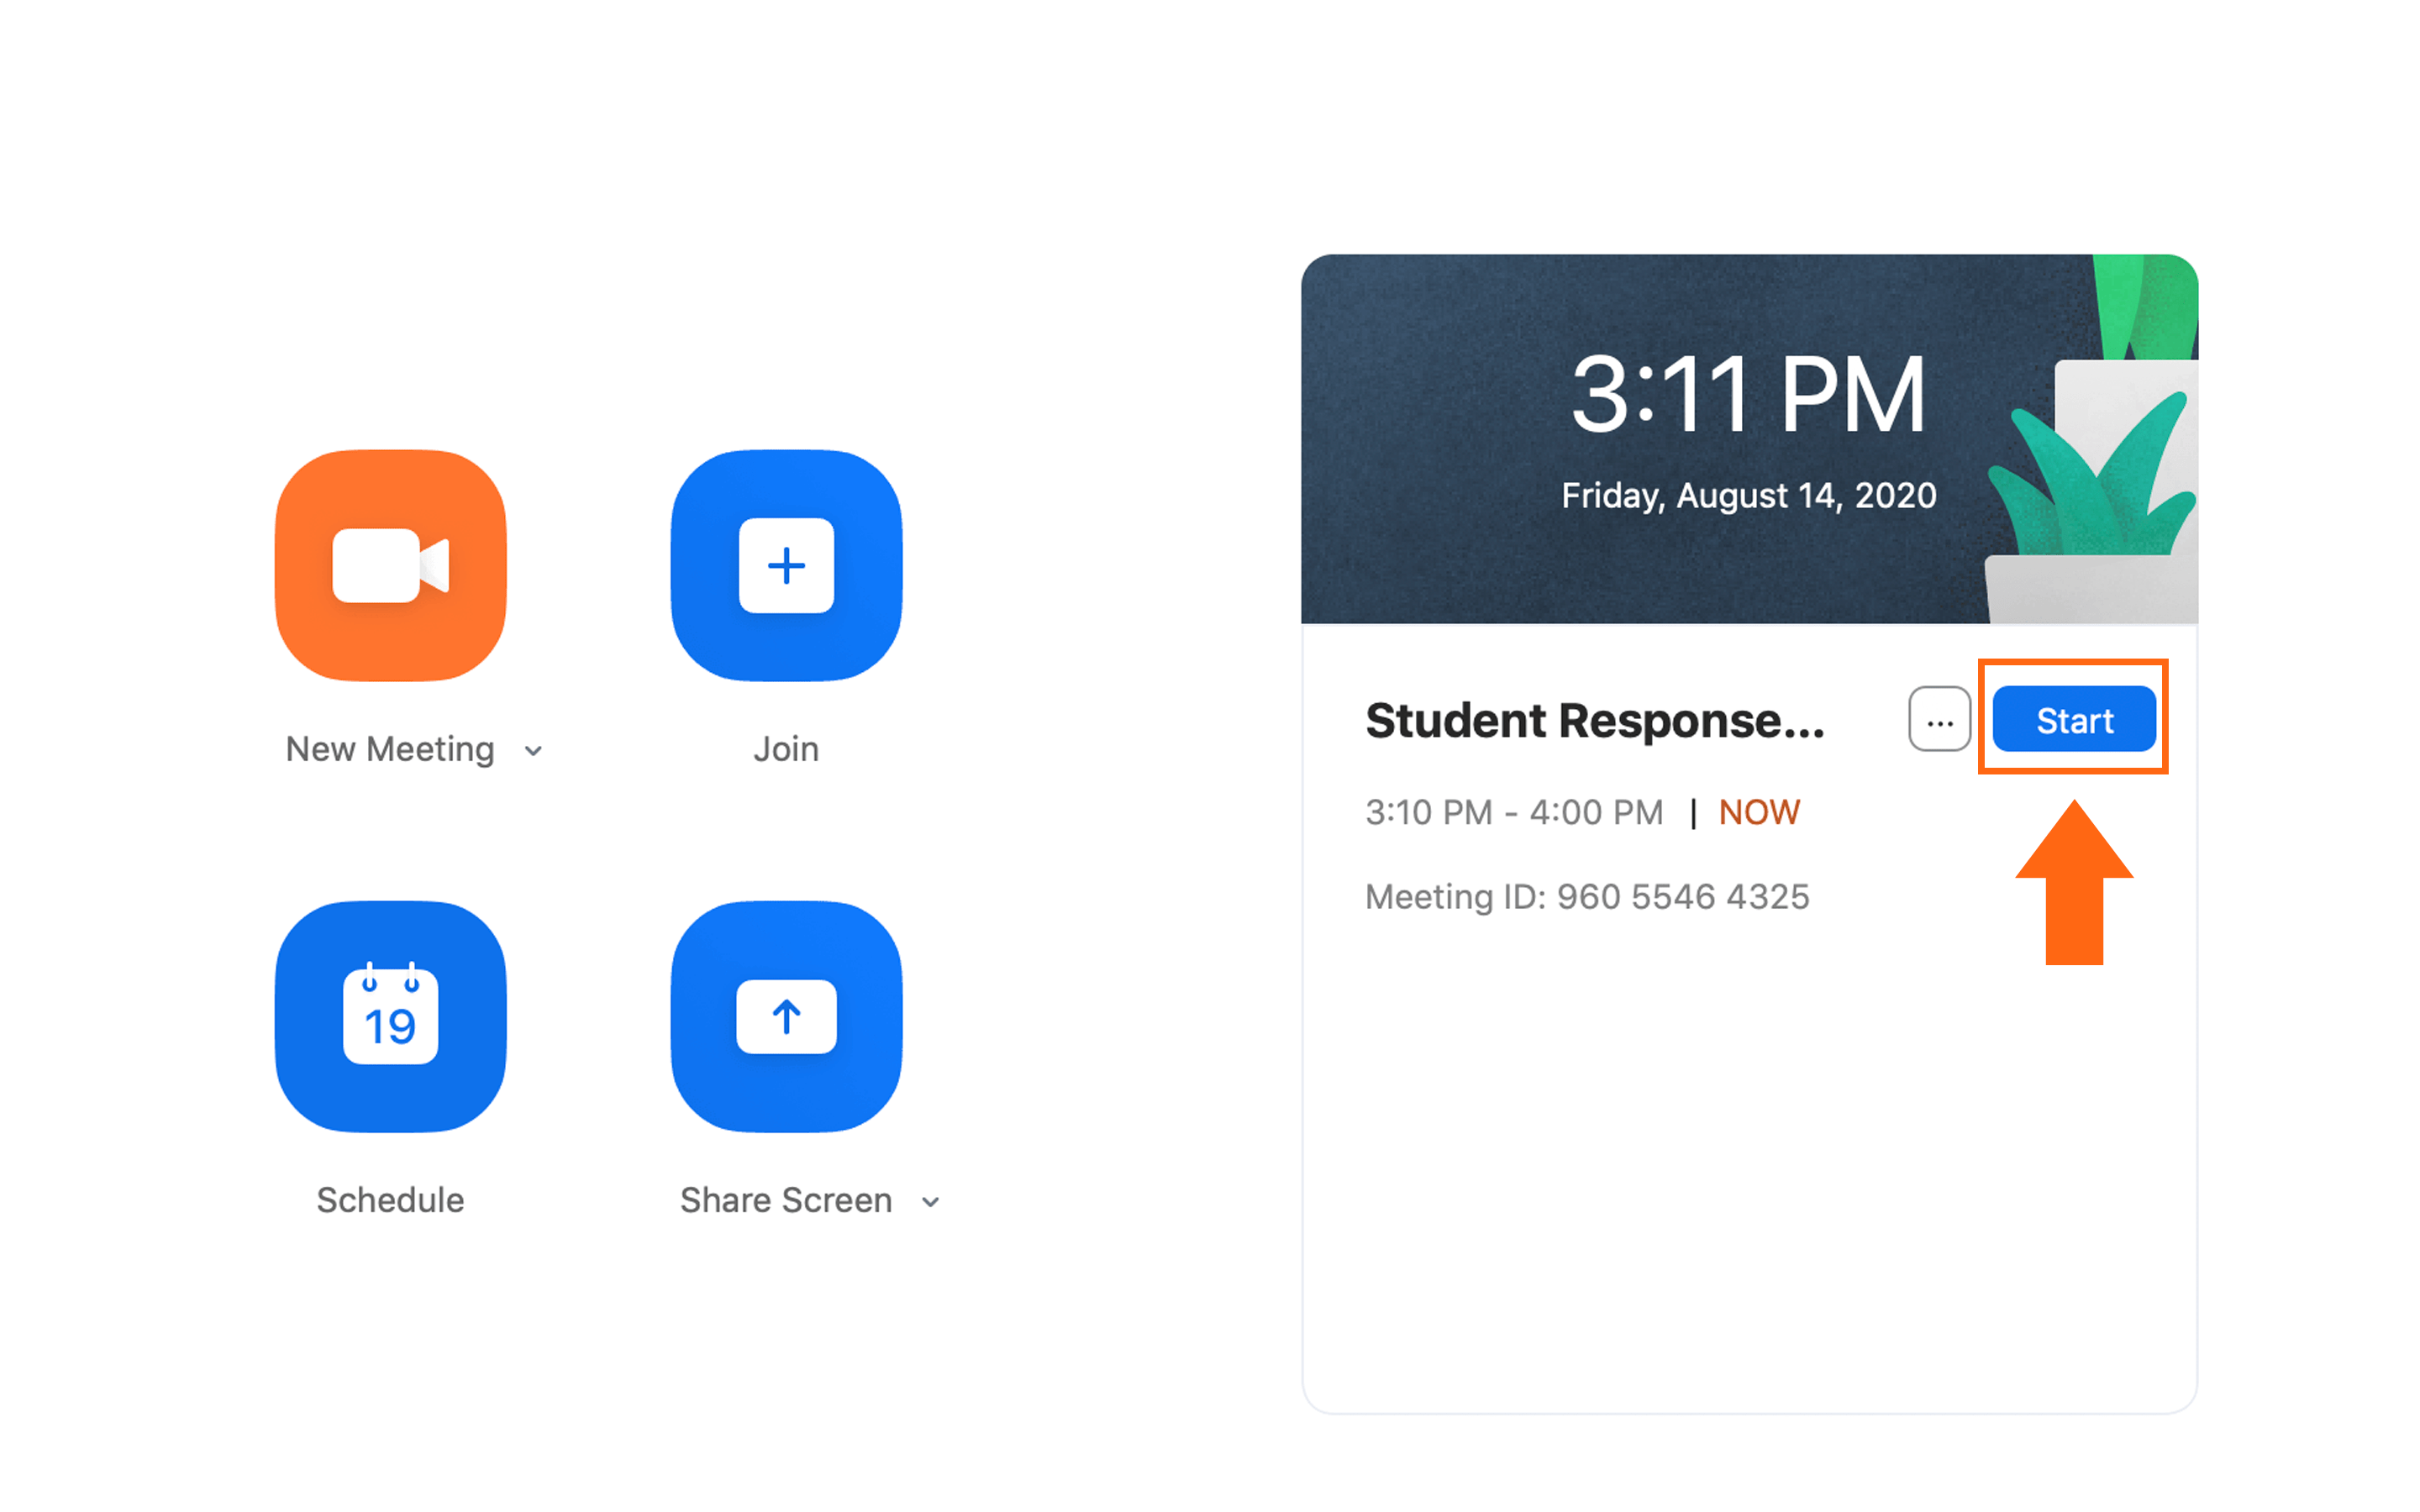
Starting the Scheduled Meeting
Once it is time to start your scheduled meeting, the meeting will pop up on the right side of the Zoom application home page. Click 'Start' to launch the meeting.
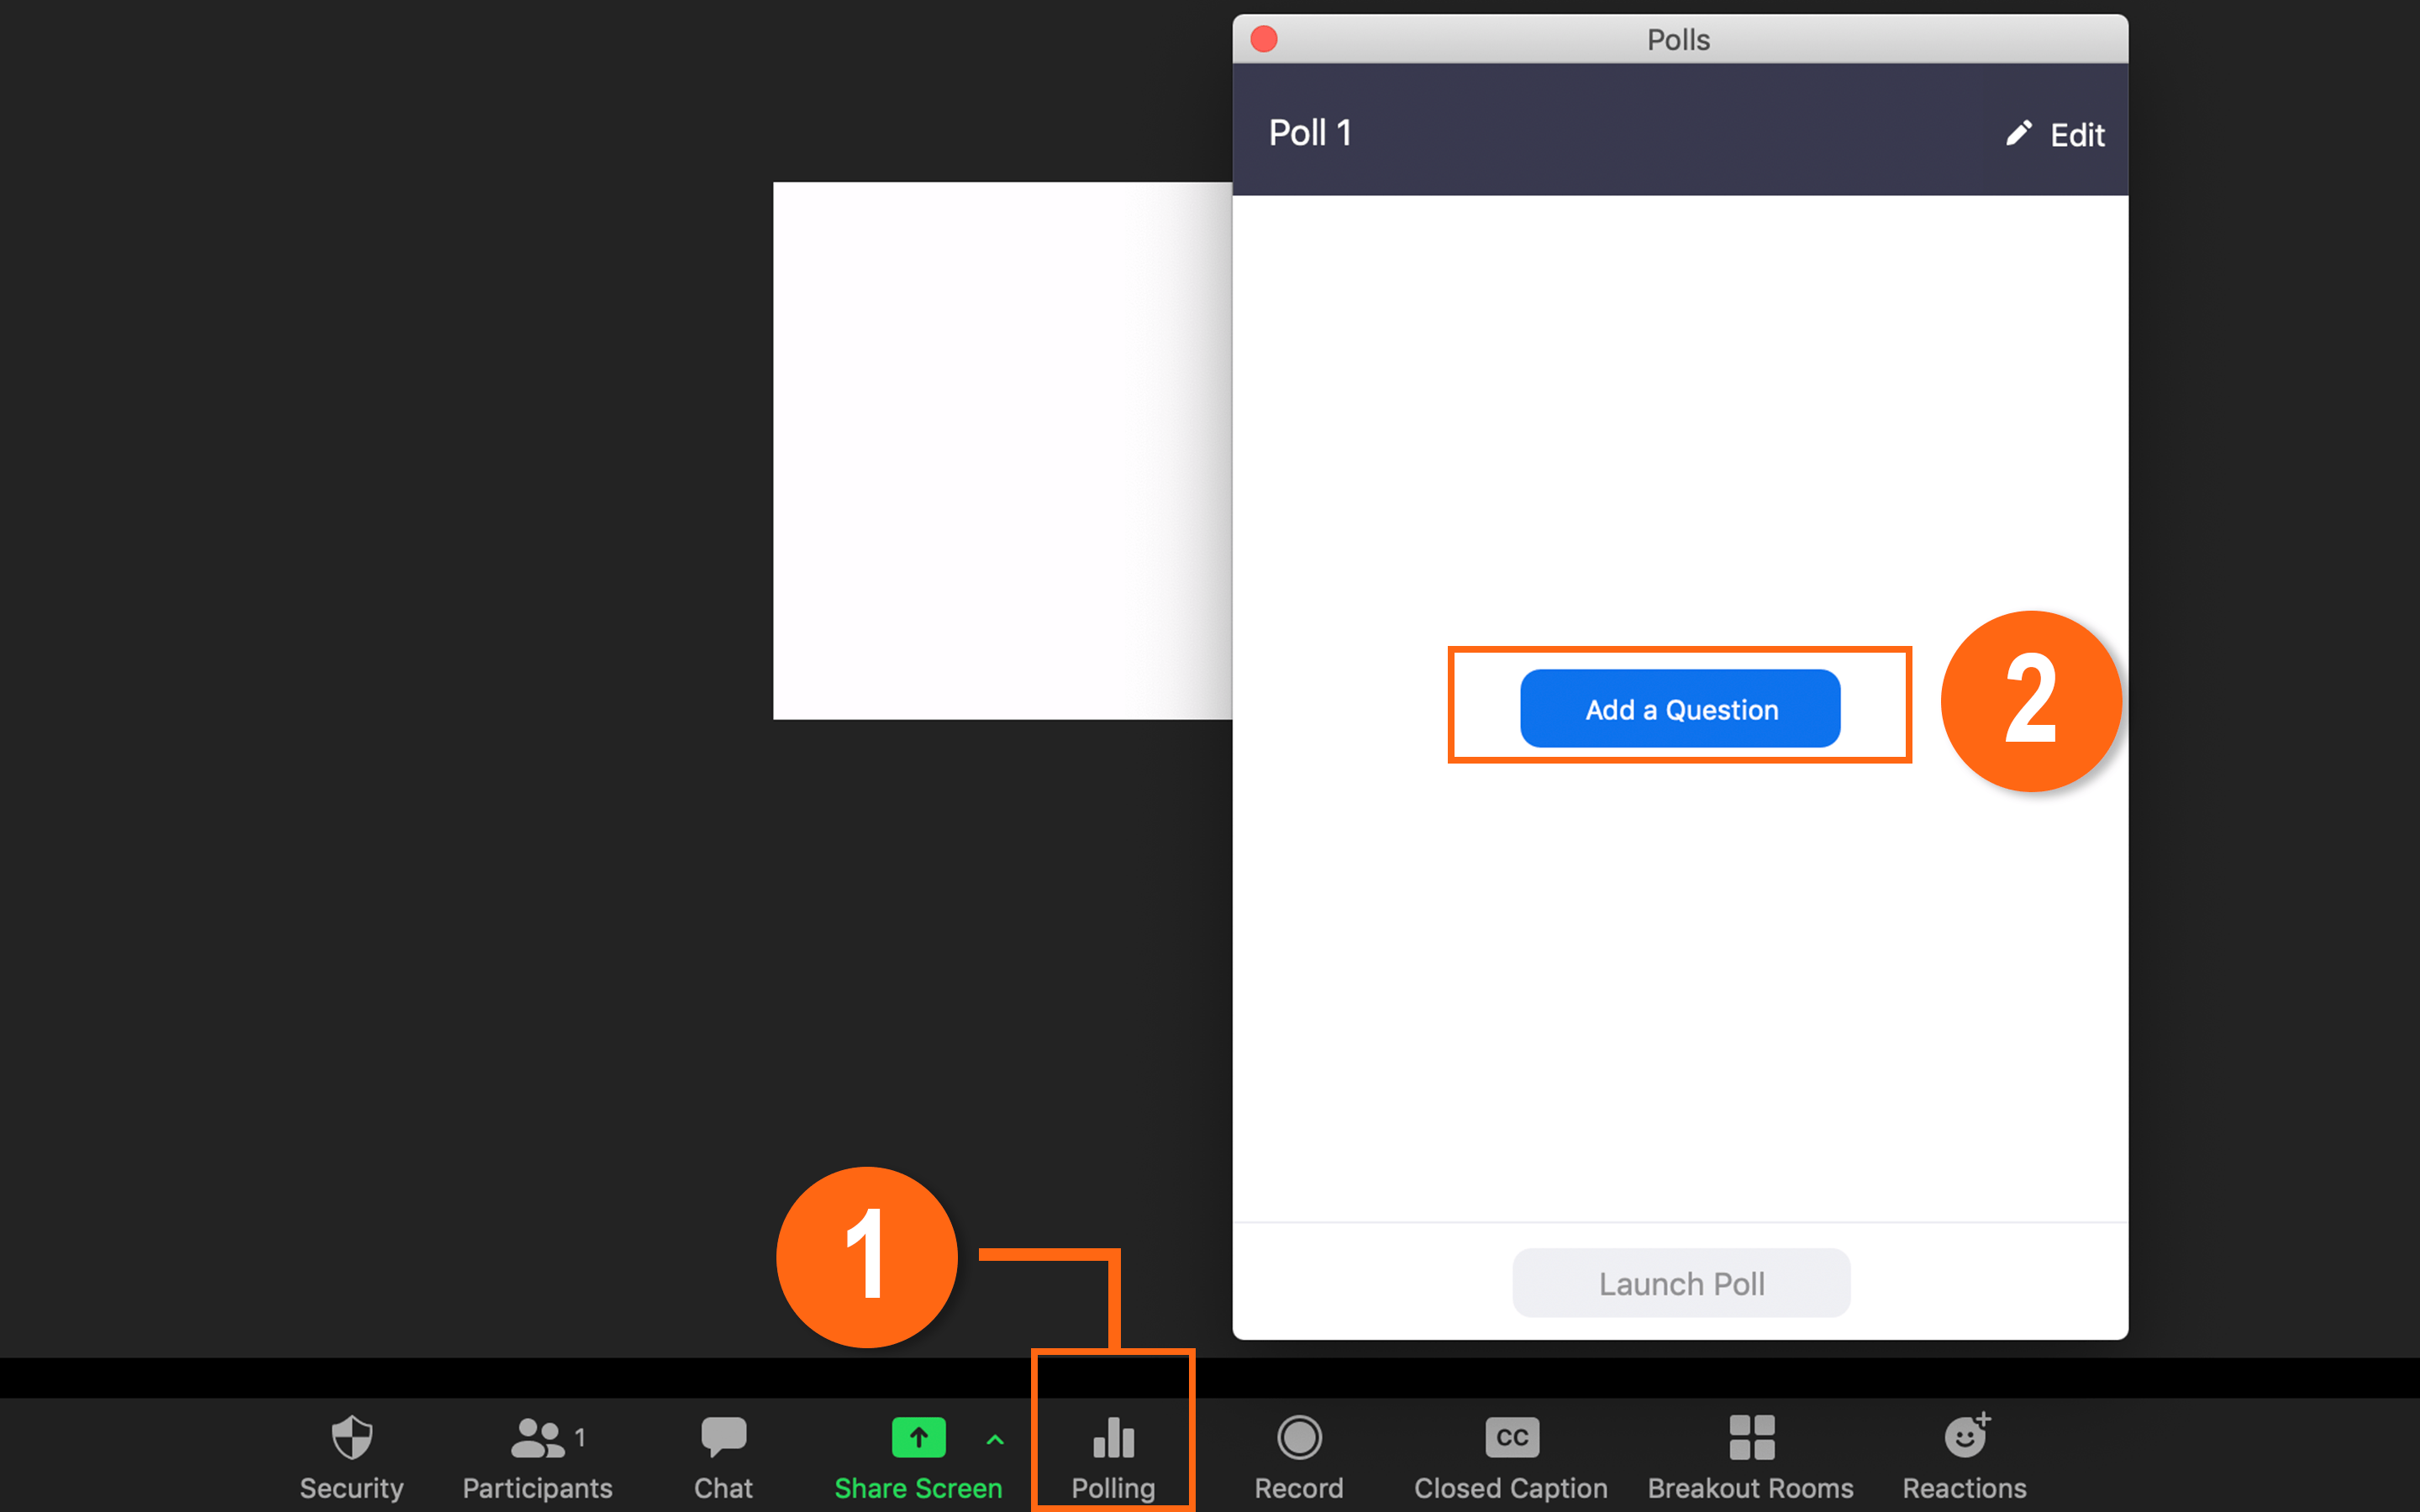
Adding Questions to your Poll
- Click 'Polling' located on the bottom menu bar to access the polling menu.
- Click 'Add a Question' to begin adding polling questions to be used during your Zoom presentation.
Adding Titles and Questions
- Enter a title for your poll.
- Optional: Checking off anonymous will make the user information in poll reports anonymous.
- Enter in your question and then select if students can answer with a 'Single Choice' or with 'Multiple Choice.'
- Enter in the answers that your students can select from.
Additional Questions and Saving
- To add another question to the same poll, click 'Add a Question.'
- Click 'Save' once you are done.
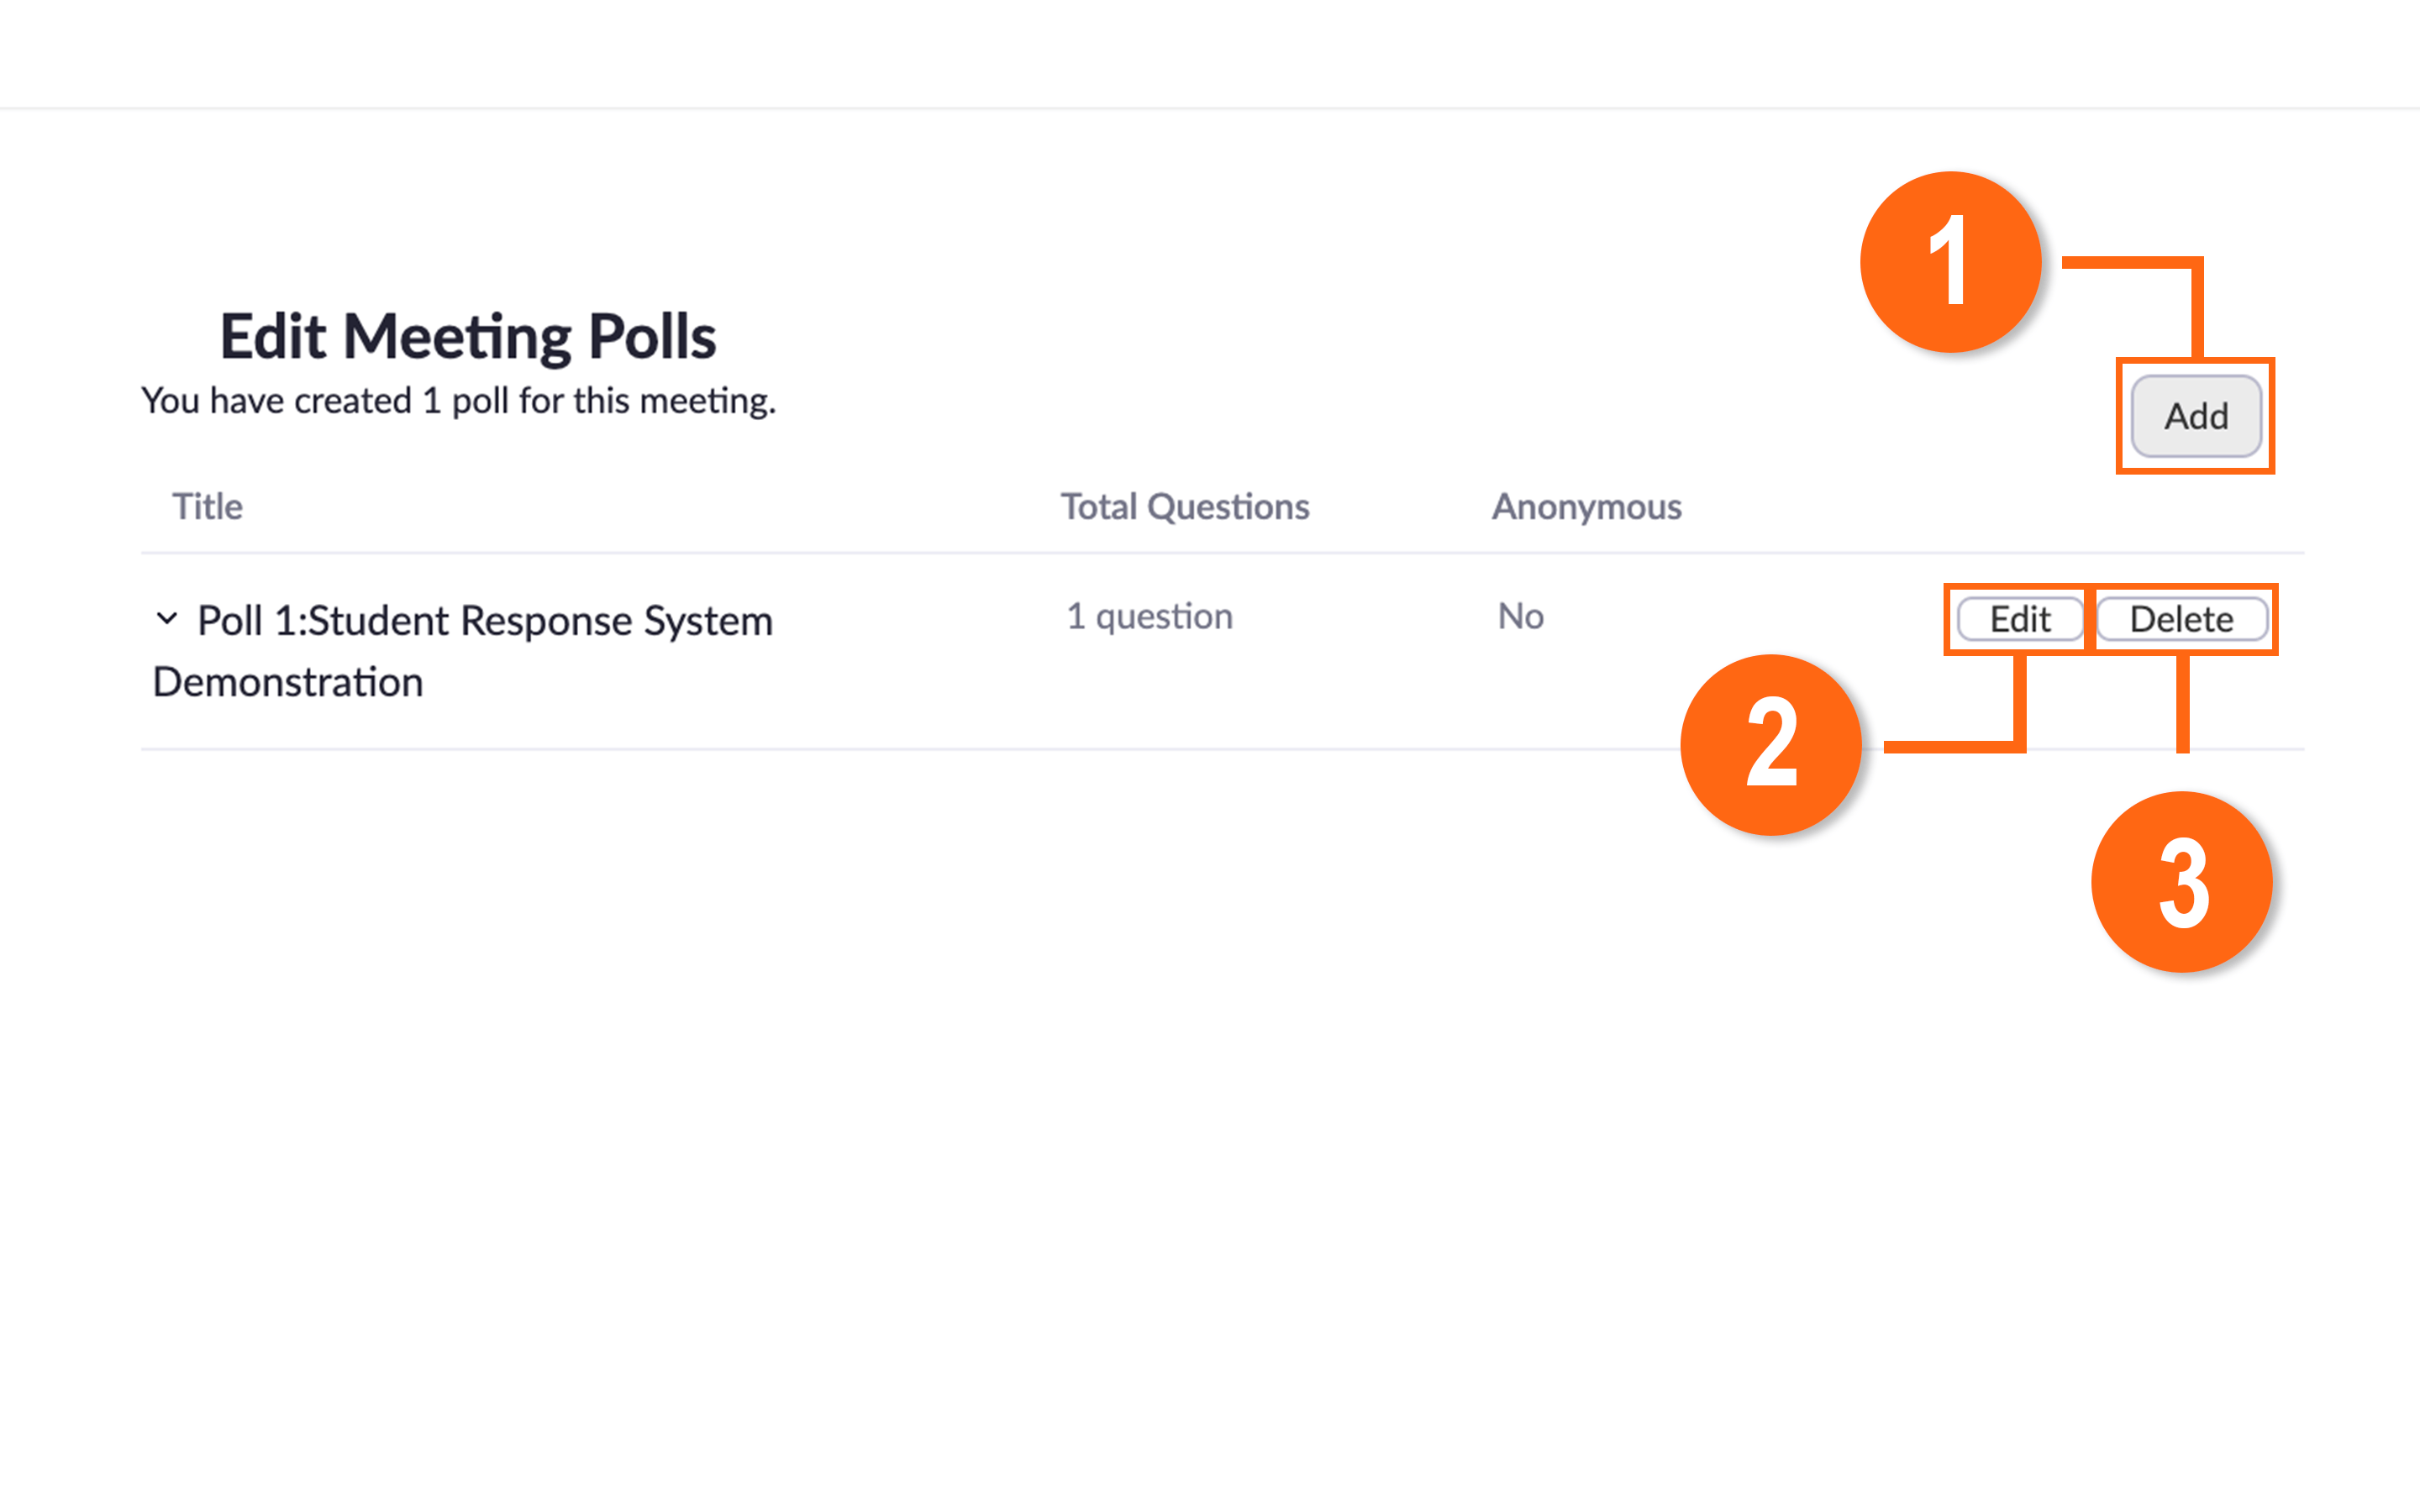
Adding Additional Polls and Editing Polls
- To add additional polls that can be launched at different times throughout your presentation, click 'Add' near the top right corner of the Edit Meeting Polls page.
- To edit your existing polls, click on the 'Edit' button corresponding to the poll you would like to edit.
- You may also delete a poll by clicking the 'Delete' button corresponding to the poll you would like to delete.
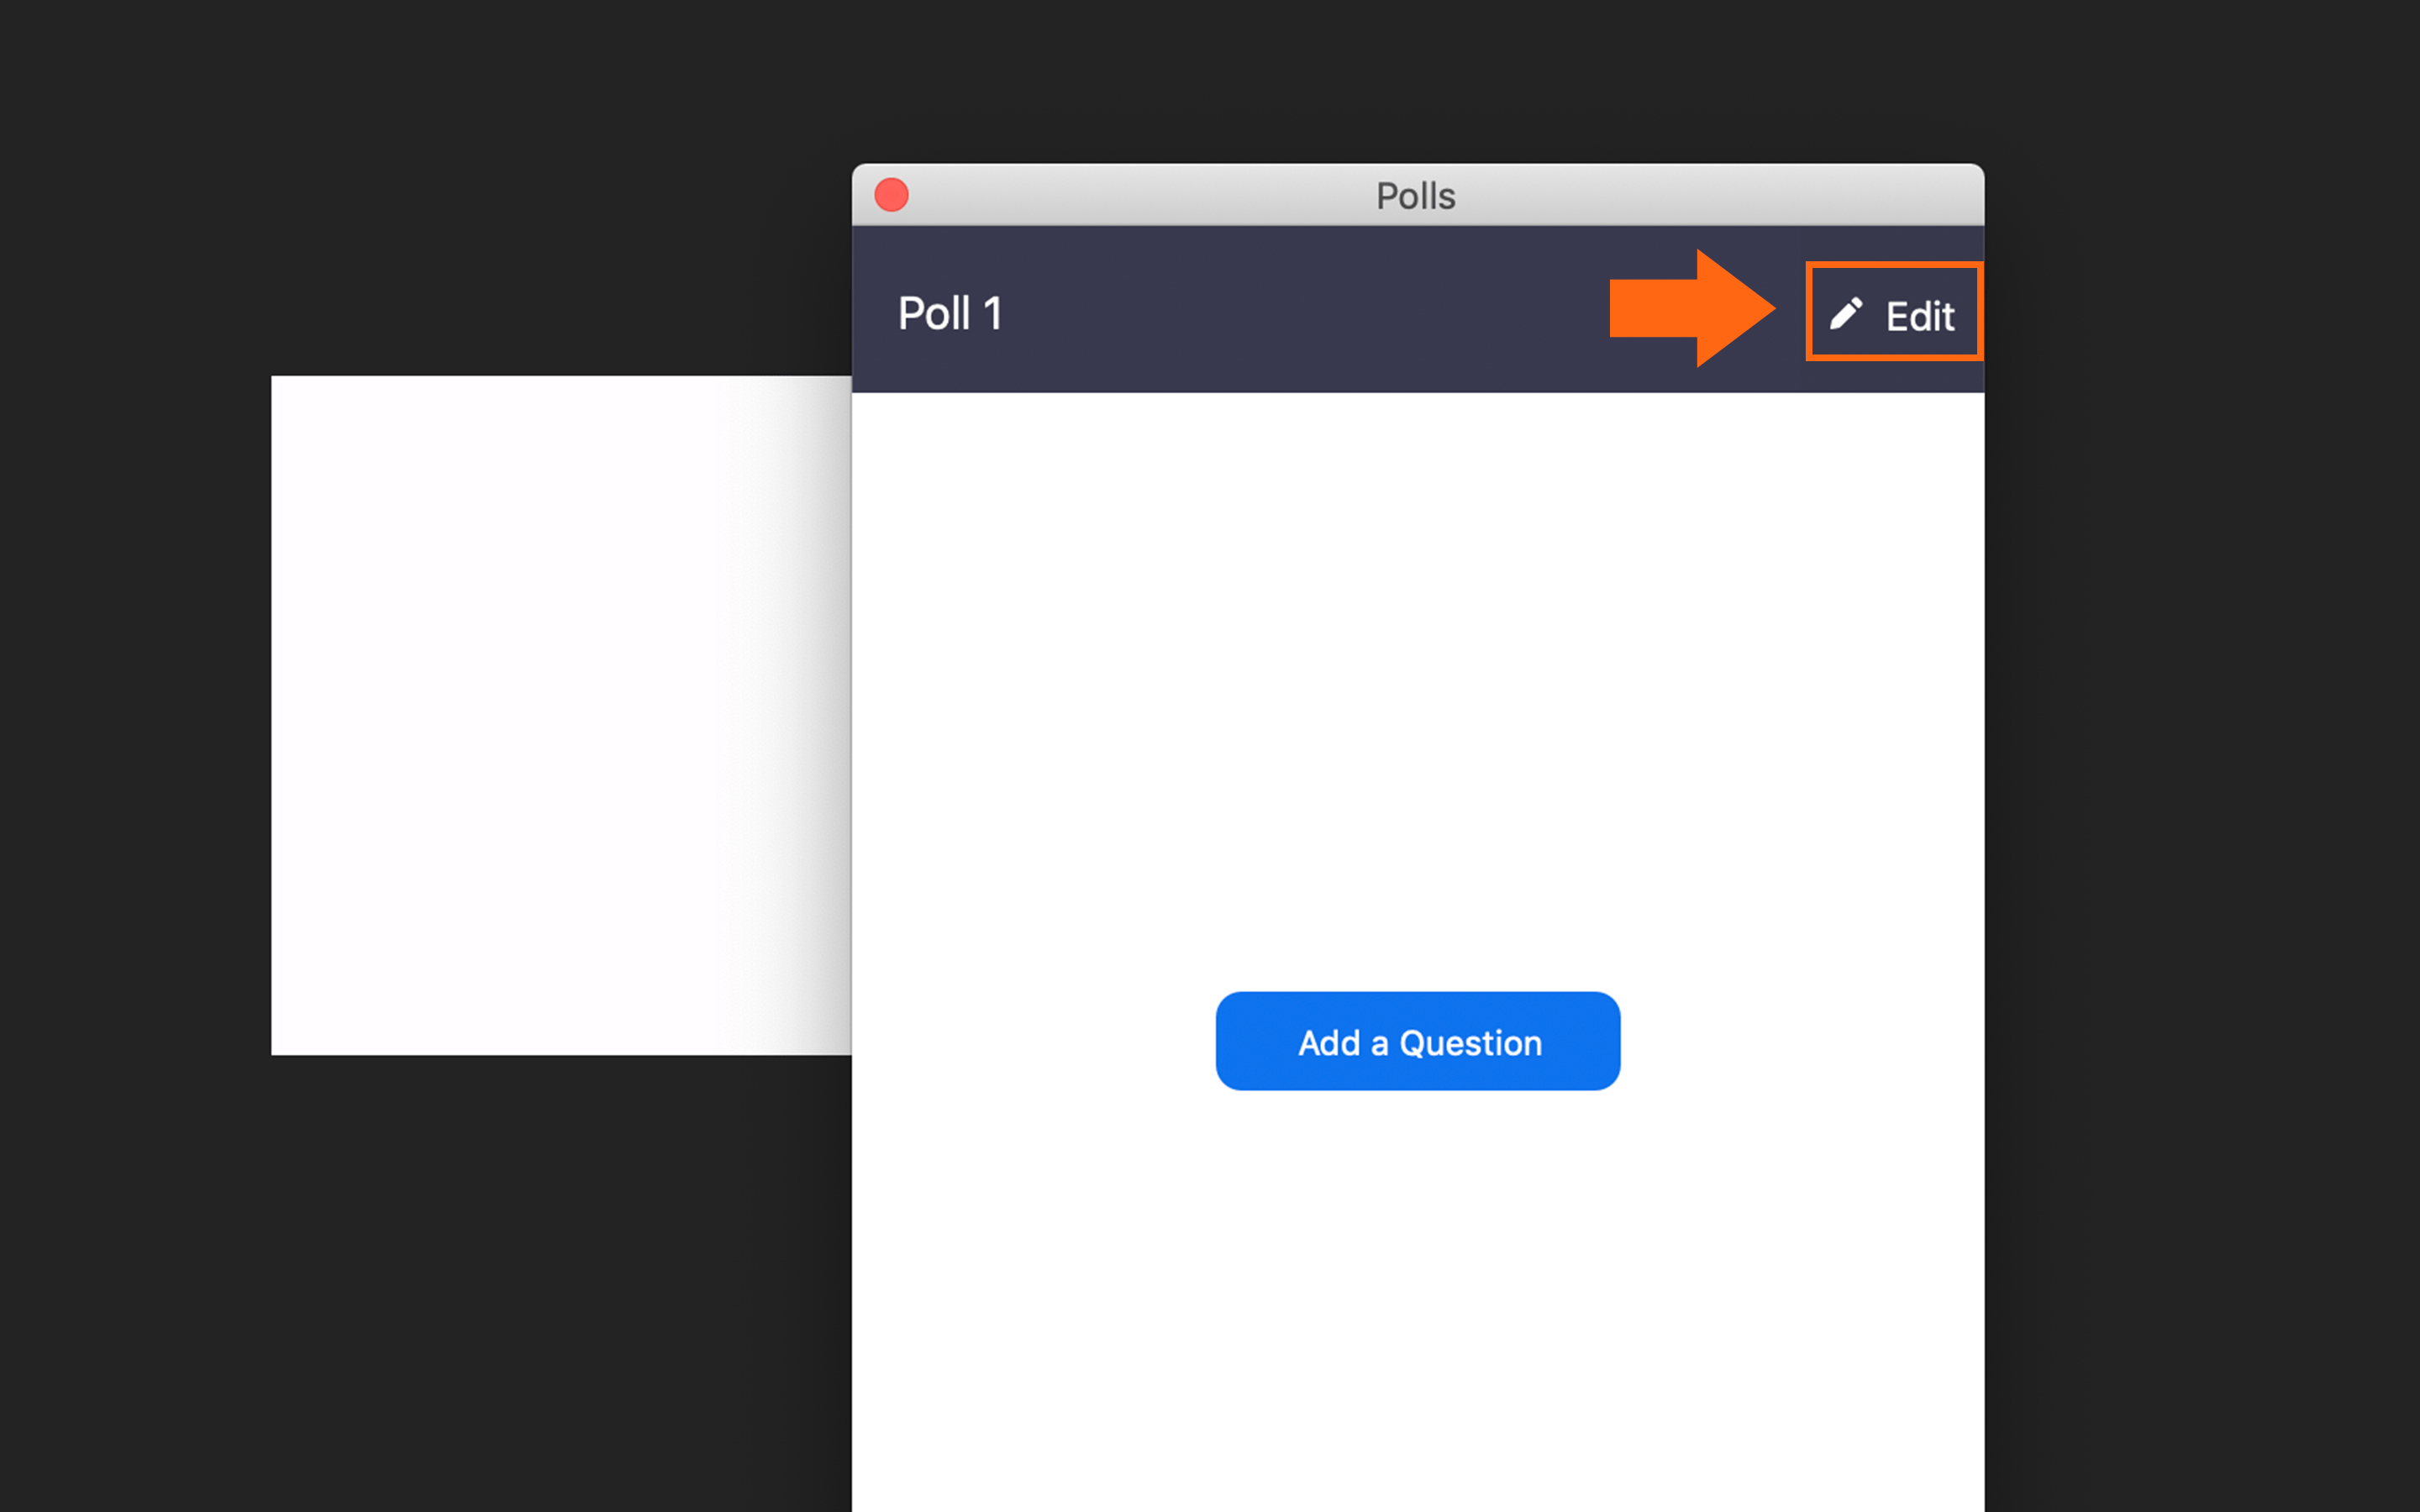
Accessing the Edit Meeting Polls Page
To access the Edit Meeting Polls page when you are in the Zoom application, click the 'Edit' button located on the top right corner of the polls window.
Launching Zoom Polls
Start the scheduled meeting if you have not done so. Make sure you are using the Zoom application.
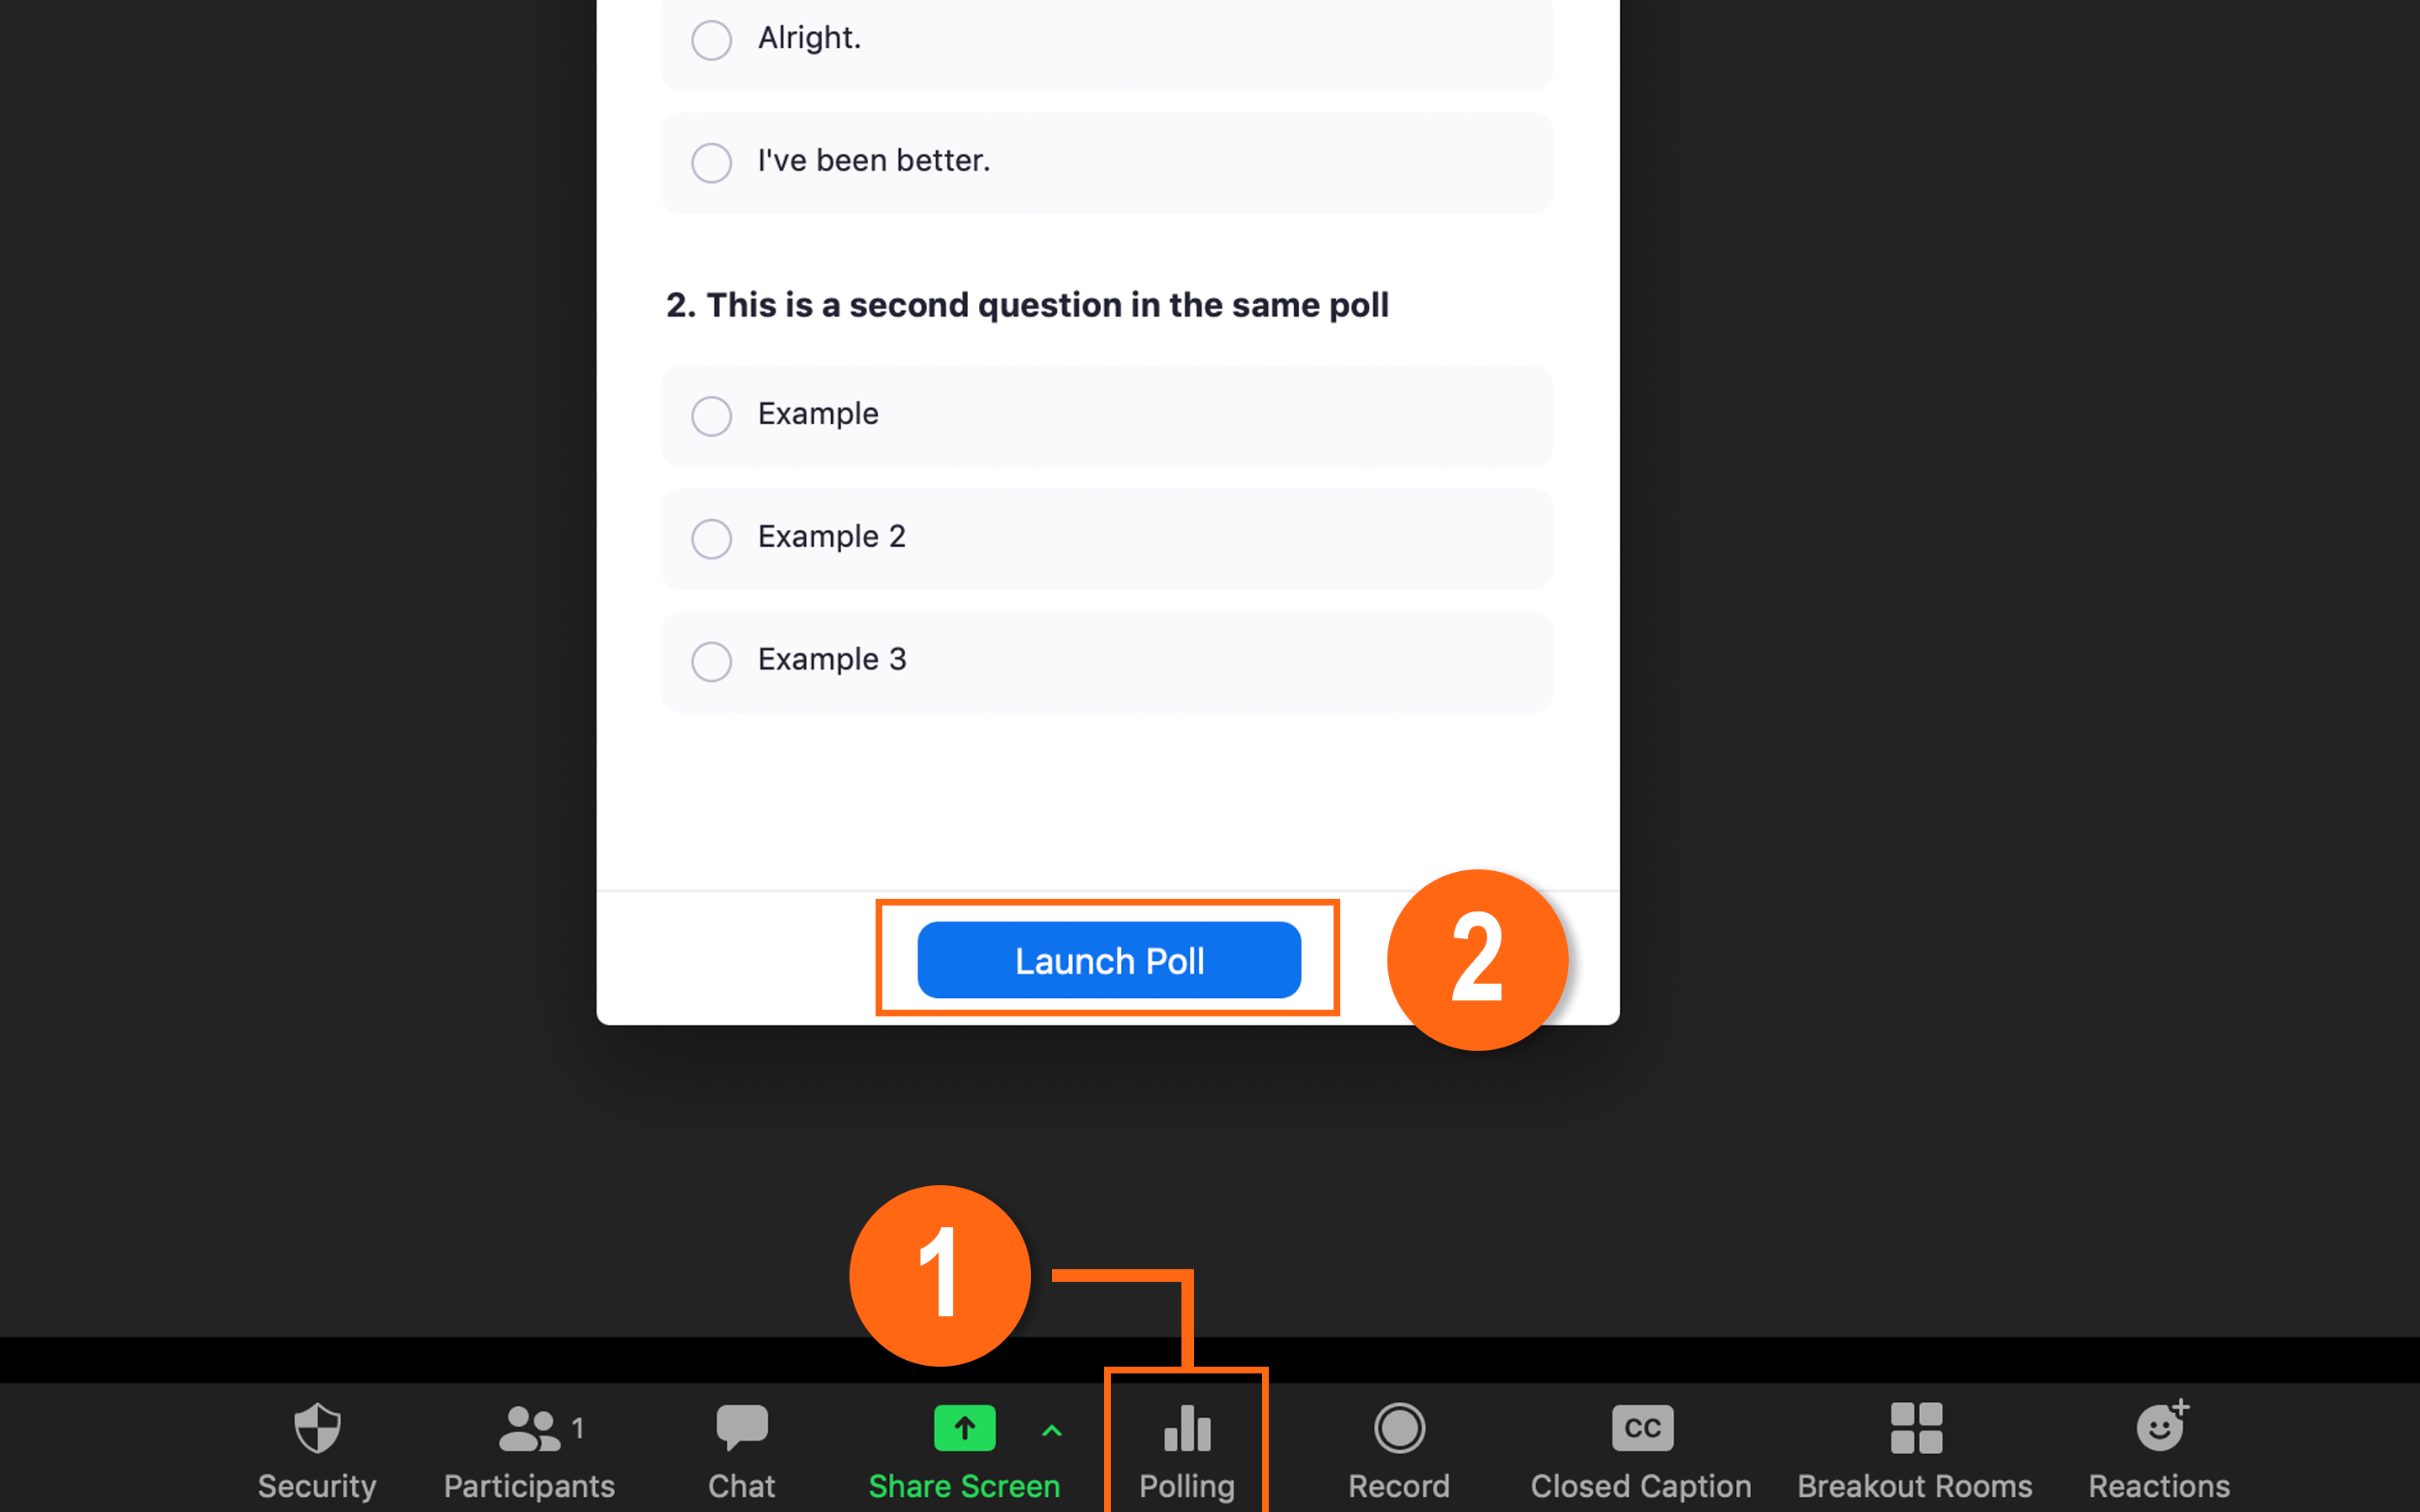
- On the bottom control bar of the Zoom application, click 'Polling.'
- Review the questions you have made. Click 'Launch Poll' when you are ready to start polling.
Your students in the meeting will now be prompted to answer the polling question(s). The host will be able to see the results live.
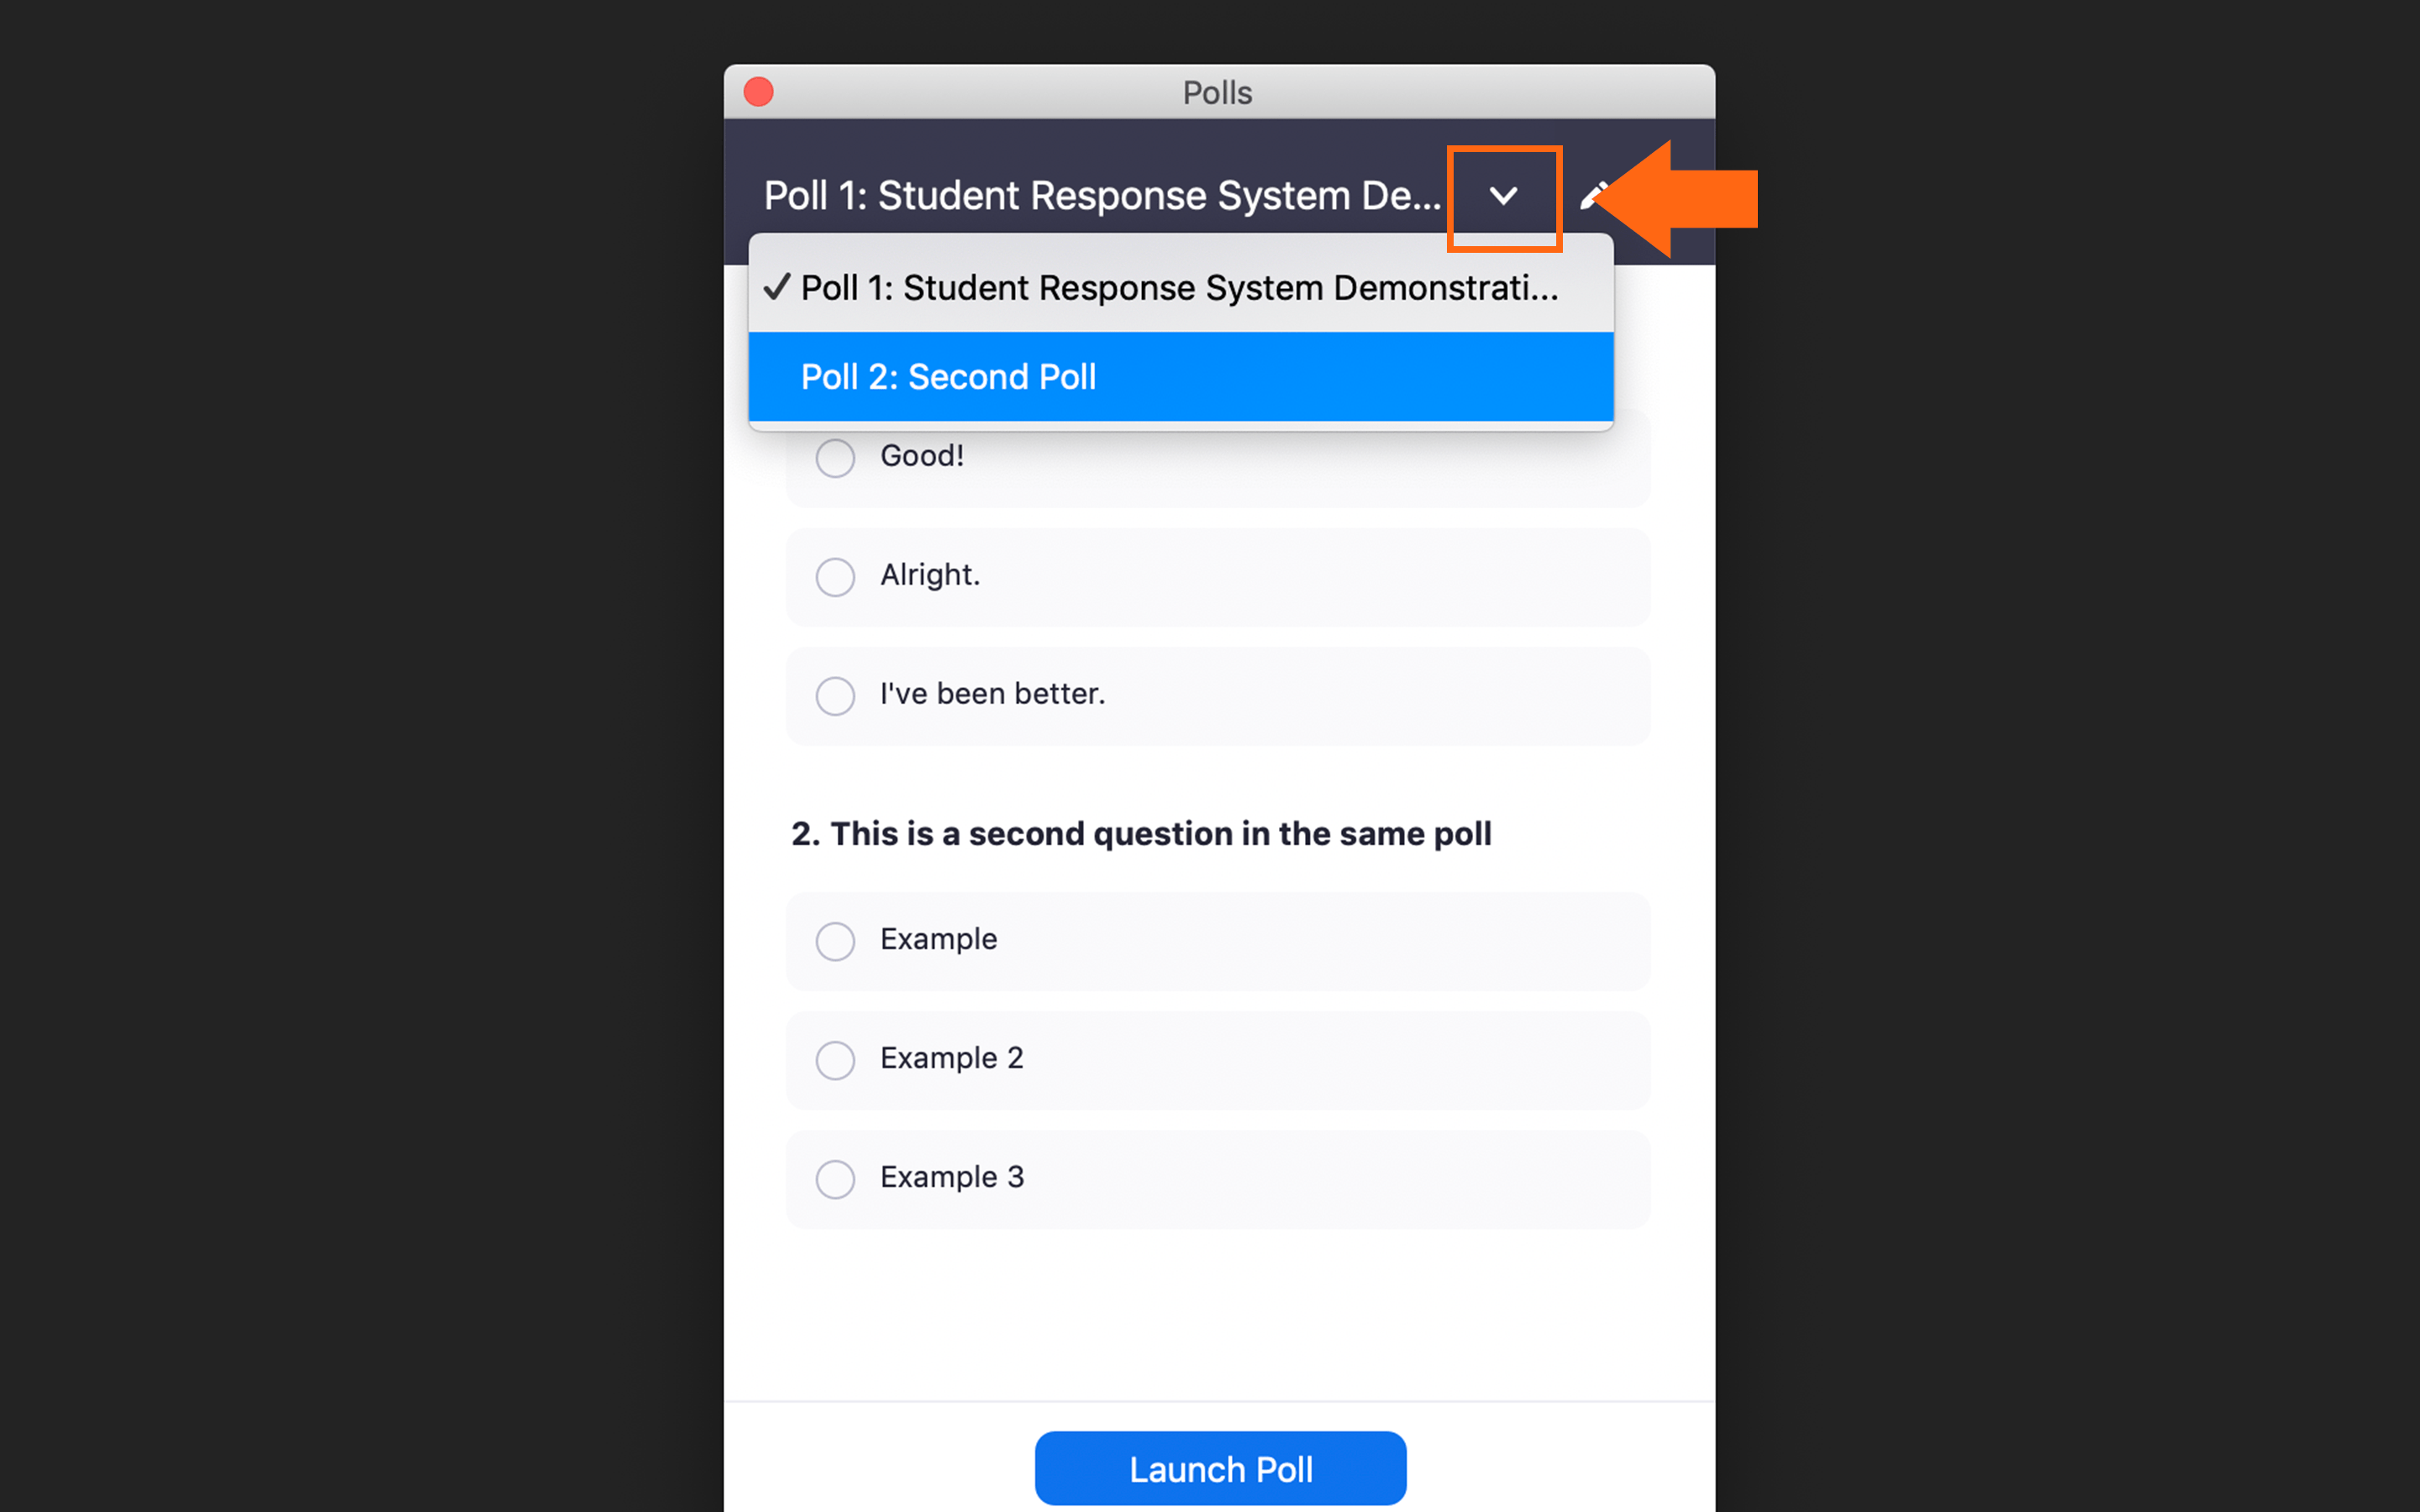
Switching between Zoom Polls
To switch between different polls that you have created and to launch different polls, click the down arrow located to the right of the title of the poll. From there, you can select which poll to launch.
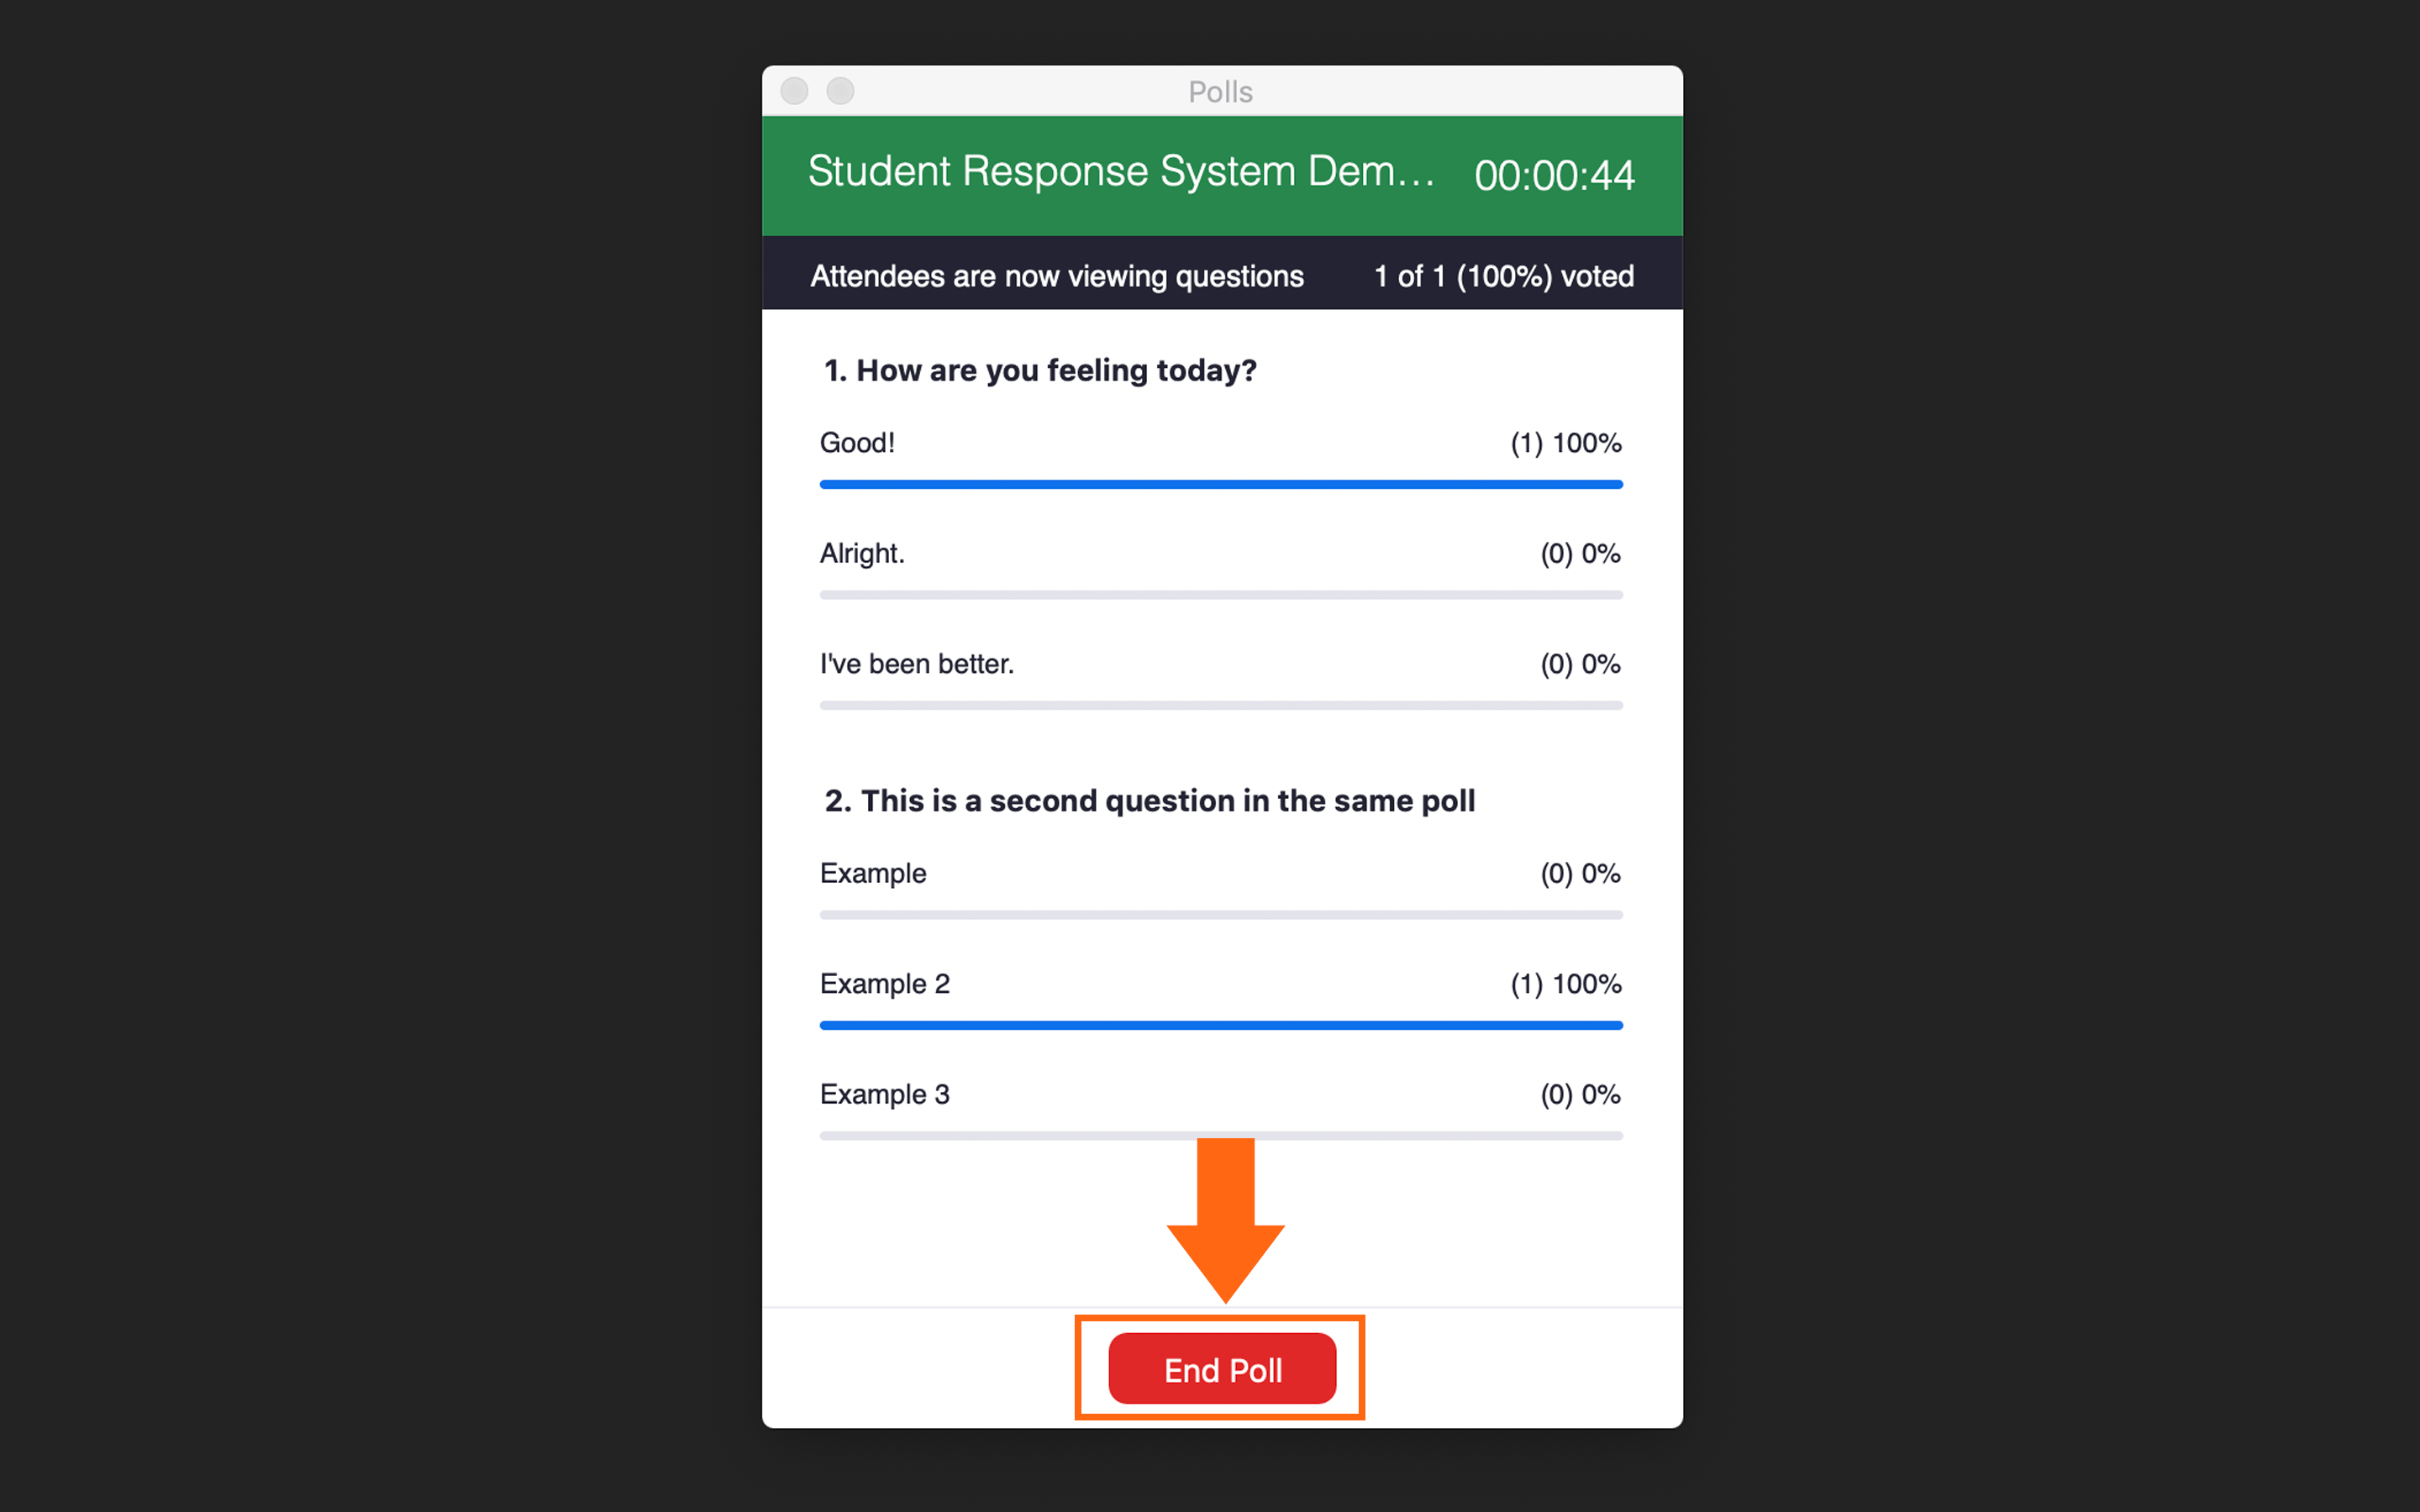
Ending Zoom Polls
To stop the poll click 'End Poll.'
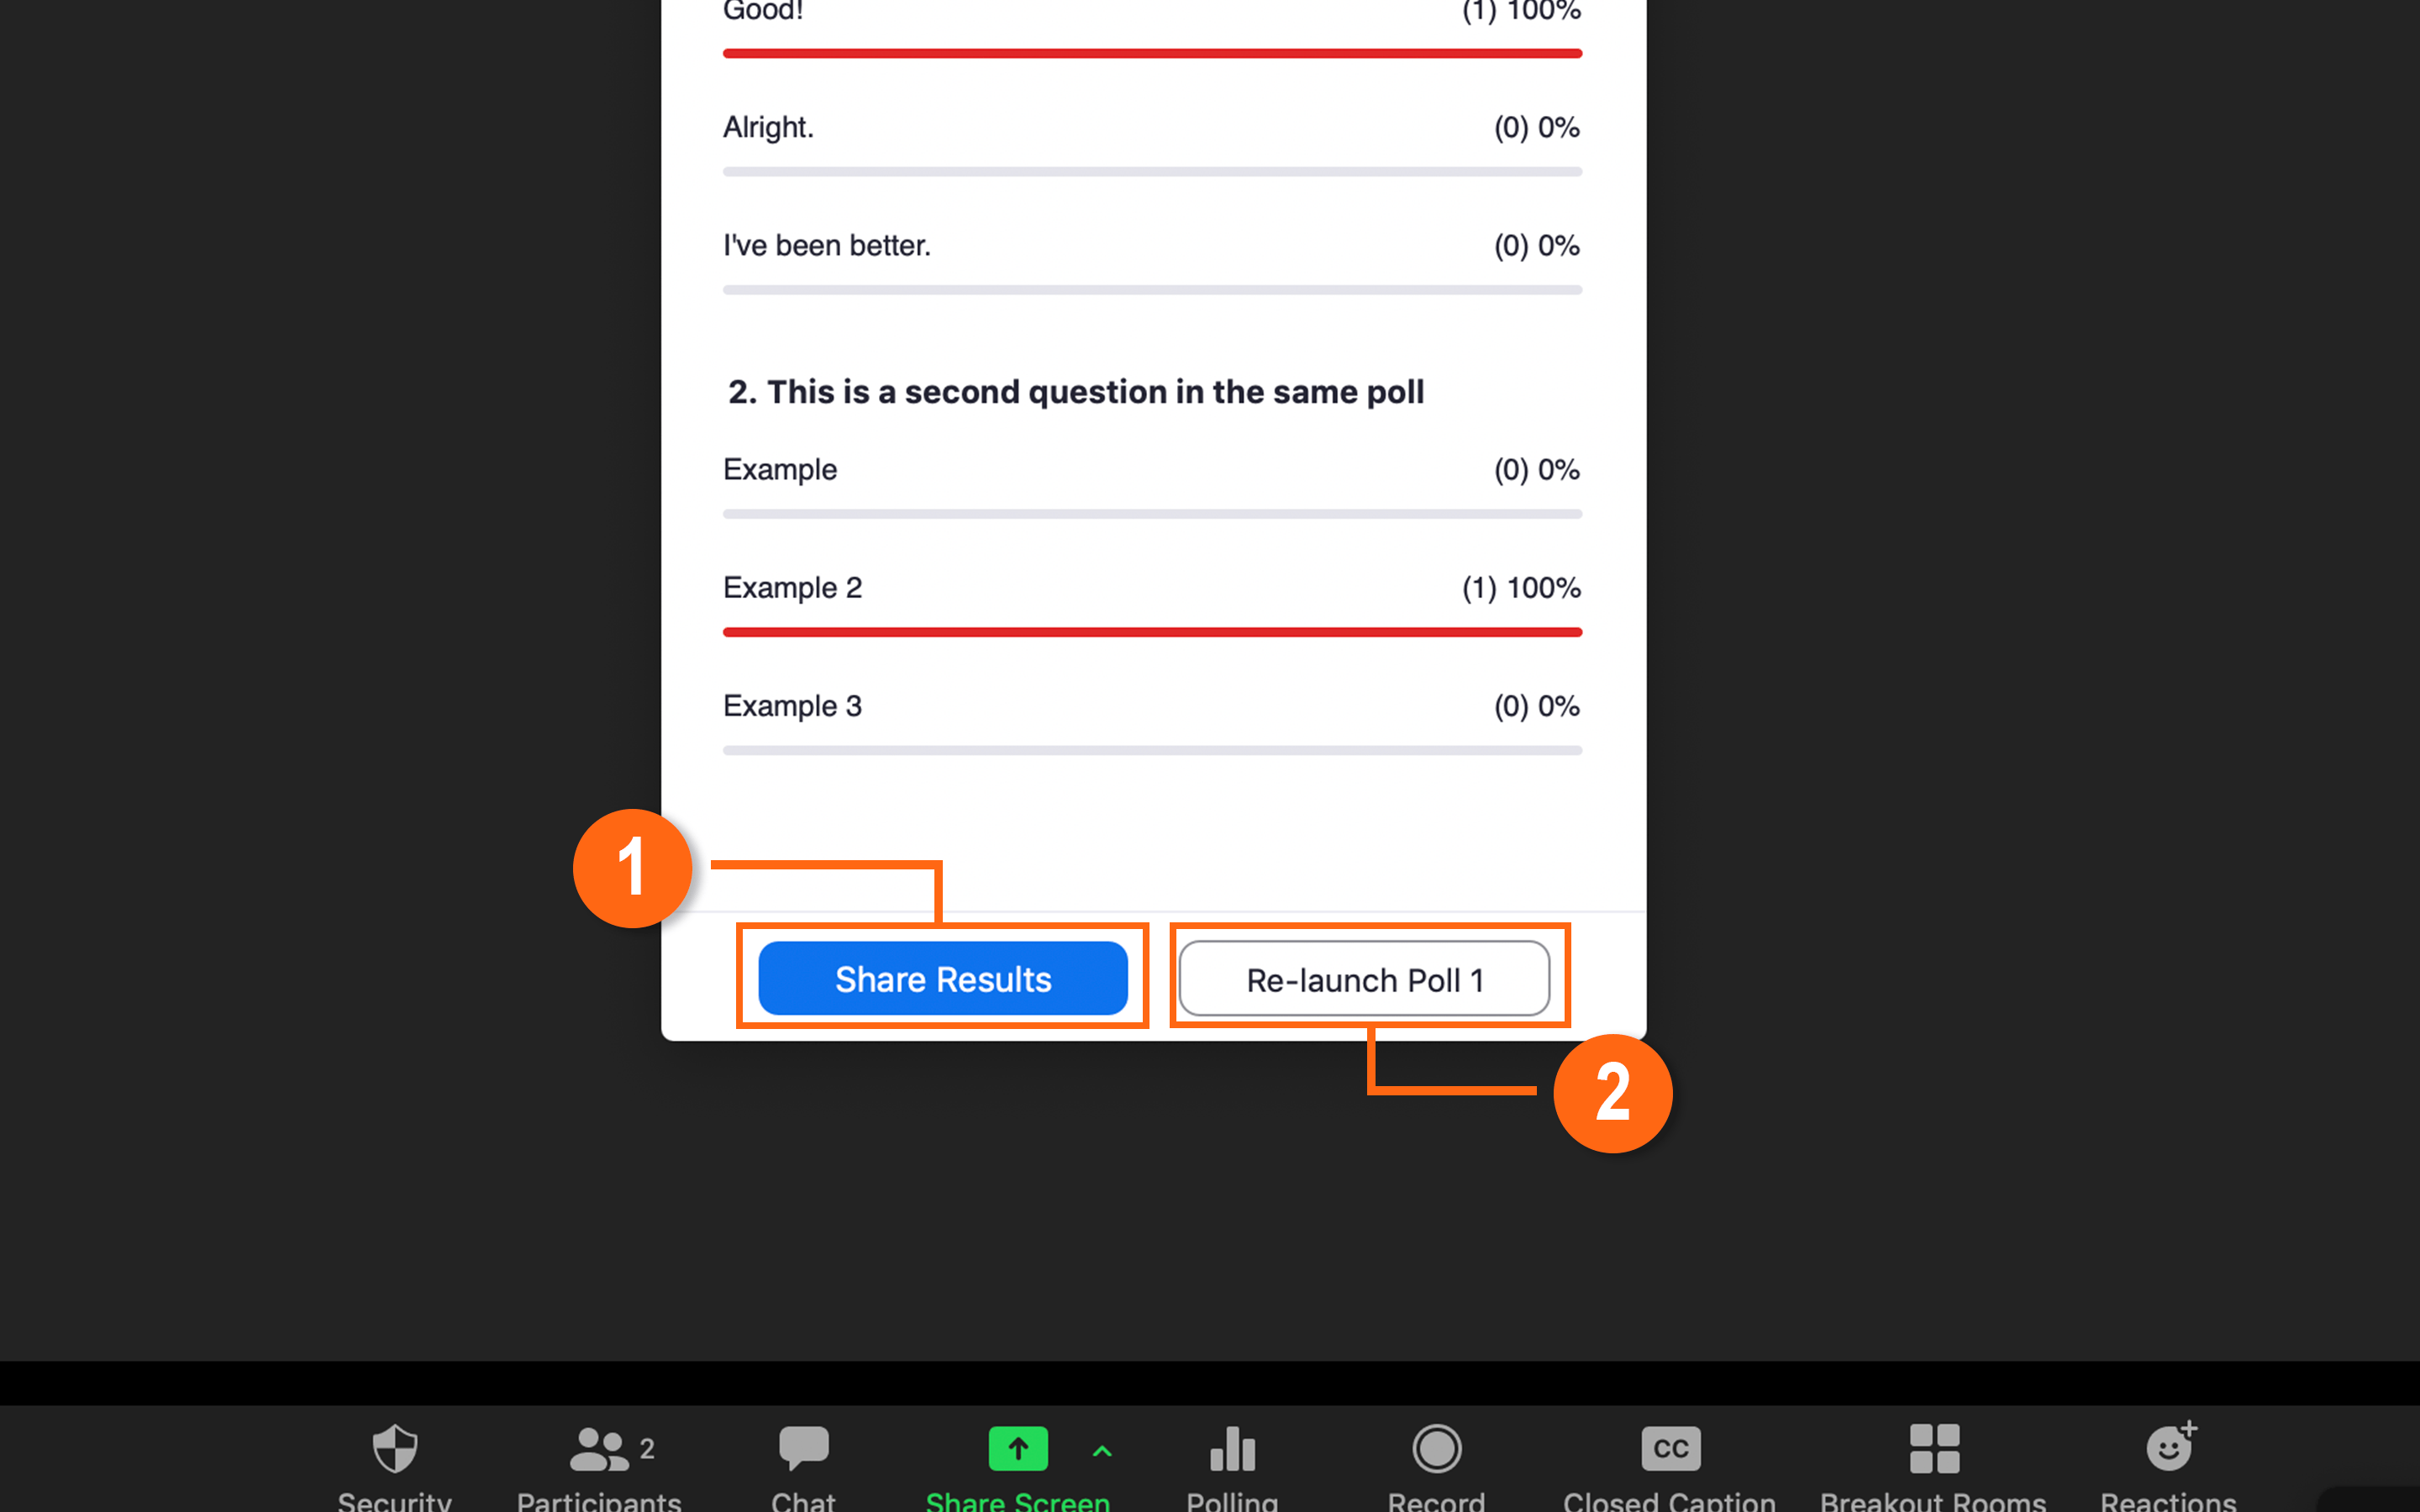
Sharing Results and Re-launching Polls
- To share the poll results to your students in the meeting, click 'Share Results.' Participants will then see the results of the polling questions until you click 'Stop Sharing.'
- You also have the option to re-launch a poll by clicking 'Re-launch Poll.'
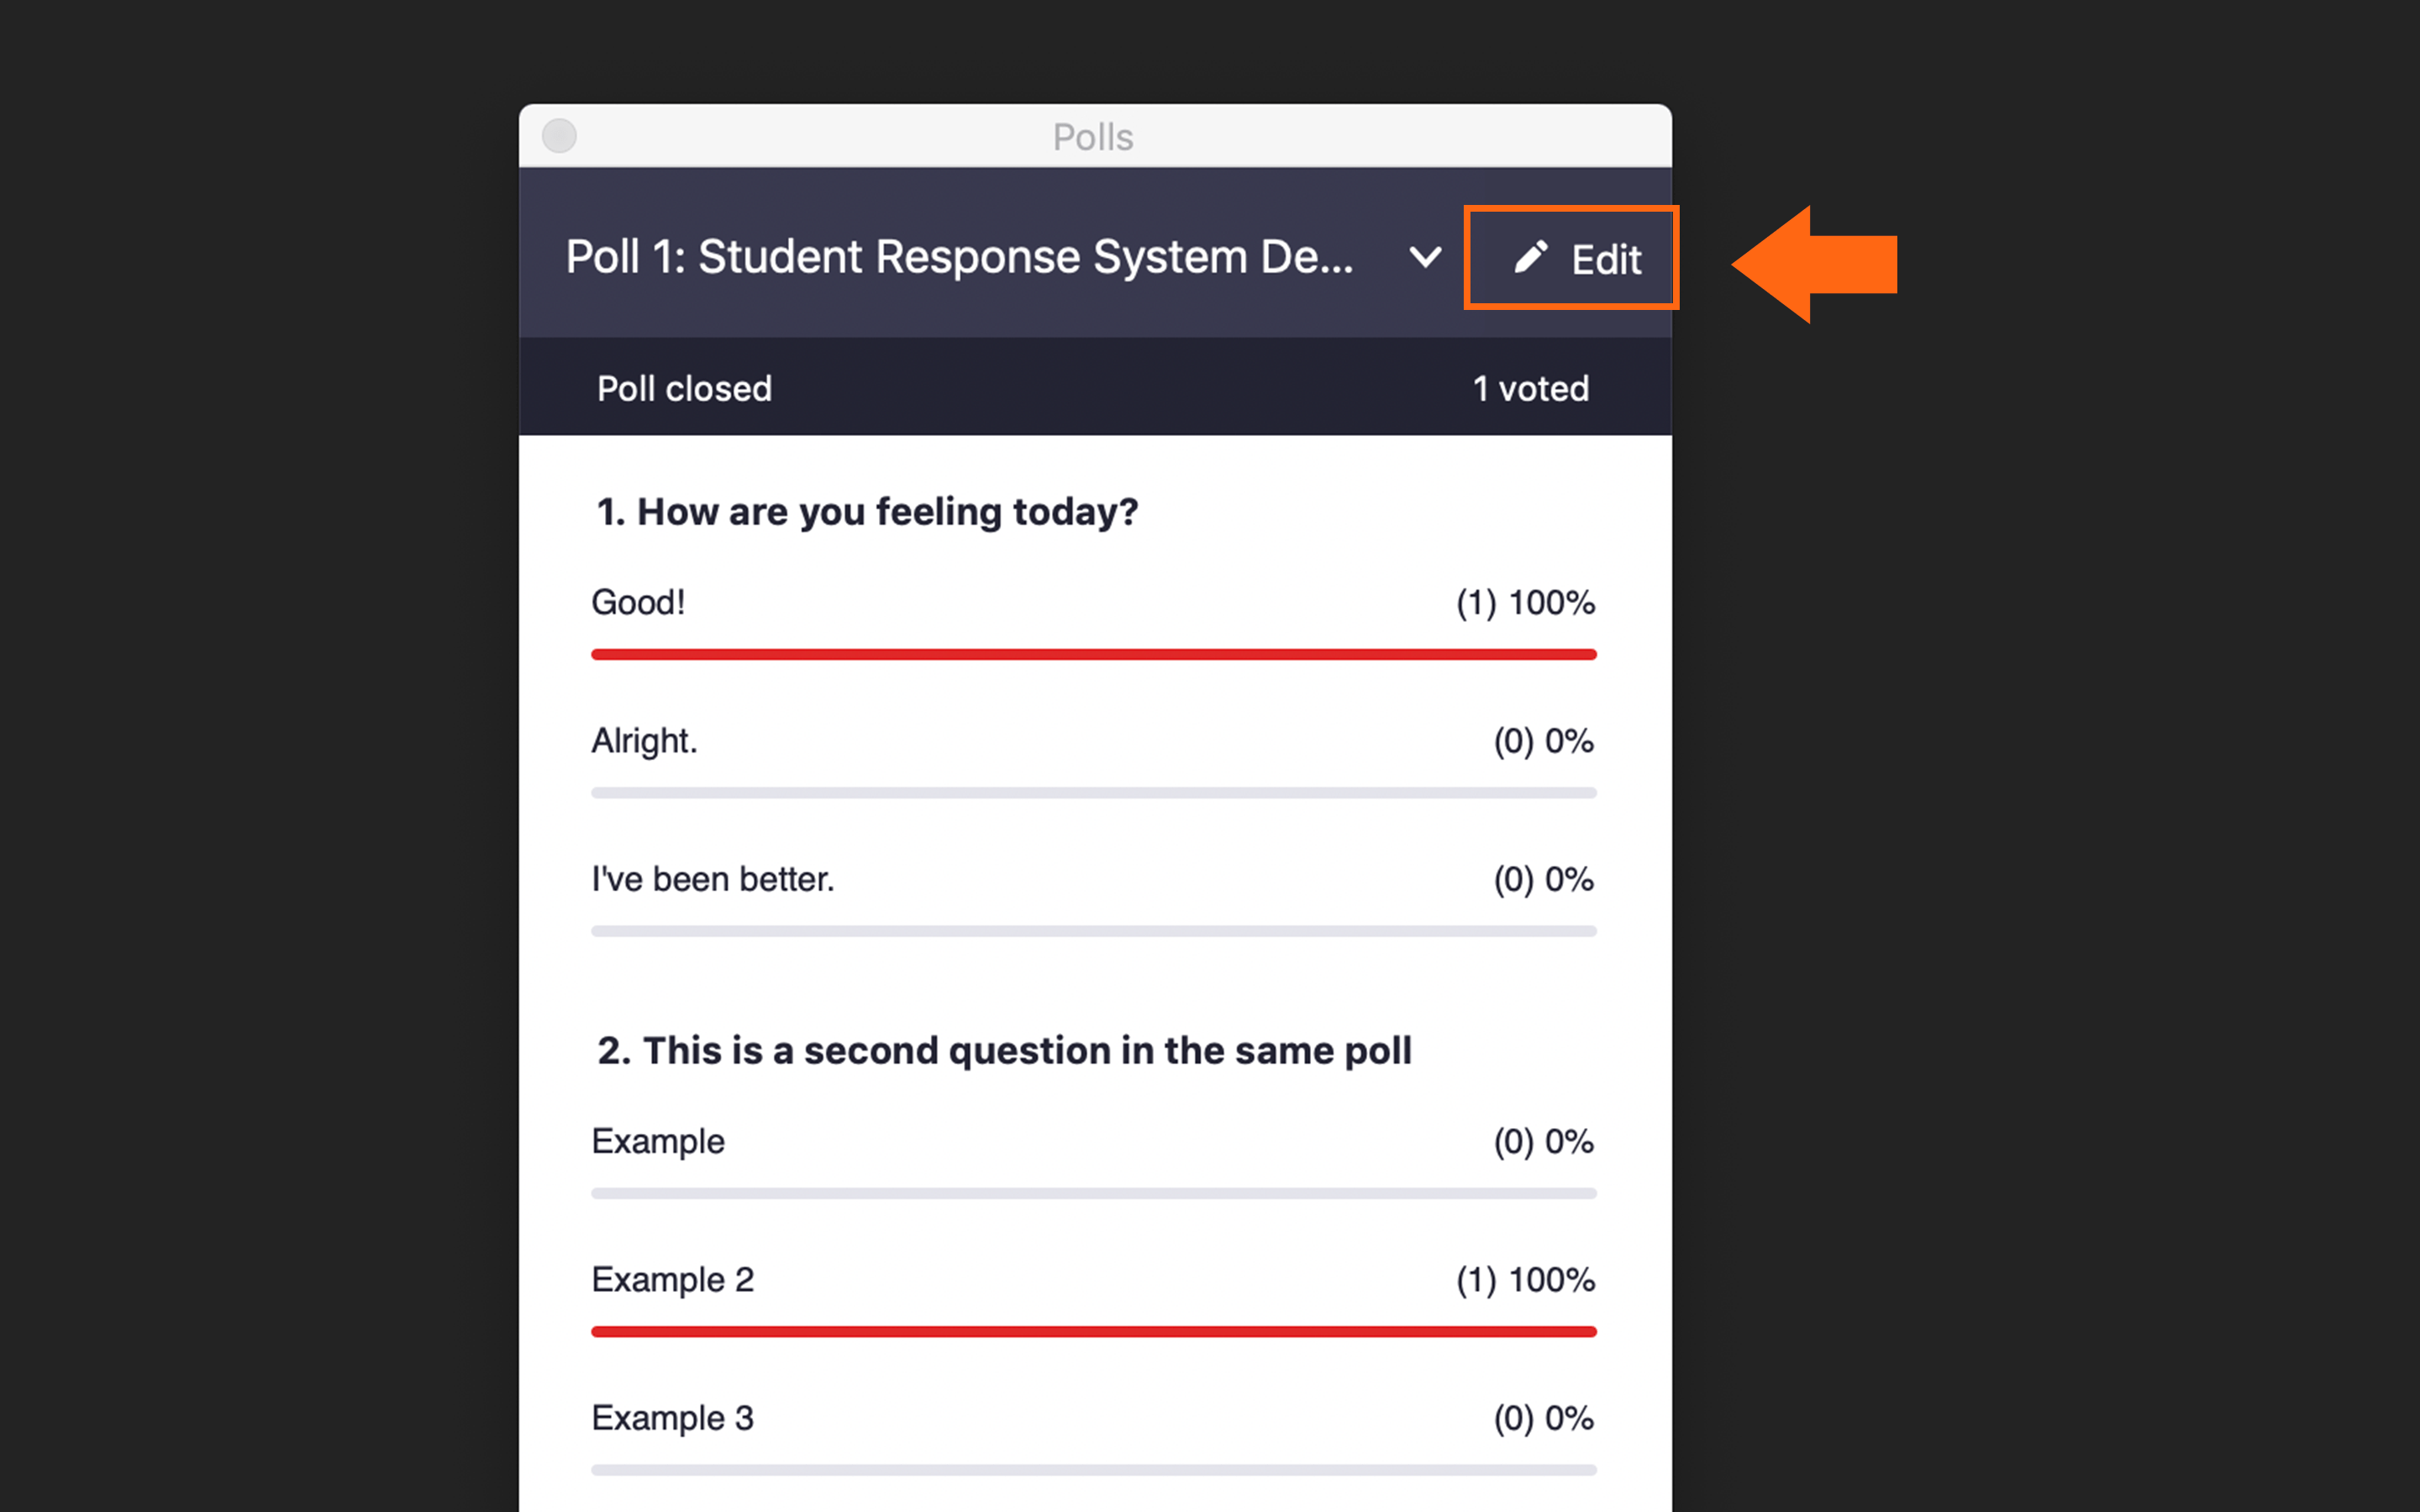
Editing Polls during Meetings
To edit or create new polls, click 'Edit' within the Polls window of the Zoom application.
This will open up your default web browser and display your meeting options. You can add new polls and edit existing polls as you initially have done.
Signing into Zoom
Visit torontomu.zoom.us (external link, opens in new window) and click on 'Sign in.'
Generating the Report
To generate your polling report:
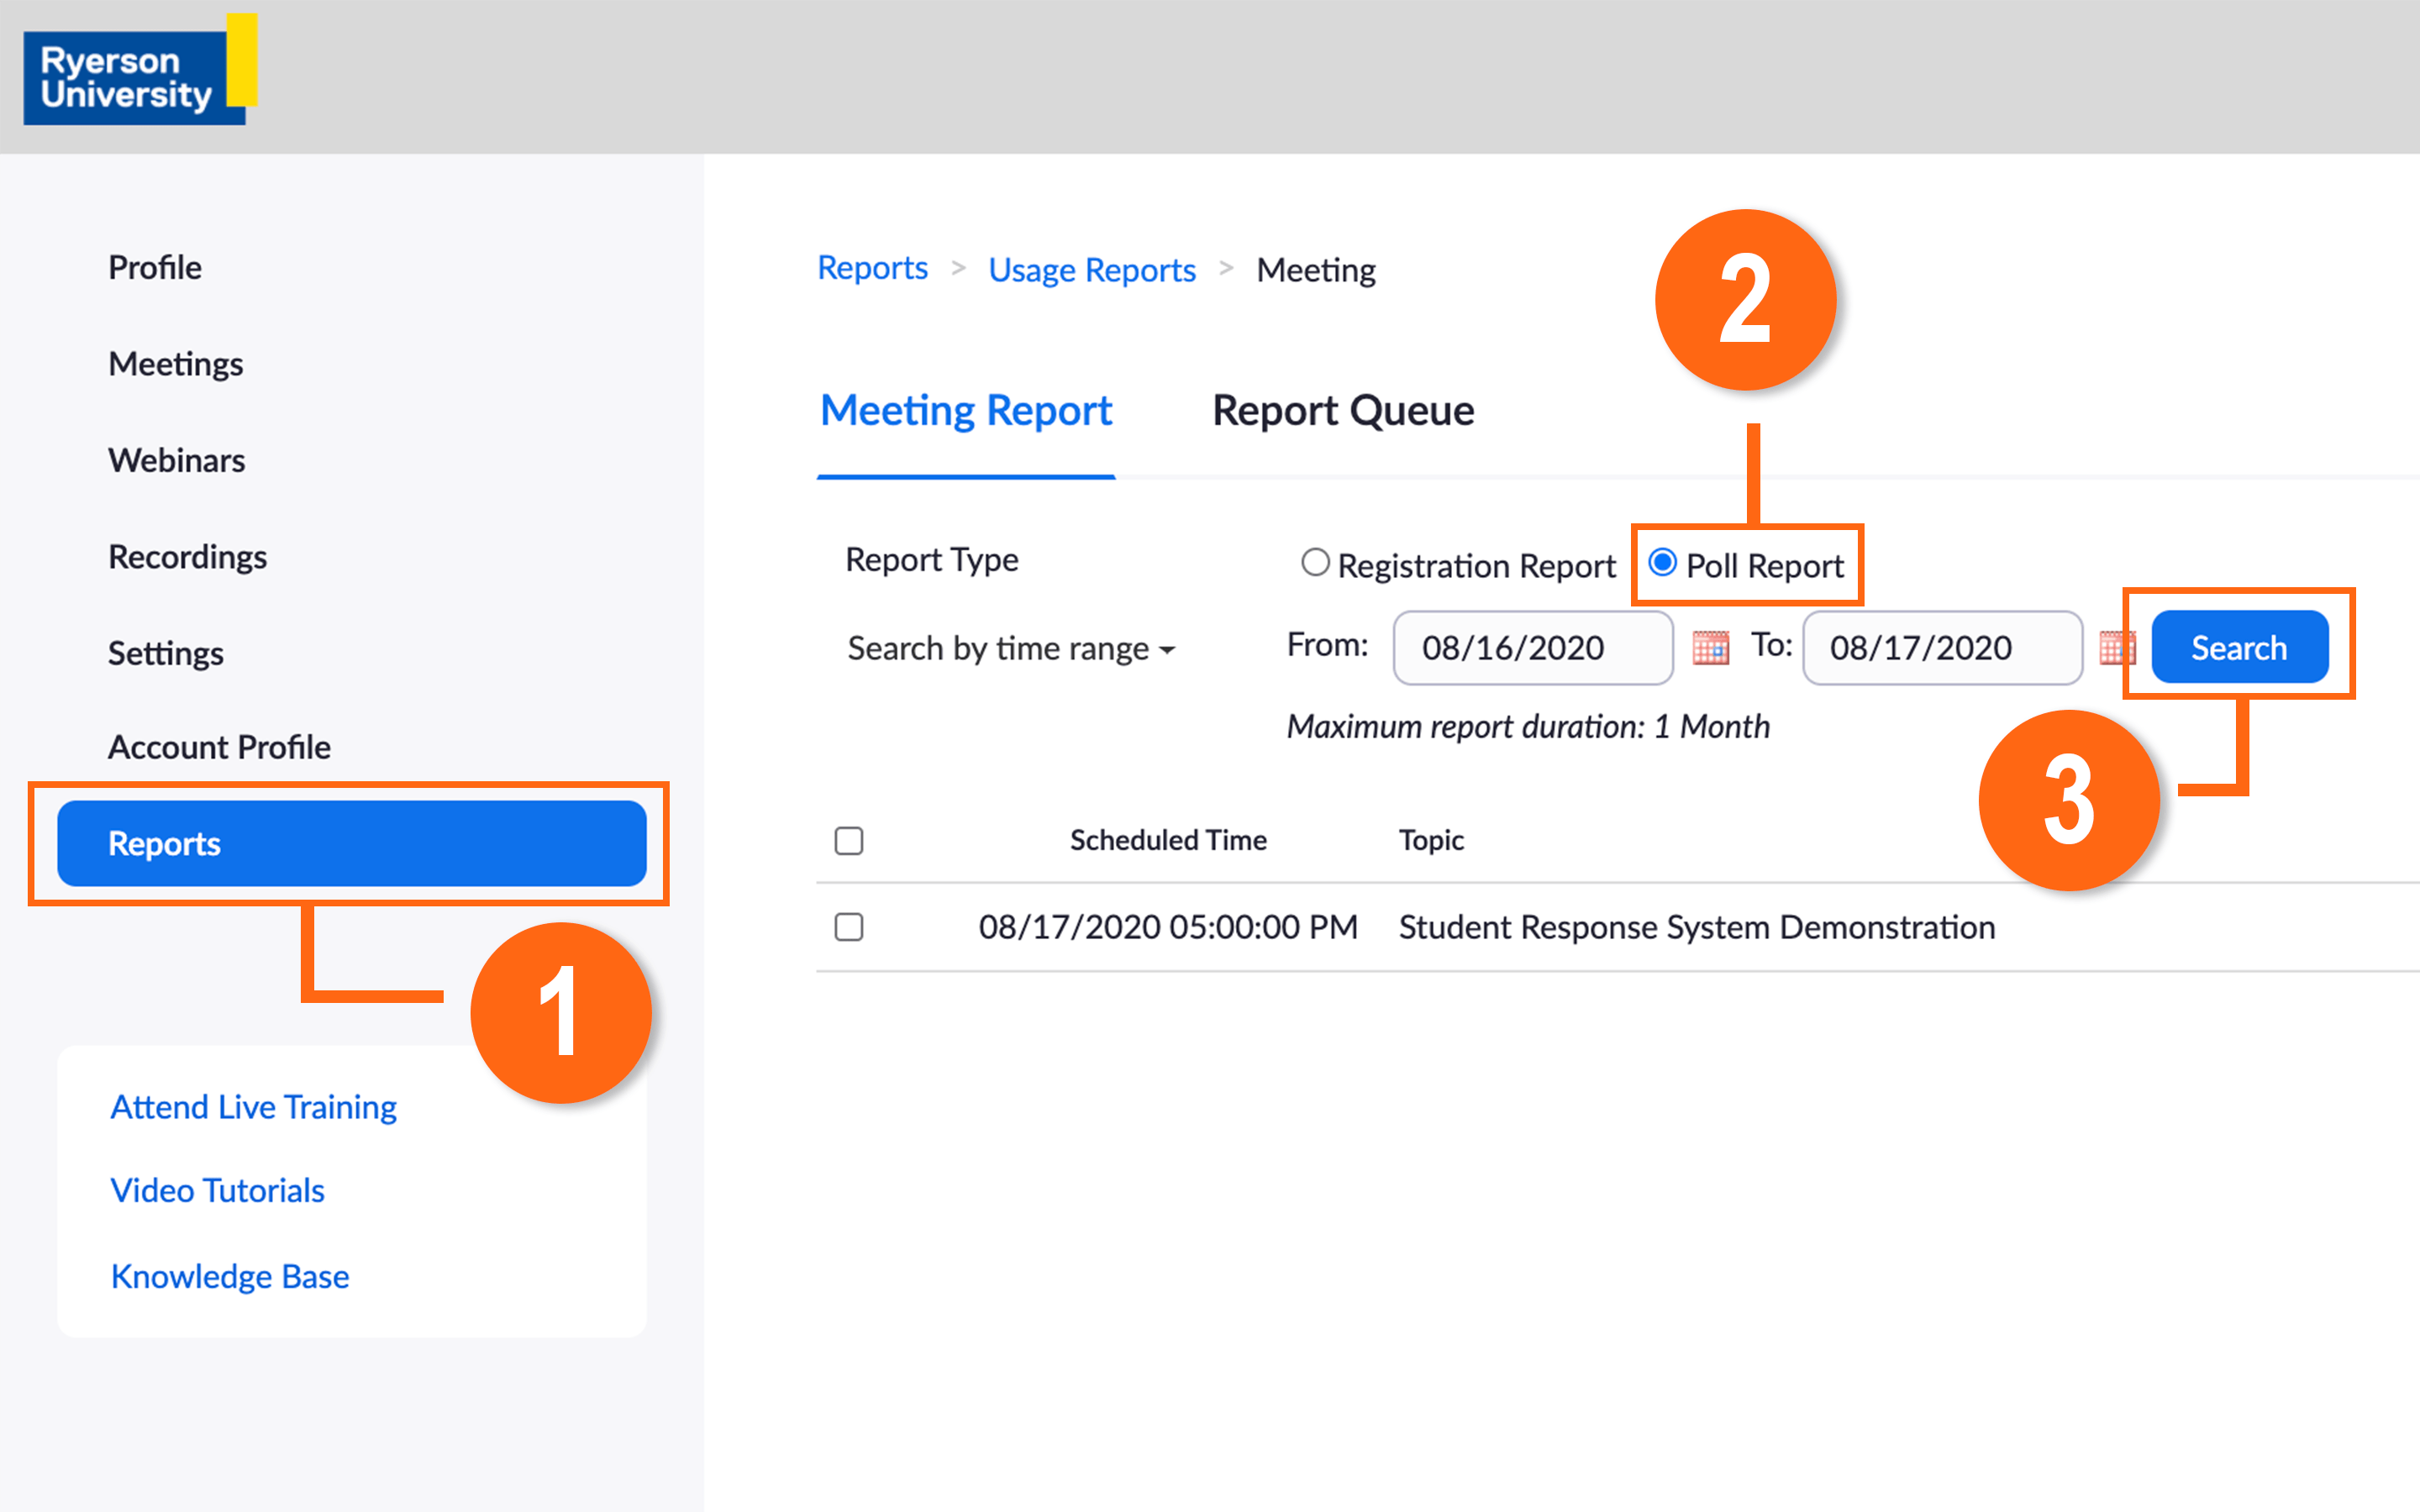
- Click 'Reports' on the left hand side.
- Select 'Poll Report.'
- Make sure that you are searching within a wide time frame if you are accessing your results several days after your meeting. Click 'Search.'
- Once the page reloads, click 'Generate' beside the poll that you would like to view the results from.
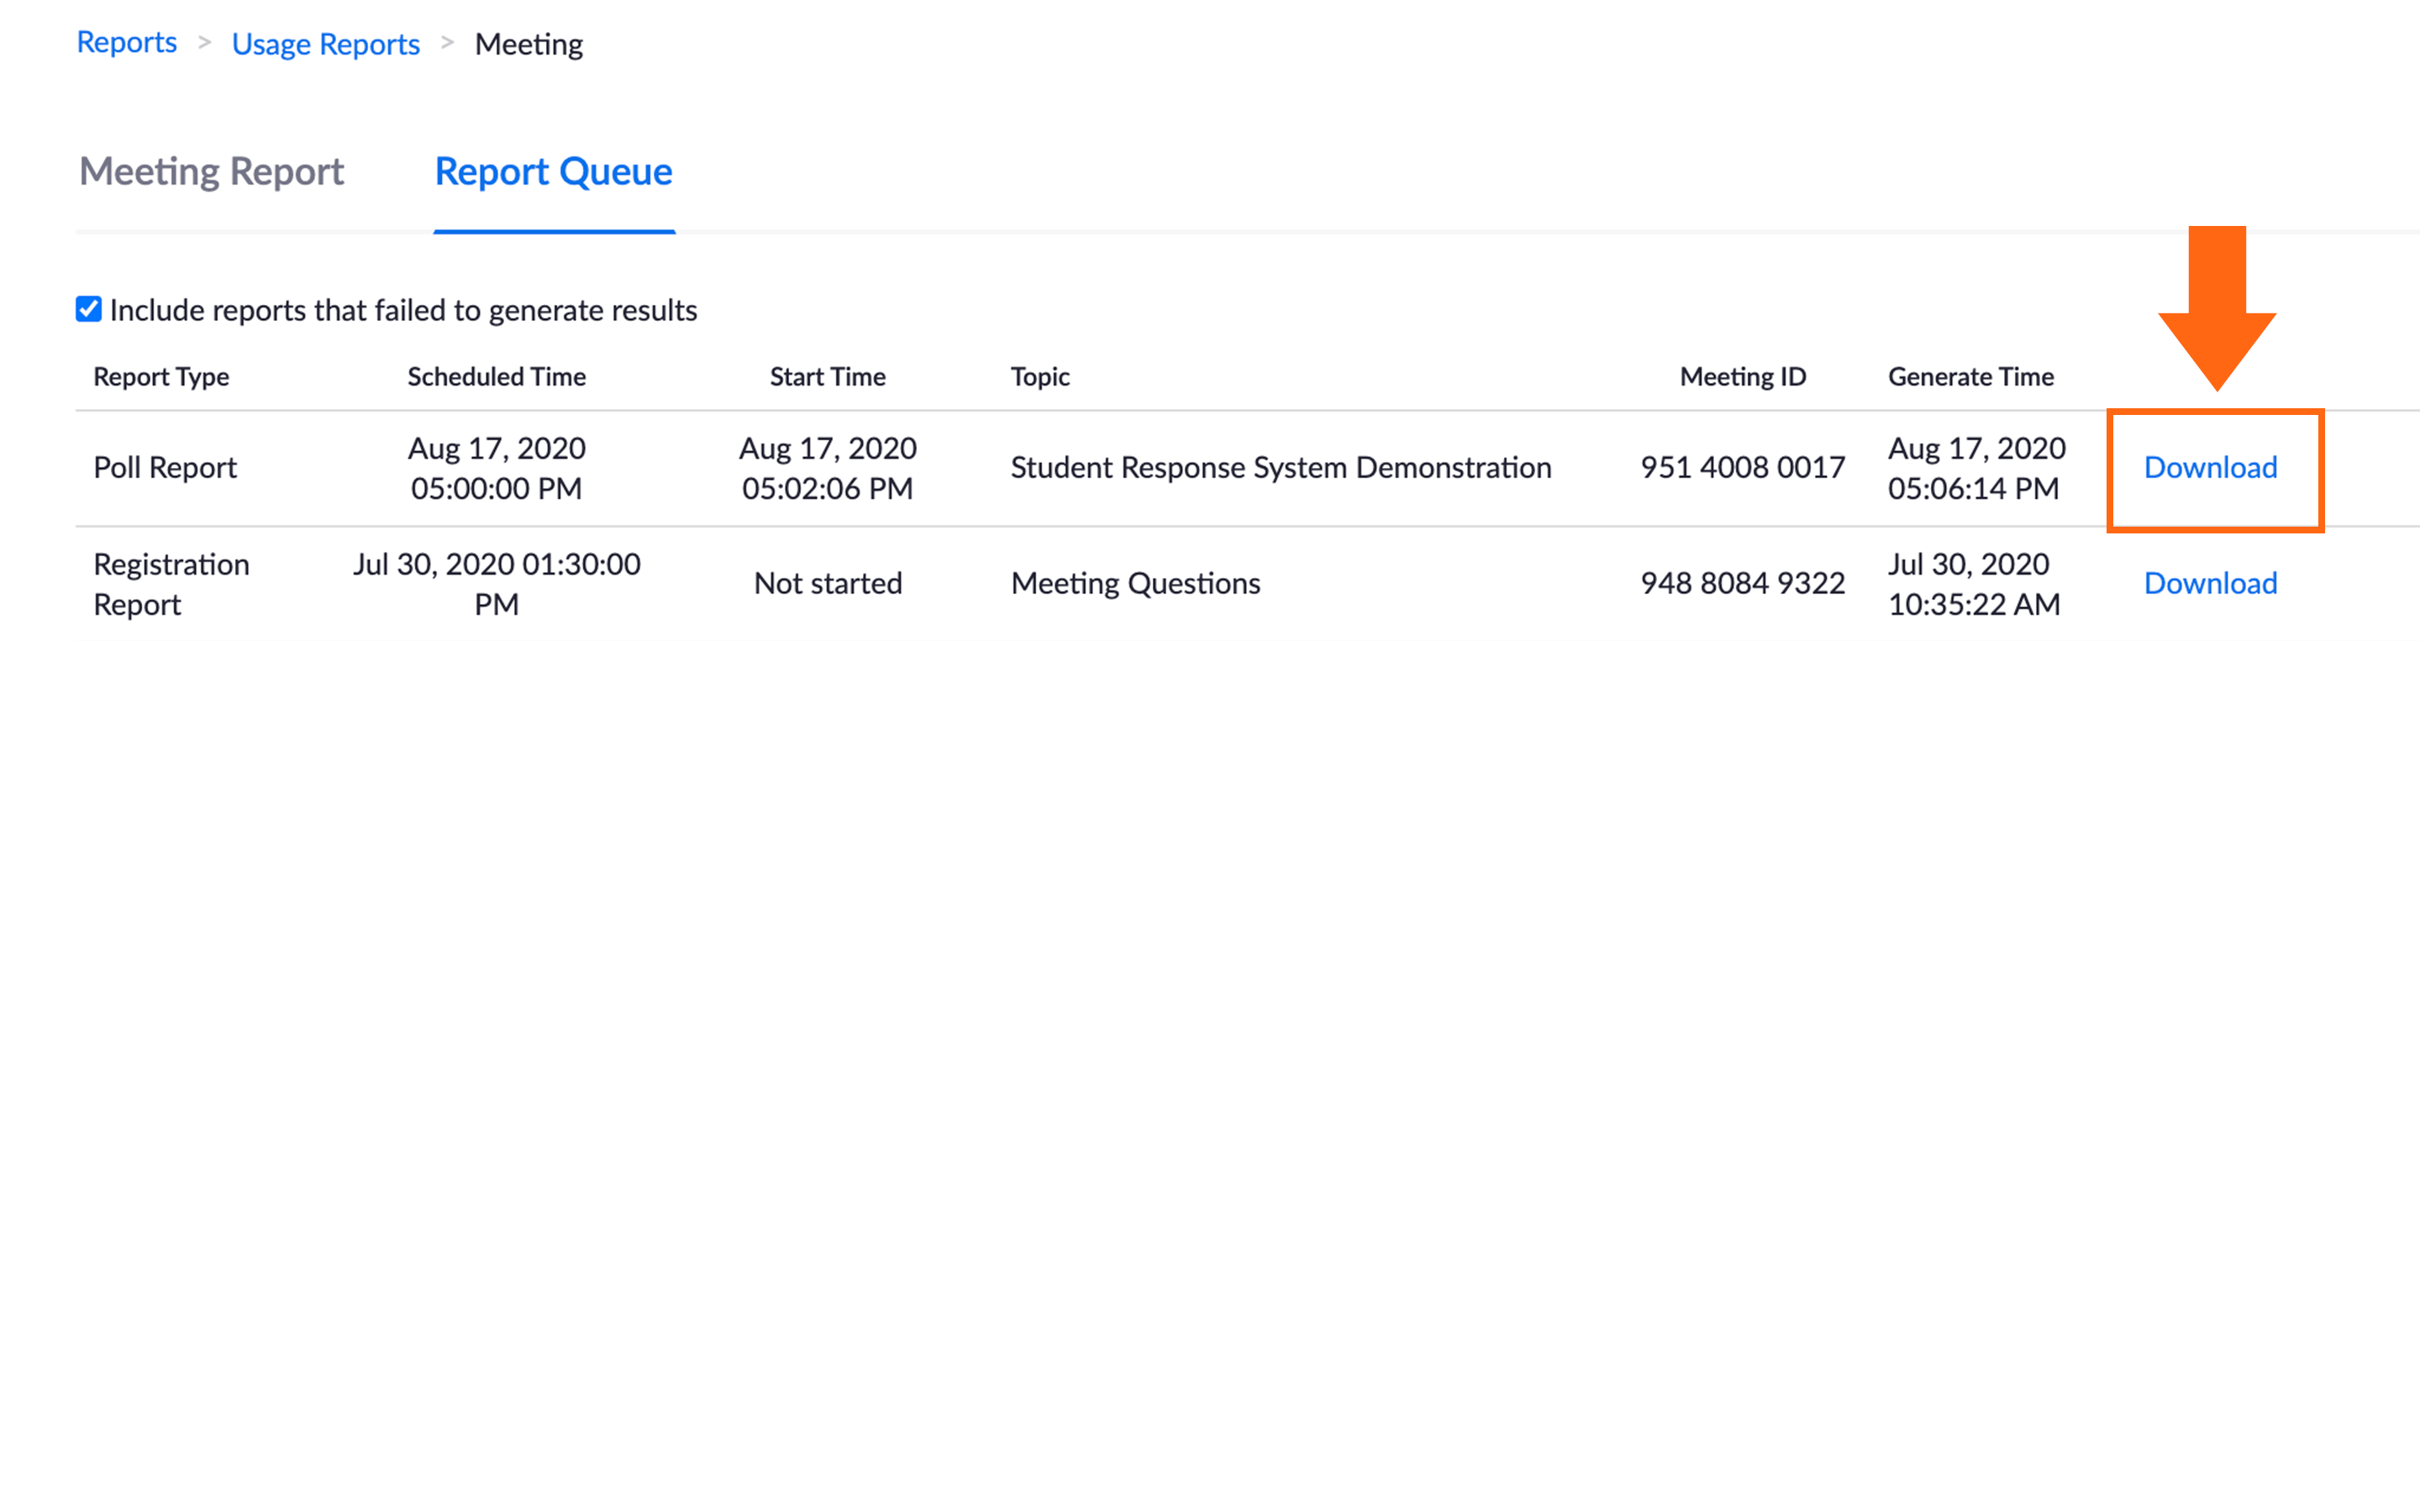
Downloading the Report
Once the report has generated, click the 'Download' button beside the corresponding meeting to download the polling report. A CSV file will be downloaded.