Biosafety
Biological organisms are used across Toronto Metropolitan University for both research and teaching applications. This includes microorganisms such as bacteria, viruses, funguses, cells, tissues, human or animal blood, or body fluids that have the potential to cause infection and contaminate the environment.
TMU’s Biosafety Program, under the authority of the Institutional Biosafety Committee and administered by the Environmental Health and Safety (EHS) office, is designed to protect students, faculty, staff and visitors from potential exposure to infectious materials, and to prevent the release of these materials into the environment. The (google doc) Biosafety Program Manual (external link) outlines the requirements and procedures established by the university for working with potentially hazardous biological agents.
Legislation
The Biosafety Program is in compliance by law with the Occupational Health and Safety Act (external link) (OHSA), Human Pathogens and Toxins Act and Regulation (external link) , as well as with applicable federal regulations regarding biohazardous materials and provisions enforced by the Canadian Food Inspection Agency (external link) (CFIA). It is also based in accordance with the university’s policy on Research using Biohazardous Materials.
Getting started
Applying for a permit
All biohazardous work conducted by university members on university property or under the control of the university requires a biosafety permit. Federal research funding agencies require a biosafety permit to be issued by an institution prior to funds being released.
Researchers and lab managers requiring a new permit should log into the EHS permit portal to complete a biosafety permit registration. All renewals/amendments should also be completed through the permit portal. When new biohazardous materials, infectious materials or toxins are added to any facility, a (google doc) local risk assessment (external link) must be conducted to examine the tasks involving the agents so that exposure risks are identified and mitigated. These local risk assessments and any required accompanying standard operating procedures will be reviewed by the Biosafety Officer and Institutional Biosafety Committee before permit approvals/amendments are granted.
For more information, please view the (google doc) biosafety local risk assessment review procedure (external link) .
Setting up your lab
When setting up a new lab, the Public Health Agency of Canada (external link) (PHAC)’s Canadian Biosafety Standards (CBS) (external link) must be followed. PHAC also provides guidance through the Canadian Biosafety Handbook (external link) . Please contact the biosafety officer at ehs@torontomu.ca or 416-979-5000, ext. 554212 for support in setting up your lab.
Resource checklists
- (google doc) Facility requirements for Containment Level 1 (CL1) laboratories checklist (external link)
- (google doc) Facility requirements for Containment Level 2 (CL2) laboratories checklist (external link)
Training
Training is a key component of the Biosafety Program and is mandatory for all students, faculty and staff prior to accessing a biosafety lab and/or handling infectious materials. The table below lists the training required depending on your scope of work.
For course instructors, EHS has the ability to enroll your class list into any of the training modules below.
| Scope of work | Training required | How to receive the training |
|---|---|---|
For individuals working in a Containment Level 1 (CL1) lab. For those either entering and/or working in biosafety labs, but who will not be handling any pathogens or infectious materials. |
Biosafety Awareness Training | Training is available online through D2L. To sign up for training, follow the D2L eLearning enrollment instructions. Once your online training is complete, you will be provided with a certificate that should be emailed to your supervisor. |
For users in biosafety labs who will be handling infectious materials. For individuals working in a Containment Level 2 (CL2) lab. |
Full Biosafety Training | Training is available online through D2L. To sign up for training, follow the D2L eLearning enrollment instructions. Once your online training is complete, you will be provided with a certificate that should be emailed to your supervisor. |
| For staff who are responsible for regular waste collection or caretaking staff. | Biohazardous Waste Awareness for Caretaking Staff | (google slide) Biohazardous Waste Awareness for Caretaking Staff (external link) |
Medical Surveillance for Biosafety Activities
Individuals who work with infectious or potentially contaminated materials are at risk of exposure to these pathogens and the adverse consequences from the exposure. Prior to work, in cases where exposures can cause disease or infection, a medical assessment may have to be considered. This will determine pre-existing immunity or latent health risk.
This section will outline key elements of the medical surveillance program. For full program details, please link to the (google doc) medical surveillance program (external link) .
Activities with Medical Surveillance Requirements
| Type of biological hazard, animal exposure or activities | Action required or immunization | |||||
|---|---|---|---|---|---|---|
| Health screen |
Tetanus | Hep. A* |
Hep. B** |
Polio | Typhoid Fever |
|
| Human blood, organs or tissues or body fluids | | |||||
| Human or animal waste*** or contaminated materials | | | | | ||
| Small lab animals (e.g. purpose-bred mice) | | | ||||
| Use of N95 respirator | | |||||
Notes on the above table
- * "Hep. A" refers to Hepatitis A
- ** "Hep. B" refers to Hepatitis B
- *** According to Toronto Public Health, Hepatitis A immunoprophylaxis is not recommended for sewage workers (i.e., plumbers) due to lack of evidence of significant occupational risk. Hepatitis A is transmitted through direct person-to-person contact (fecal–oral transmission) or through ingestion of contaminated food or water. Therefore Hepatitis A is recommended only for work with human and animal waste
- Tetanus booster is recommended every 10 years (Tetanus-Diphtheria, Td)
- Polio immunization is dependent on the sample's country of origin where the risk of these diseases are high.
- For information on N95 respirator use, see Respiratory Protection and Mask Fit-Testing.
References
- Public Health Agency of Canada. Immunization for Workers: Canadian Immunization Guide (external link)
- CDC. Guidance for Reducing Health Risks to Workers Handling Human Waste or Sewage (external link)
- Toronto Public Health. (PDF file) Working with Wastewater. 2010
How to participate in the medical surveillance program
Step 1: Review Table 1
If you are performing activities indicated in Table 1, review the potential hazards associated with your work with your supervisor and contact the BSO for participation in the medical surveillance program.
Step 2: Complete health assessment forms and review with your healthcare provider
Complete section 1 of the (google doc) Medical Certificate of Approval (external link) . If you work with lab animals, also complete the (google doc) Health Evaluation Questionnaire for Users of Laboratory Animals. (external link) Bring both documents to a healthcare practitioner. The healthcare practitioner will review all the information provided, and depending on the individual assessment, immunizations or other additional tests may be required.
Step 3: Return forms to your supervisor for filing
Return the completed forms to your supervisor. Your supervisor should forward a copy to the biosafety officer. Any work considerations or accommodations should be reviewed with your supervisor. For more information, contact the biosafety officer or ehs@torontomu.ca.
Disposing of biohazardous waste
Biohazardous waste collection should be managed in the following ways:
Biological waste
Biological waste is waste containing biological material that has not been in contact with a cytotoxic drug or other hazardous (chemicals or radioactive) materials.
Cytotoxic waste
Cytotoxic waste is defined as any material that may have come into contact with a cytotoxic drug. Cytotoxic waste cannot be treated by just autoclaving — this kind of waste must be segregated and sent offsite to be incinerated.
When disposing of waste, please note that cytotoxic and regular waste should never be mixed together.
Step 1: Choose a container
Cardboard boxes with a plastic liner are best used for either biological or cytotoxic waste that is not sharp or will not cause punctures, while plastic pails with lids should be used for objects that can puncture a bag.
Step 2: Fill the container
Autoclave bags
If you currently have waste in autoclave bags, these must be placed inside a box with liner (yellow/red) before disposal. Please note that the color of the autoclave bag does not matter (only the colour of the box liner matters).
Sharps containers
If you currently have sharps waste in sharps containers, these can be placed inside a box with liner (yellow/red) before disposal. Please note that the color of the sharps container does not matter (only the colour of the box liner matters).
Cardboard boxes
- Before you begin, inspect the cardboard box to ensure there is no damage.
- Reinforce the bottom of the box with extra tape.
- Place a yellow liner inside the box. Pull the edges of the yellow liner over the box so that none of the waste misses it.
- Place the waste inside of the yellow liner.
- Once it is approximately 75% full, close the plastic liner and the cardboard box.
- Close the box with tape and ensure it is firmly shut.
- Label the side of the box with the date and location and/or name of the principal investigator (e.g. August 14, 2022, KHE-317, Alaina Leoz).
- If the box contains cytotoxic waste, place the cytotoxic sticker on the box.
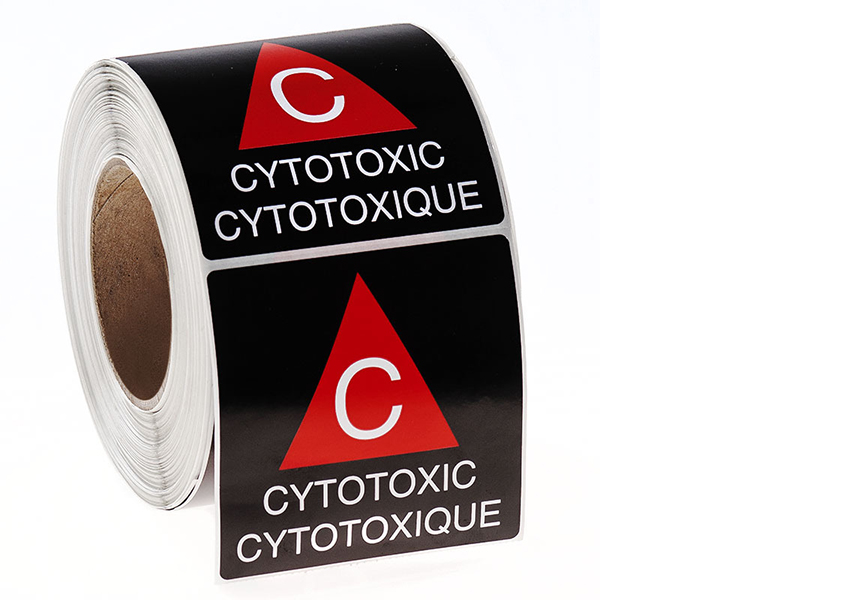
Cardboard boxes with cytotoxic waste should be labelled with a cytotoxic sticker.
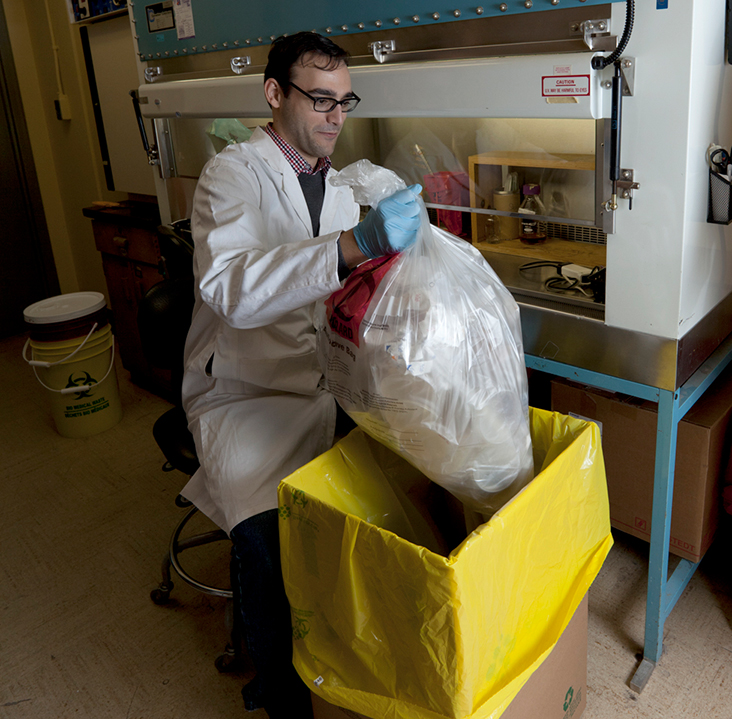
Before filling the yellow liner with waste, pull the edges of the yellow liner over the box so that none of the waste misses it. Once the box is approximately 75% full, close the plastic liner and firmly enclose the cardboard box with tape.
Pails
Cytotoxic waste goes into red pails while regular biological waste goes into yellow pails. Cytotoxic and regular waste should not be mixed together.
- Before you begin, inspect the pail and lid to ensure there is no damage.
- When the pail is approximately 75% full, firmly place the lid on top to seal it. If necessary, use a mallet to ensure it is tightly sealed all the way around.
- If possible, use one pail for all serological pipettes to maximize space in the pail.
- Label the top of the lid with the date and location and/or name of the principal investigator (e.g. August 14, 2022, KHE-317, Alaina Leoz).
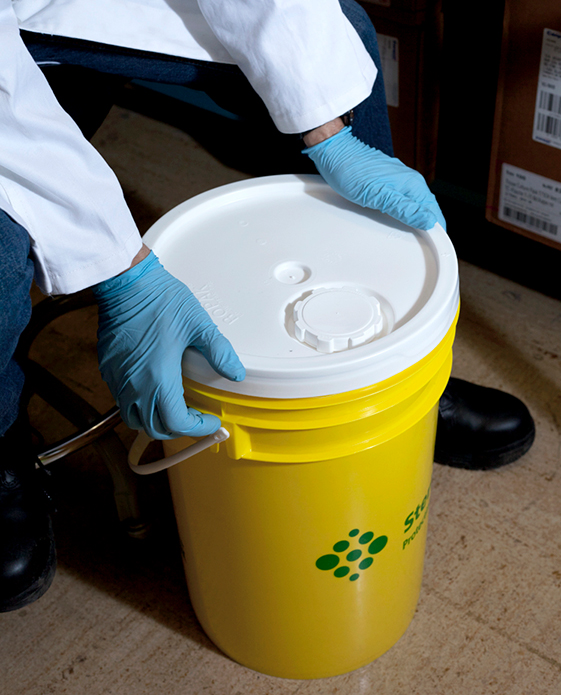
This yellow pail is for regular biological waste. Fill the pail with waste until it is approximately 75% full, then firmly place the lid on top to seal it. If necessary, use a mallet to ensure it is tightly sealed all the way around.
For information about where to get these supplies, please contact Environmental Health and Safety at 416-979-5000, ext. 553770 or ehs@torontomu.ca.
Drop-off and pick-up sites for biohazardous waste and supplies are in the following buildings:
| Building | Room | How to access |
|---|---|---|
| Kerr Hall North (KHN) | KHN 202D | Please contact Chemistry and Biology at 416-979-5000, ext. 555313. |
| Centre for Urban Innovation (CUI) | CUI 146 | Please contact Environmental Health and Safety at 416-979-5000, ext. 553770 or ehs@torontomu.ca. |
| Daphne Cockwell Health Sciences Complex (DCC) | DCC 113 |
Additional resources
Importing animal or plant pathogens
To understand the risks associated with your human or animal pathogen or toxin, Biological Safety Data Sheets (external link) must be consulted and retained in your lab.
When planning to import animal or plant pathogens, users should visit the Canadian Food Inspection Agency of Canada (external link) ’s website on the Importation of Non-Terrestrial Animal or Plant Pathogens (external link) .
Biosafety cabinets
To help users with Biosafety Cabinet selection, follow (PDF file) Baker's Clean Air and Containment Decision Map for Research Labs.