Windows 11 - Eduroam Wireless Connection Instructions

These instructions will configure your wireless connection to the eduroam wireless network. It will allow you to authenticate and browse using a higher level of security.
NOTE: These instructions will assume you have the latest Windows updates and are using Windows to manage your wireless connection and not a third party vendor’s program (Intel, Linksys, D-Link, etc.).
Configure Wireless Connection
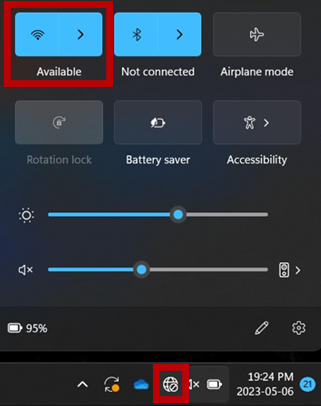
1. Click on the wireless/network icon found at the bottom right of your screen by the clock, and then click on the available wireless networks button.
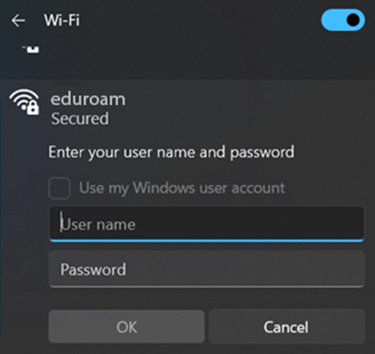
2. Click on “eduroam” and when prompted enter your torontomu.ca username and password, please ensure to include your username with @torontomu.ca. This is the same as your toromtomu.ca email address – your student number will not work (ex. firstname.lastname@torontomu.ca). Click OK.
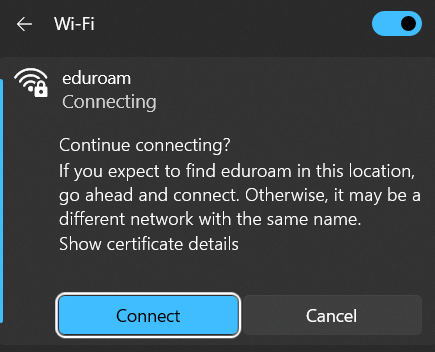
3. A message will appear asking to accept the certificate and if you expect to find the eduroam network in this area. Click on “Show certificate details”.
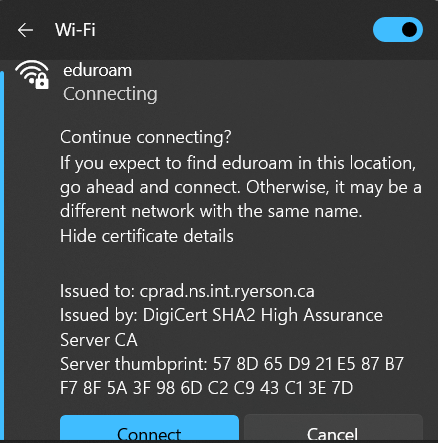
4. Ensure that the certificate is issued to “cprad.ns.int.ryerson.ca”, and then click connect.
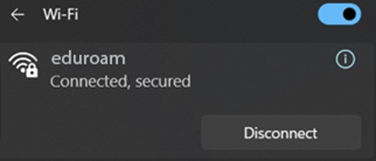
5. After a few moments your device will be connected.
If you encounter any issues connecting, please contact wireless@torontomu.ca.